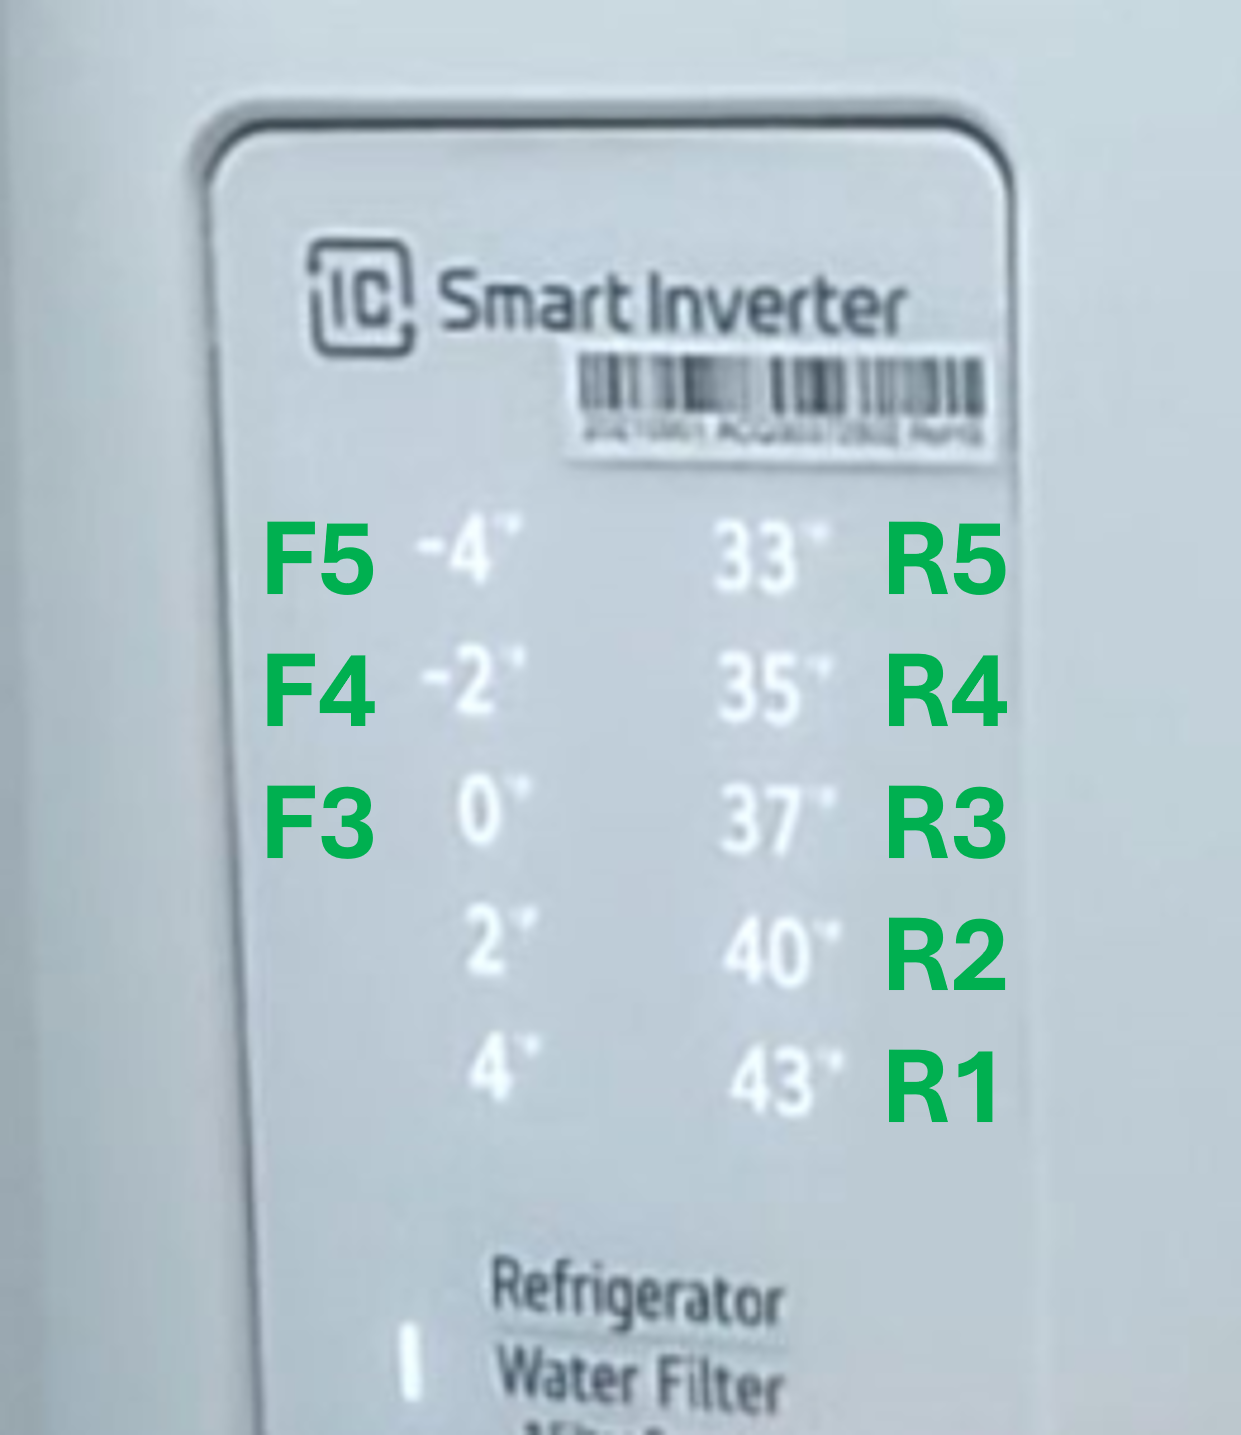
Compensation Mode is available to use on most newer models with the Display PCB located on the inside of the unit on the right wall. The article below will show you how to use compensation mode to make temperature adjustments from -2 to +2 degrees Celsius. Also, adjust Icemaker fill time from -2 to +4 seconds.
Simple Display PCB's:
To Enter Compensation Mode:
1. Press and Hold Freezer and Ice Plus at the same time.
2. After holding for 5-6 seconds you will hear an audible tone and will be in compensation mode.
(If compensation mode has never been ran before it will typically light up -4 on the freezer and 37 on the refrigerator side as shown below the first time you enter compensation mode)

When you enter Compensation Mode use the FREEZER BUTTON to cycle between -4, -2, 0 in the left column.
-4 (F5)=Freezer Temperature
-2 (F4)=Refrigerator Temperature
0 (F3)= Icemaker Fill Time
Use the REFRIGERATOR BUTTON to cycle between R5-R1 (Use the table below to see what those numbers correspond to temperature wise)


Example Scenario:
Customer is complaining that the refrigerator temperature is not correct. They have the unit set for 35 but its actually staying around 38-39 degrees.
You would need to compensate the temperature down 3-4 degrees F.
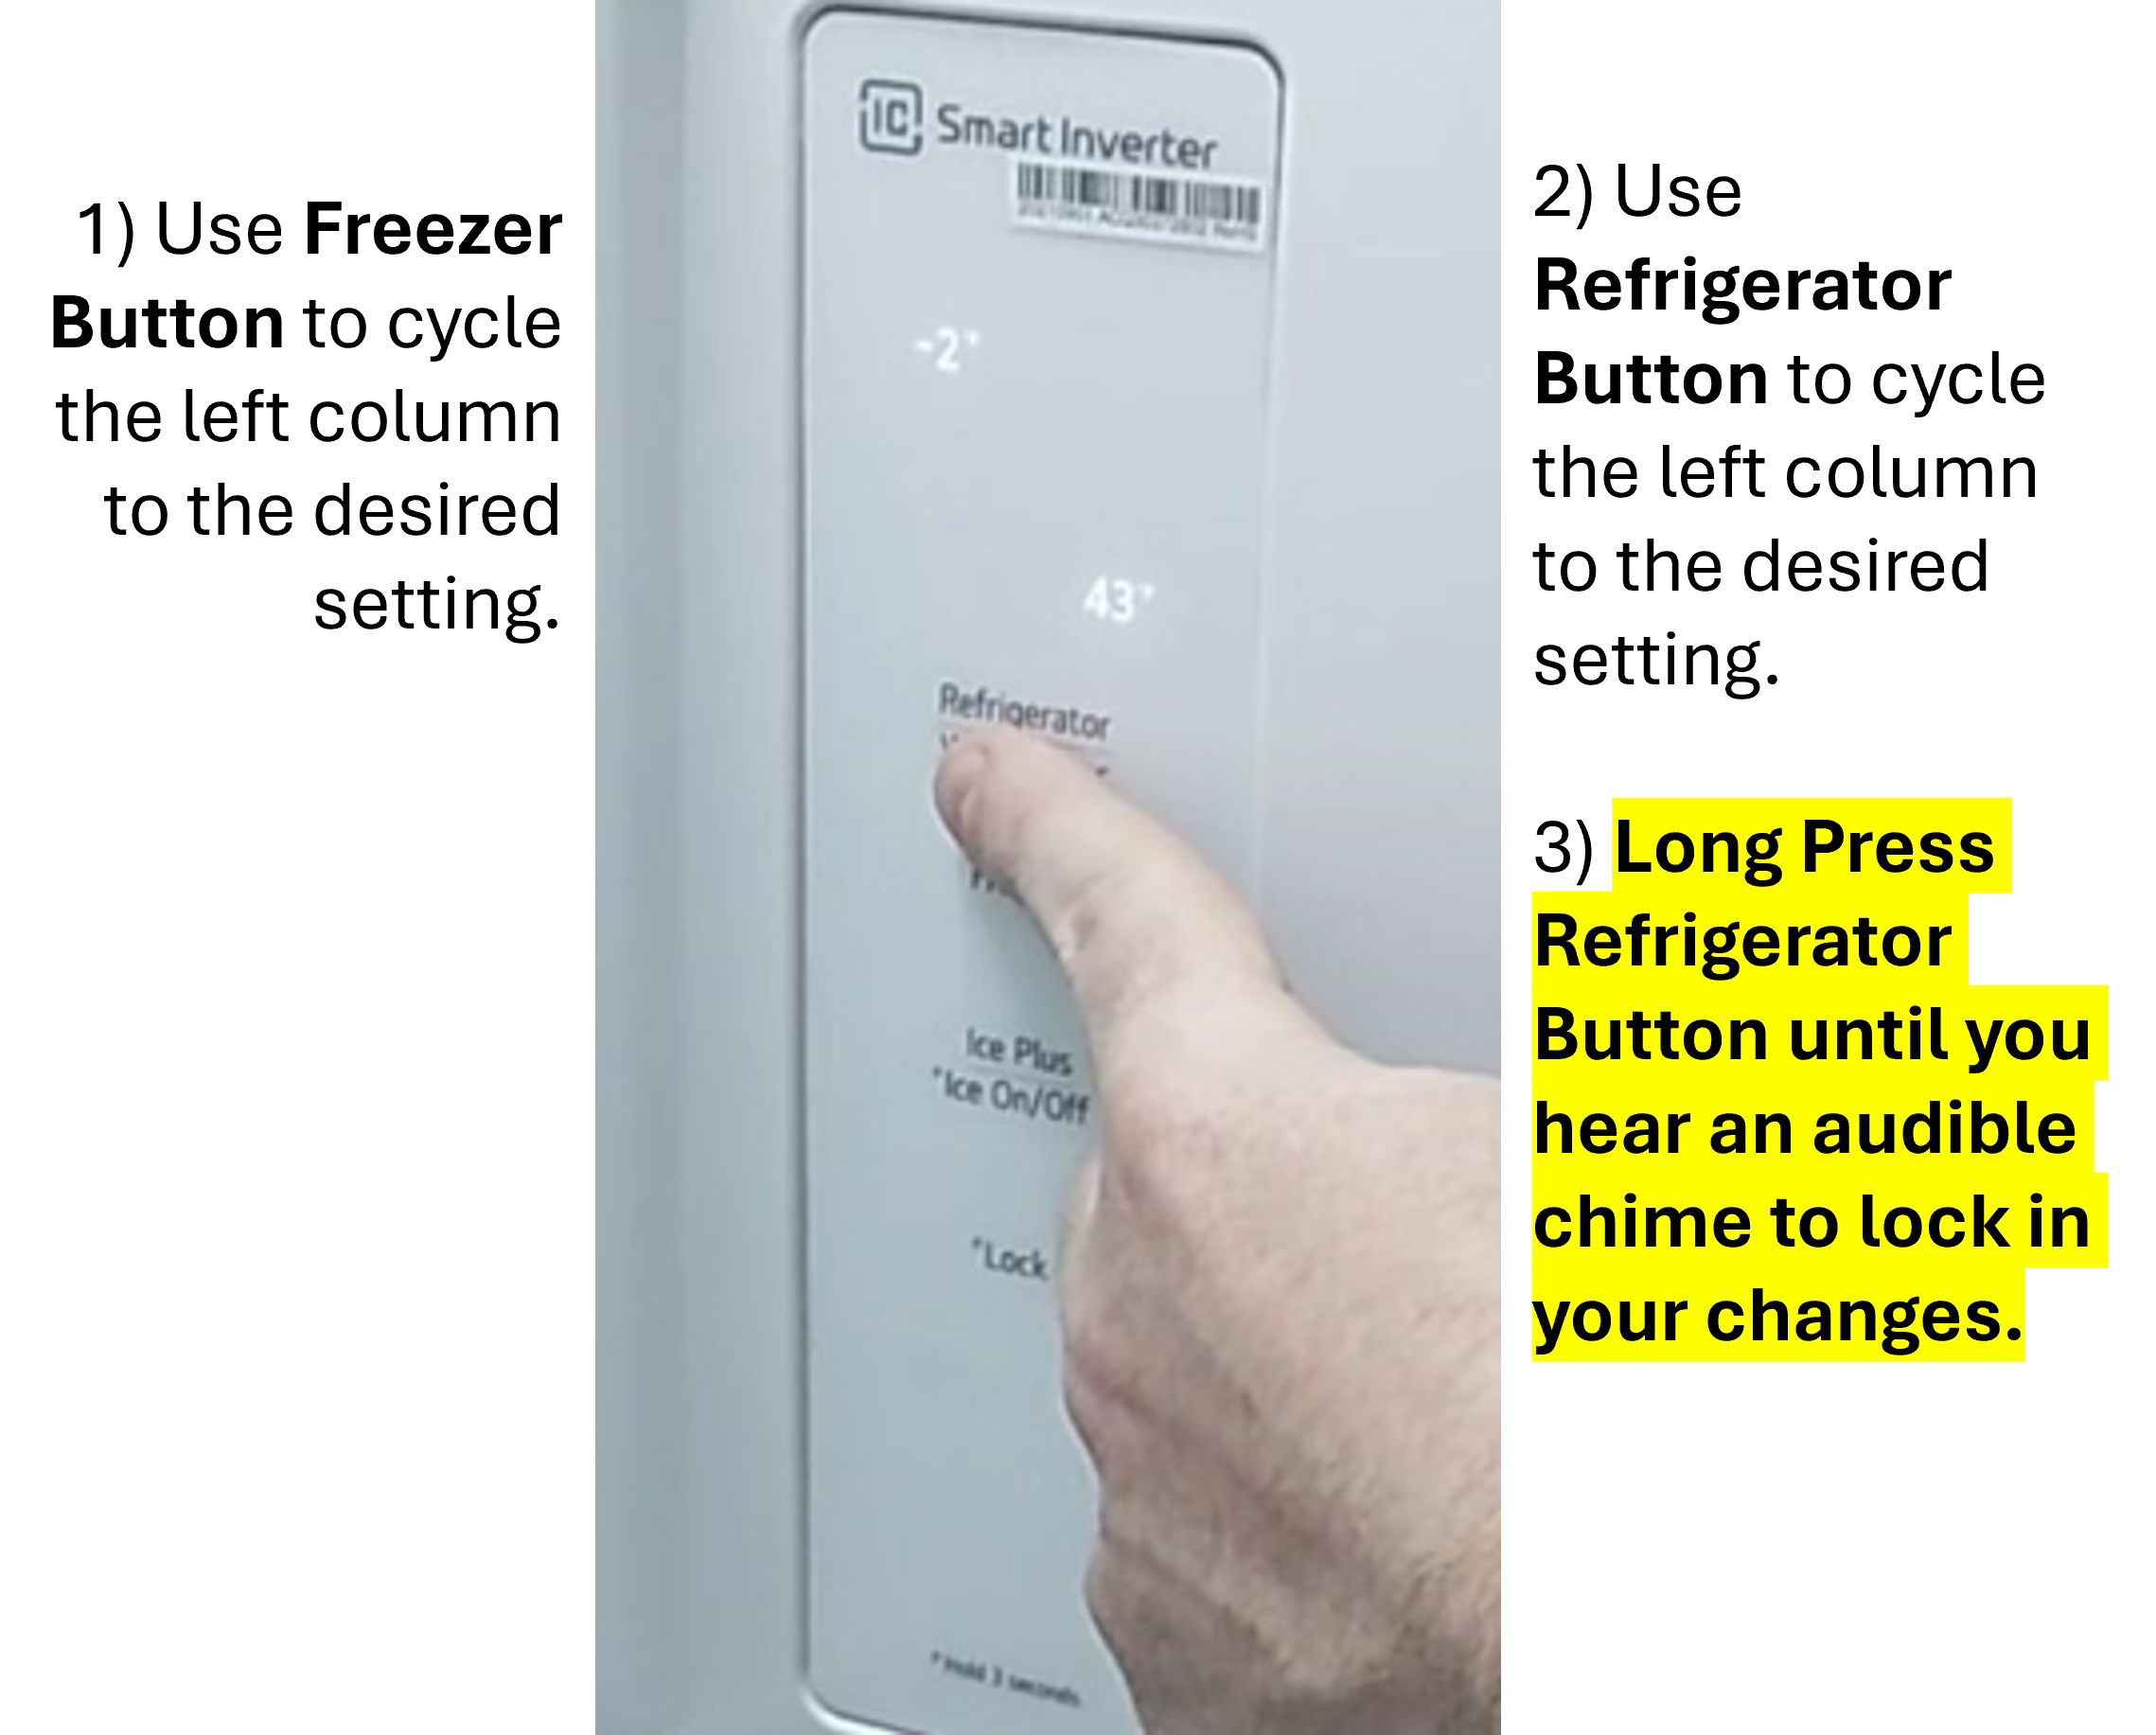
To accomplish this you would set the left column using the Freezer Button to -2(F4) so that you are adjusting the refrigerator temperature, and set the right column to 43(R1) using the Refrigerator Button.
Then lock in your changes with a long press of the refrigerator button until you hear a confirmation chime (refer to the video above for a demonstration of this).
Once accomplished you would have reduced the temperature 2 Degrees Celsius (which is around 4 Degrees Fahrenheit.)
Picture of this adjustment below:
