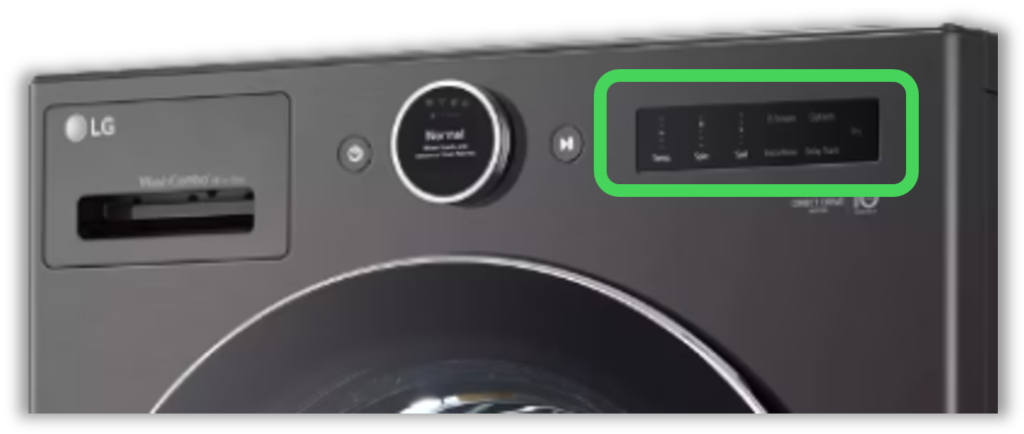
RePLACING New Style DiSPLAY PCB and Digital Dial (For Washer/Dryer/Combo)
First we will show how to replace the Display PCB, if you need information on installing the Digital Dial scroll down further in this article.
Start by removing the top cover and the front panel from the machine. This is done exactly like all past LG Front Load Washers. Then follow the video instructions below on how to replace the Display PCB Assembly, Wifi Board , and Glass Touch Panel.
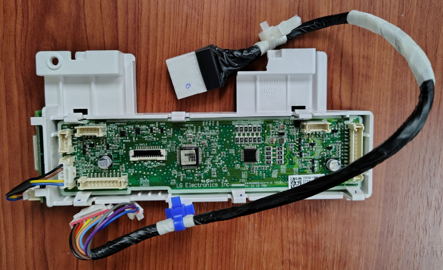
How TO REMOVE THE DISPLAY PCB ASSEMBLY
HOW TO INSTALL THE DISPLAY PCB ASSEMBLY
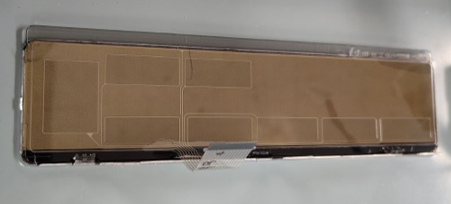
HOW TO Remove and Install the Glass Touch Panel
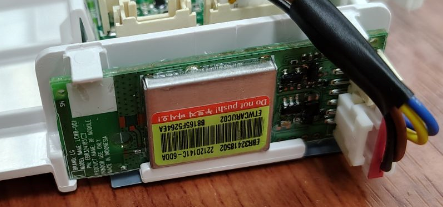
HOW TO Remove and Install the Wi-Fi PCB
HOW TO Remove and Install the Digital Dial
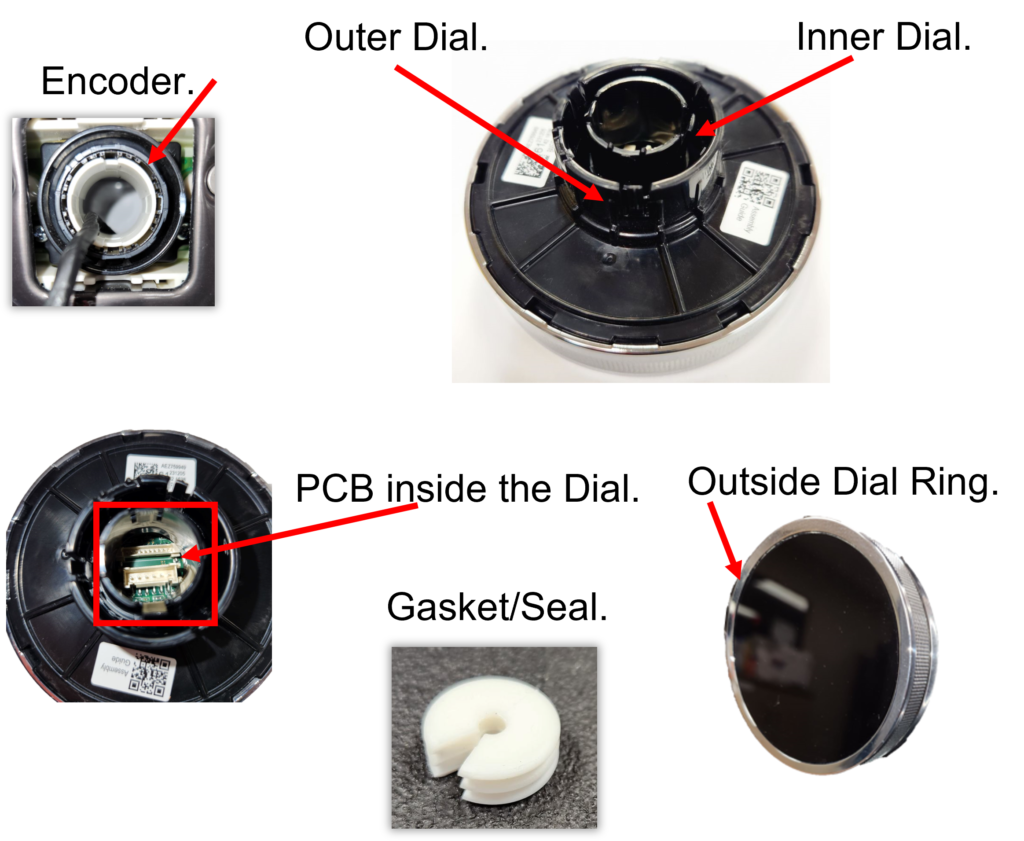
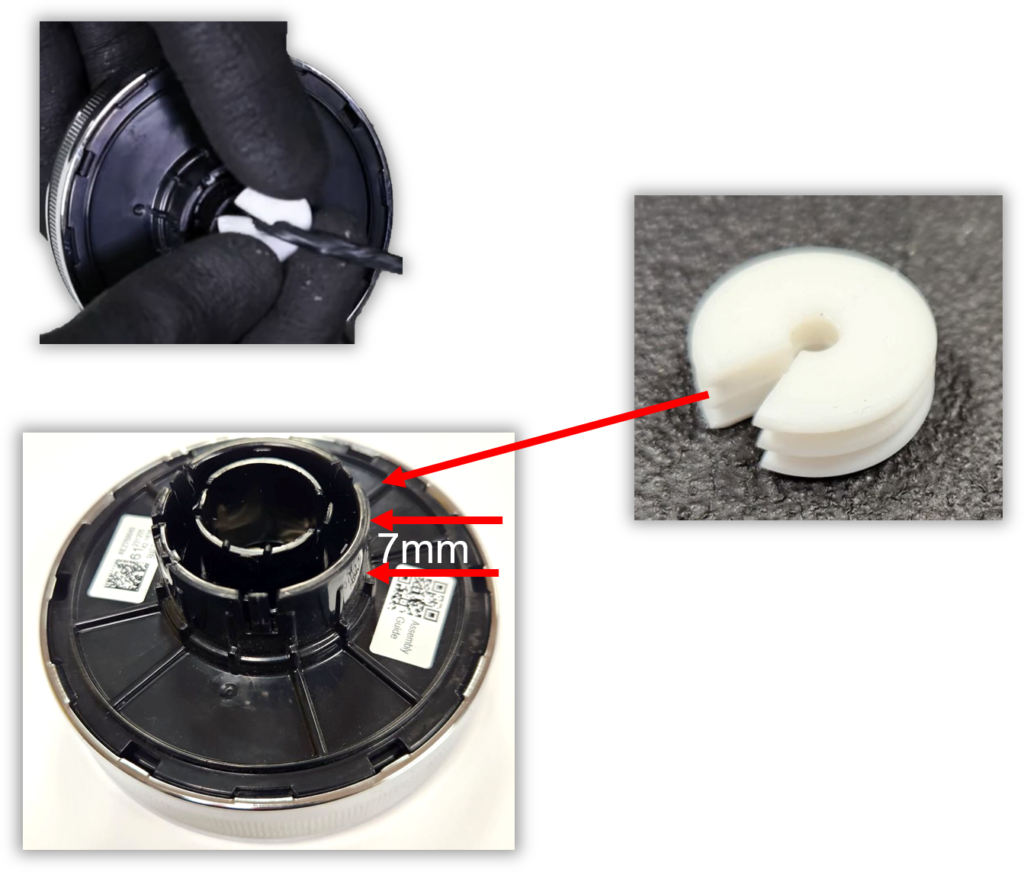
Parts of the Digital Dial:
Removing the Digital Dial:
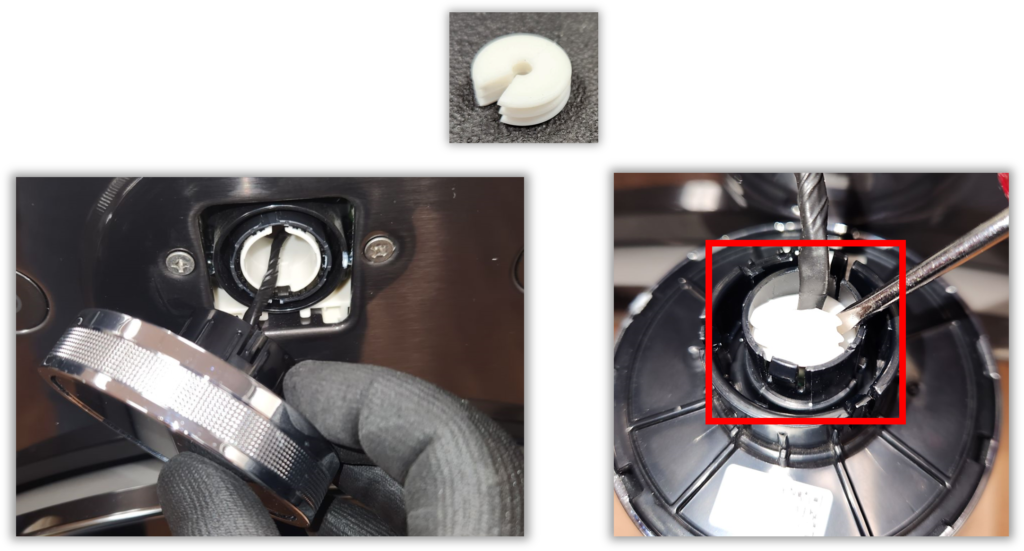
Start from the right side of the Digital Dial using your fingers or a strong plastic removal tool and pull it away from the front panel.
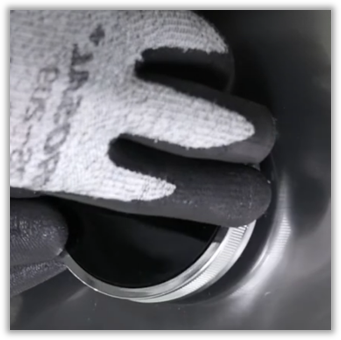
Now that the Digital Dial is removed you need to remove the gasket/seal from around the connector harness. Use a pick or small screwdriver, be careful as there is a PCB under this gasket.
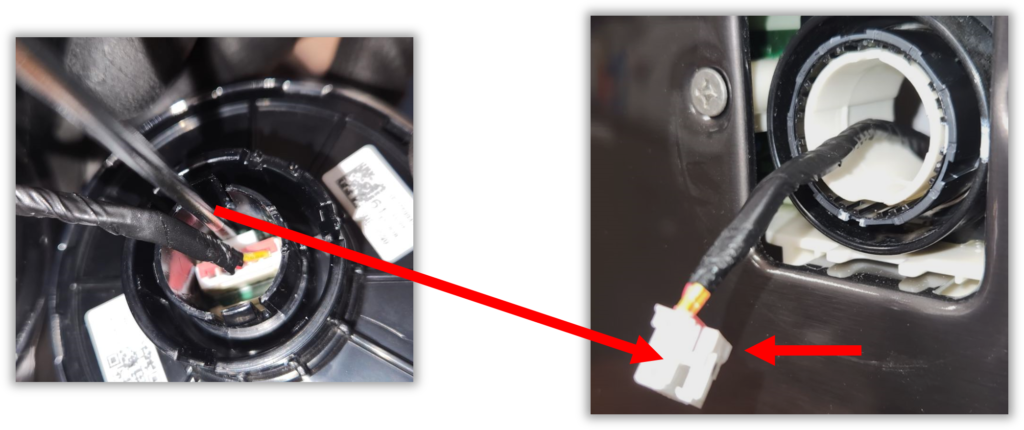
Now, you can remove the Digital Dial from the harness. Use the small screwdriver to depress the clip and release the harness.
Now, you can remove the Digital Dial from the harness. Use the small screwdriver to depress the clip and release the harness.
Installing the Digital Dial:
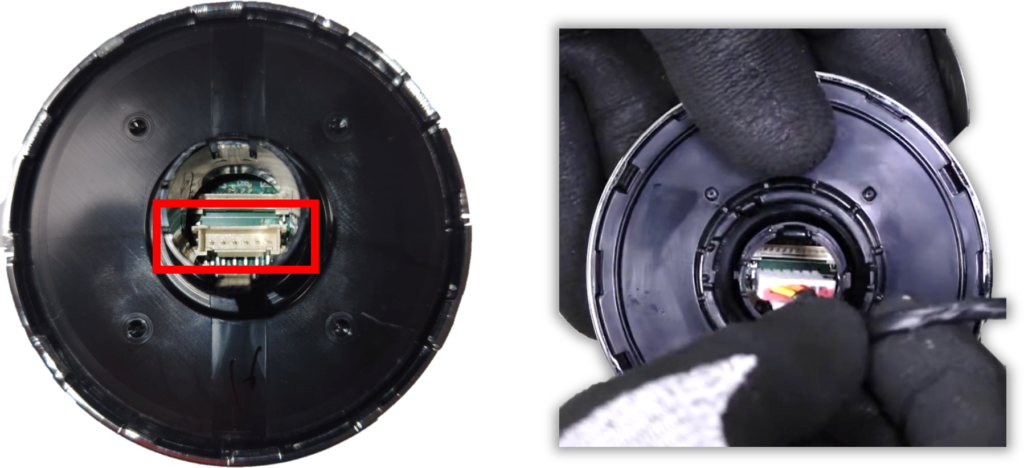
Inspect the connector on the internal PCB making sure there are no debris there or bent pins.
Install the connector in the Dial (make sure it clicks into place).
Install the gasket in the center around the harness cable.
Do not press the gasket too deep into the knob. It could damage the PCB just below it.
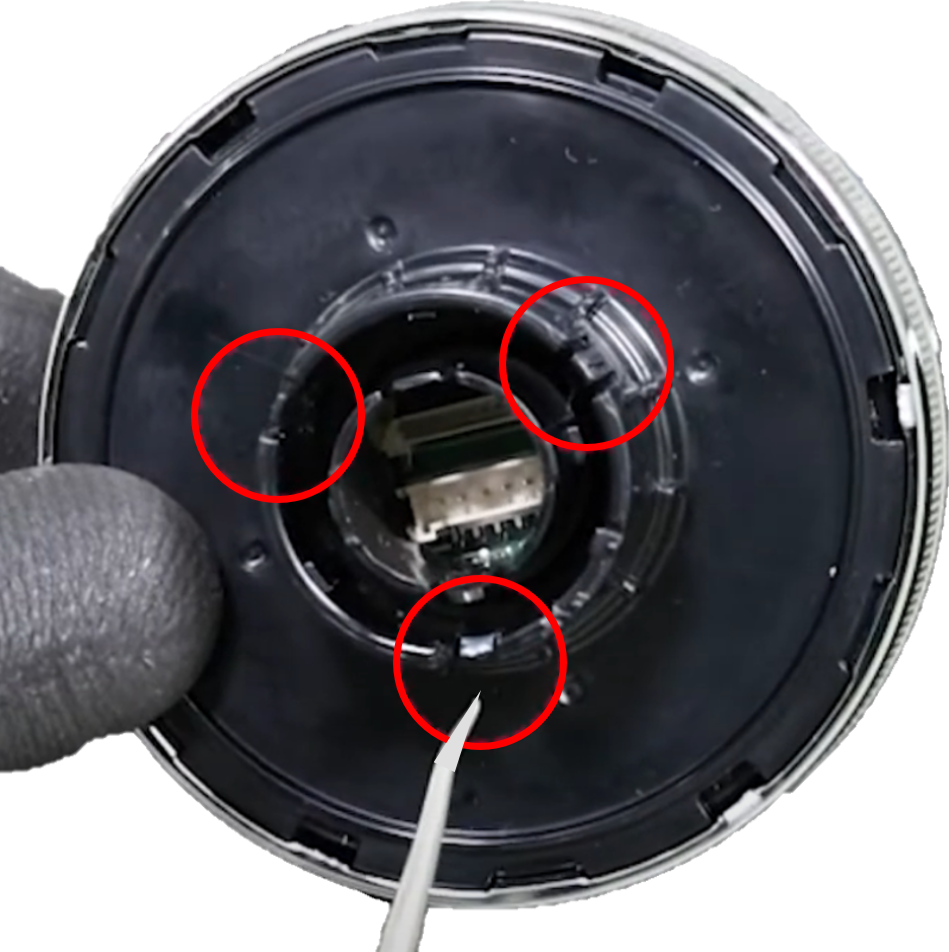
Locate the 3 hooks on the outside knob.
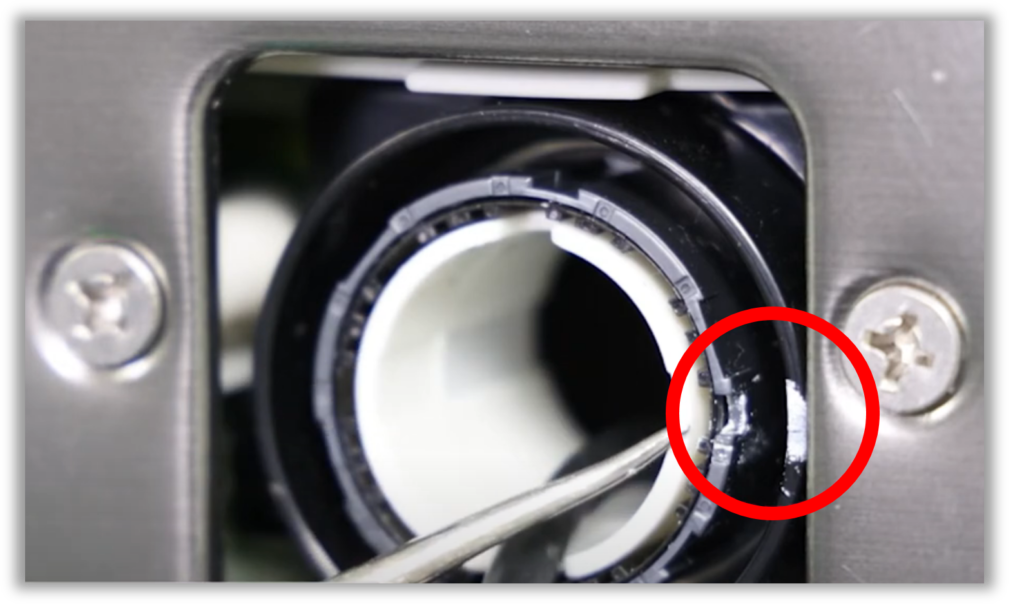
Align the Encoder.
Line up the Encoder. The white section will stay stationary and is a part of the PCB housing. The sleeve next to it can be moved easily with your fingernail and needs to be in the 3 O’clock position.
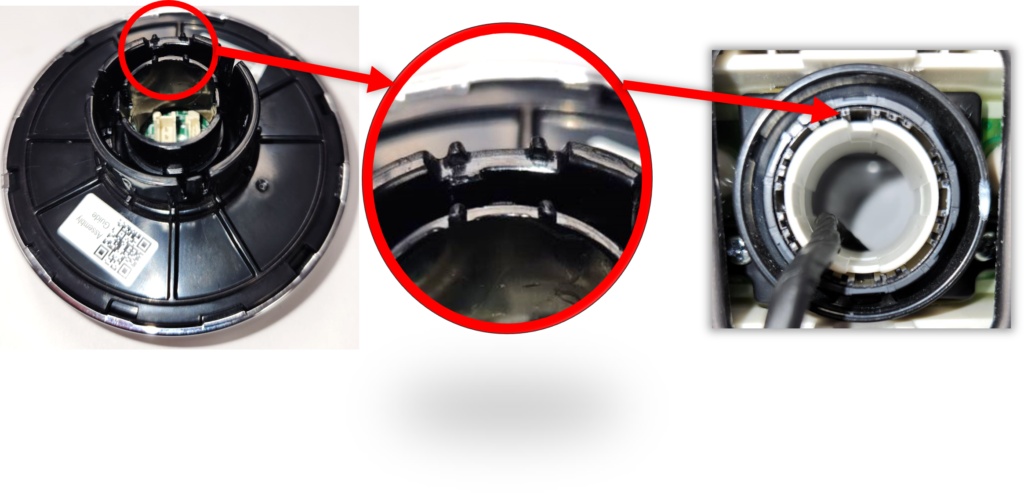
Line the Inner and Outer Dial parts.
These two points on the inner and outer dial need to be aligned, then when replacing the Dial Assembly align them with the top slot, while making sure the slot on the encoder is in the 3 o’clock position as was already mentioned.
Install the Digital Dial Knob with these points aligned. It should turn freely and the screws under it should not be easily seen. Turn on the power and make sure it is installed correctly