Fan Grille Replacement
Click on the Steps below to jump directly to that section:
**NOTICE**
Wiring Colors, Connectors, and Pins will vary by model/product code. Always be sure to download and use the service manual for your specific model.
Remove Freezer Door
- Remove all bins and drawers from inside the freezer section.
- Remove the 2 screws holding the door to the railing.
- Lift the door and brackets out as one assembly.
See Video Below for Details:
Remove Icemaker (If unit has Freezer Icemaker)
- Remove 2 Screws securing icemaker to the freezer ceiling.
- Pull Icemaker Down and Forward to remove from mounting position.
- Unplug 1 Wiring Harness.
See Video Below for Details:
Remove Fan Grille Assembly
- Pull Fan Grille forward from the top to pop out of place. (Easiest to use pliers to assist).
- Unplug all wiring connectors connected to fan grille.
- Remove Fan Grille Assembly from unit.
See Video Below for Details:
Install New Fan Grille Assembly
- Position Fan Grille where each wiring harness can be plugged back in and make sure all connectors are plugged in correctly.
- Maneuver the Fan Grille Assembly back into place. (Easiest to position one side behind railing first).
- Snap the bottom tabs into place. (Press firmly on on side, middle, and opposite side).
- Press top into place. (Again press firmly on both sides and center making sure the fan grille is fully seated in place).
See Video Below for Details:
Reinstall Icemaker
- Plug the icemaker back in to the cabinet connector.
- Push the back of the icemaker up and back into place. (If done correctly icemaker will support itself).
- Reinstall the two screws that were removed earlier at the front of the icemaker.
See Video Below for Details:
Reinstall Door
- Place rear hooks on door brackets into the slots located at the back of the railing.
- Align front tabs into the railing. (May need to pick up on door or pull railing forward while trying to align).
- Reinstall the two screws that were removed earlier, one on each side of the door railing.
- Insert bins back into the freezer section.
See Video Below for Details:
How to release fan grille on 2023 and newer models
The steps outlined above for removing the door and icemaker will be the same. These instructions simply show how to release the fan grille so that it can be removed.
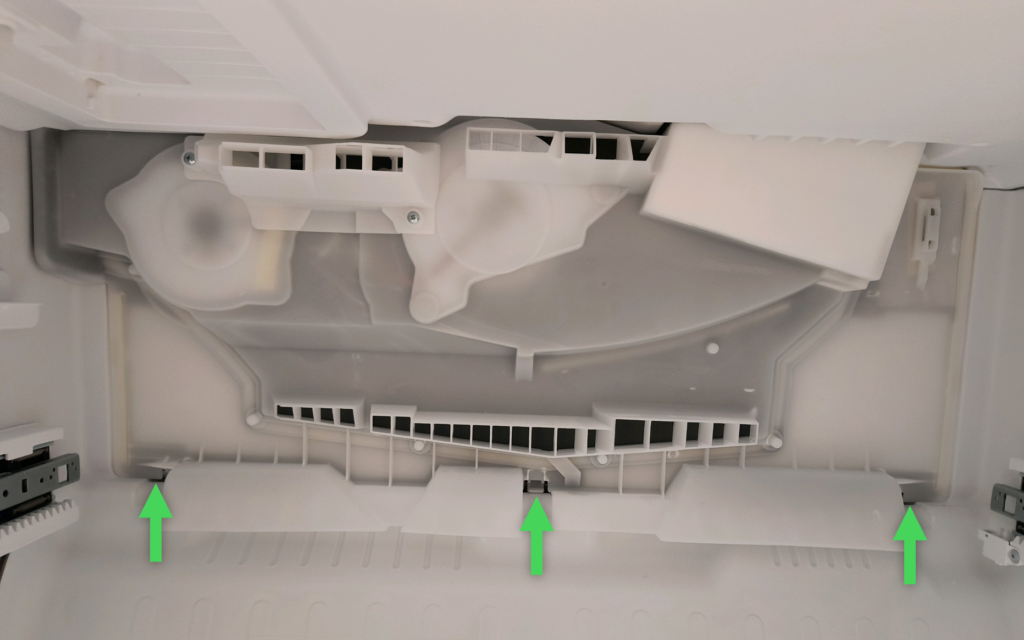
- There are three tabs that lock the fan grille into place along the bottom.
- Use a flat blade screwdriver to pry up and pull each tab forward.
- With all 3 tabs released the fan grille can be removed.
See Video Below for Details:
(1) Locate the three locking tabs along the bottom of the Fan Grille:
(2) Use a flat blade screwdriver to pull up and forward. Work from one side to the other:

(3) The fan grille can now be pulled out of place and wiring can be disconnected.
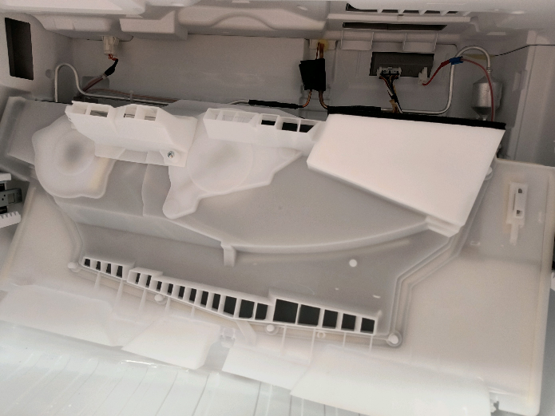
Reinstall in reverse order. (Push top in first and then the bottom will snap into place).