Dishwasher
Not Draining
Click on the Steps below to jump directly to that section:
**NOTICE**
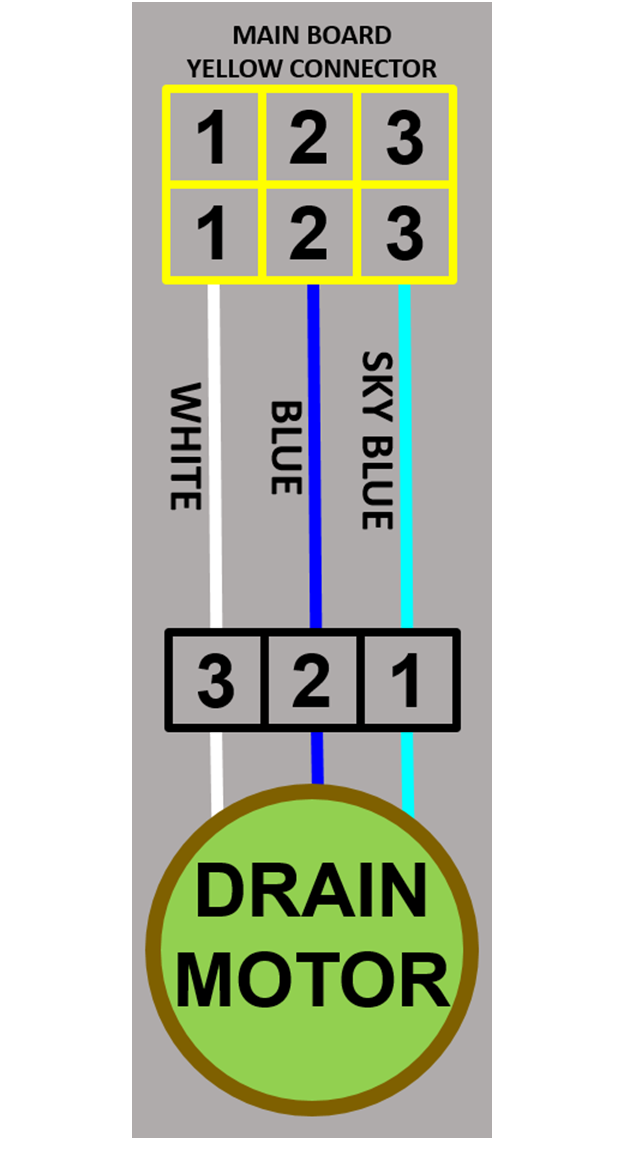
Wiring Colors, Connectors, and Pins will vary by model/product code. Always be sure to download and use the service manual for your specific model.
For Test Mode procedures use this link and input your specific model: https://lgtestmodes.com/
Drain Hose Requirements
- Follow local codes and ordinances.
- Do not exceed 12 feet distance to drain.
- Do not connect drain hoses from other appliances to the dishwasher’s drain hose.
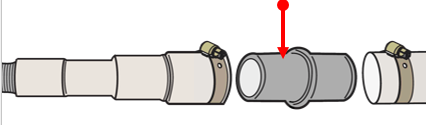
- If an extension drain hose is required, use a 5/8 inch or 7/8 inch inside diameter, 2-3 feet length hose and a coupler for connecting the two hose ends.
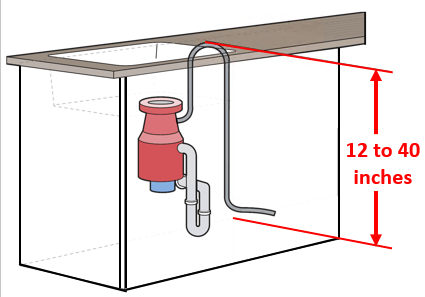
Height of the Drain Hose
The height of the drain hose end must be at least 12″ and within 40″ from the base of the dishwasher to avoid water being siphoned from the tub.
Check for obstructed drain hose
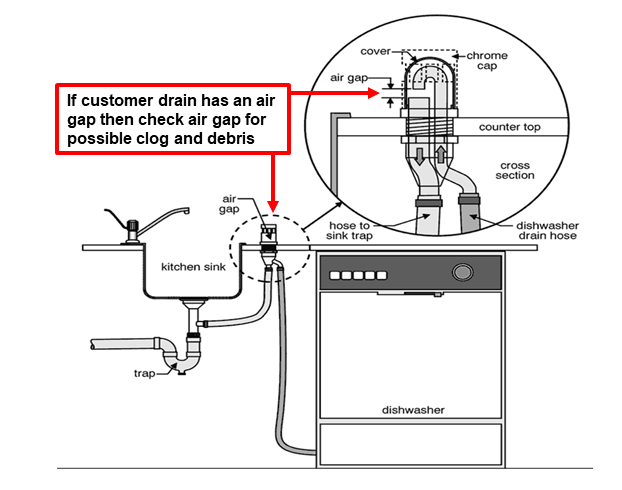
Check for a clogged, kinked, frozen water drain hose, clogged disposal. If unit is equipped with a filter then check it for possible clogged. If the customer’s sink has an air gap then check it for clogged also.
If customer drain has an air gap then check air gap for possible clog and debris.
Check voltage to the drain pump and be sure the main board is sending proper voltage to the drain pump.
Measure the voltage and the resistance of the drain pump from the Main PCB.
– If no voltage is present at the Main PCB, replace the Main PCB.
-If voltage is present, measure voltage at the drain pump.
Non Filter Sump Style
Drain Pump for this style of sump will have 2 wires
120 volts motor windings will read 20 ~ 40 ohms

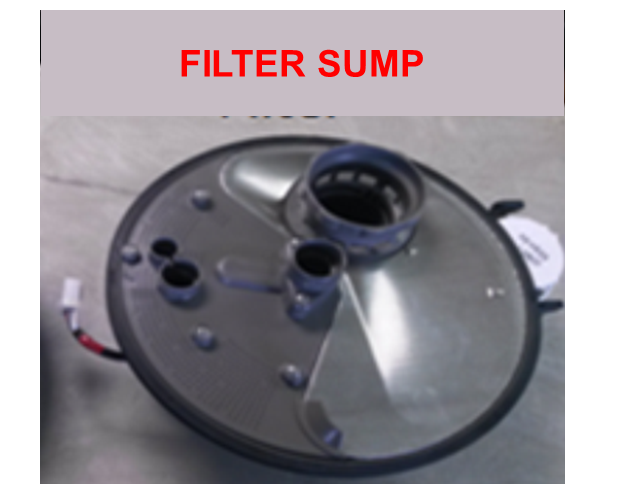
Filter Sump Style
Drain Pump for this style of sump will have 3 wires
24 volts ac motor windings will read 3 ~ 6 ohms between any two wires
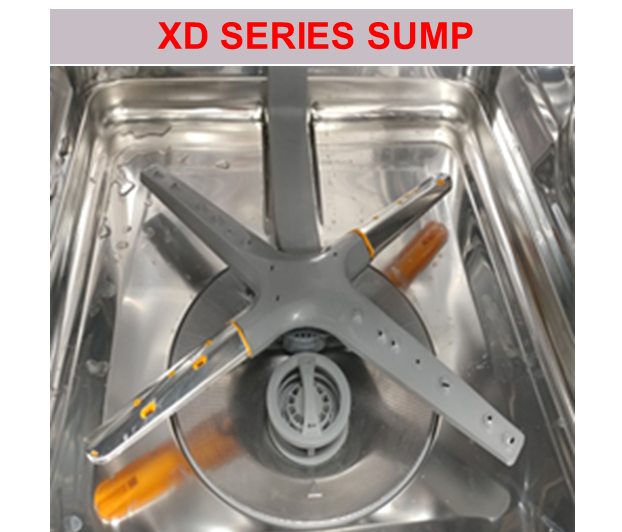
XD series Sump Style
Drain Pump for this style of sump will have 3 wires
24 volts ac motor windings will read 3 ~ 6 ohms between any two wires
7 -2) Measure the voltage and the resistance of the drain pump from the Main PCB.
If no voltage is present at the Main PCB, replace the Main PCB.
If voltage is present, measure voltage at the drain pump.
If voltage is present, replace the drain pump.
If voltage is not present at the pump, suspect a wiring harness issues.
Check resistance values of the drain pump from the Main Board.
If an open is read, read the resistance of the drain pump at the pump.
If an open is still read, replace the drain pump.
If the resistance is okay, suspect a harness issue.
If the resistance of the pump is okay from the Main Board, suspect a Main Board problem.
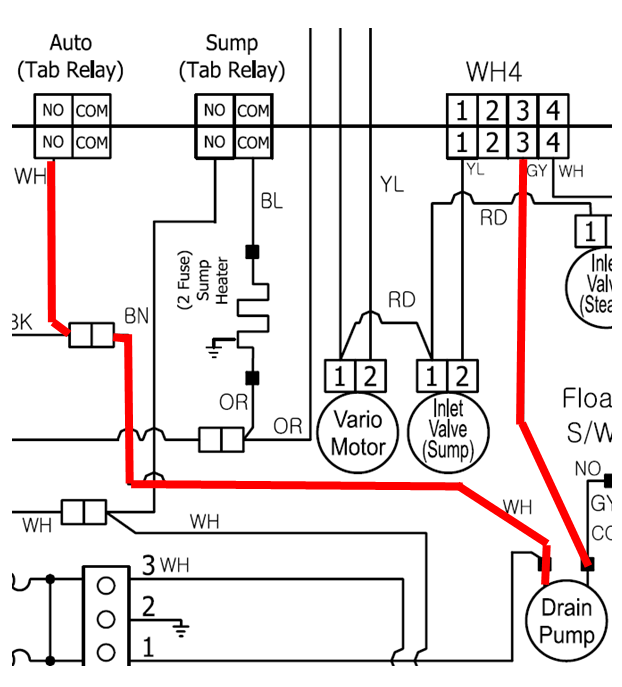
Example of 3 wire drain pump on wiring diagram.
This is a 24 Volt AC pump. When running you should read 24 Volts AC between any two wires. The resistance values for this motor should be 3 ~ 6 ohms between any two wires.
Note: The unit you are working on may have different wire colors please see your wiring diagram for exact colors of the unit you are working on.