heatpump dryer
HeatPump Not Drying / Long Dry Time
Click on the Steps below to jump directly to that section:
**NOTICE**
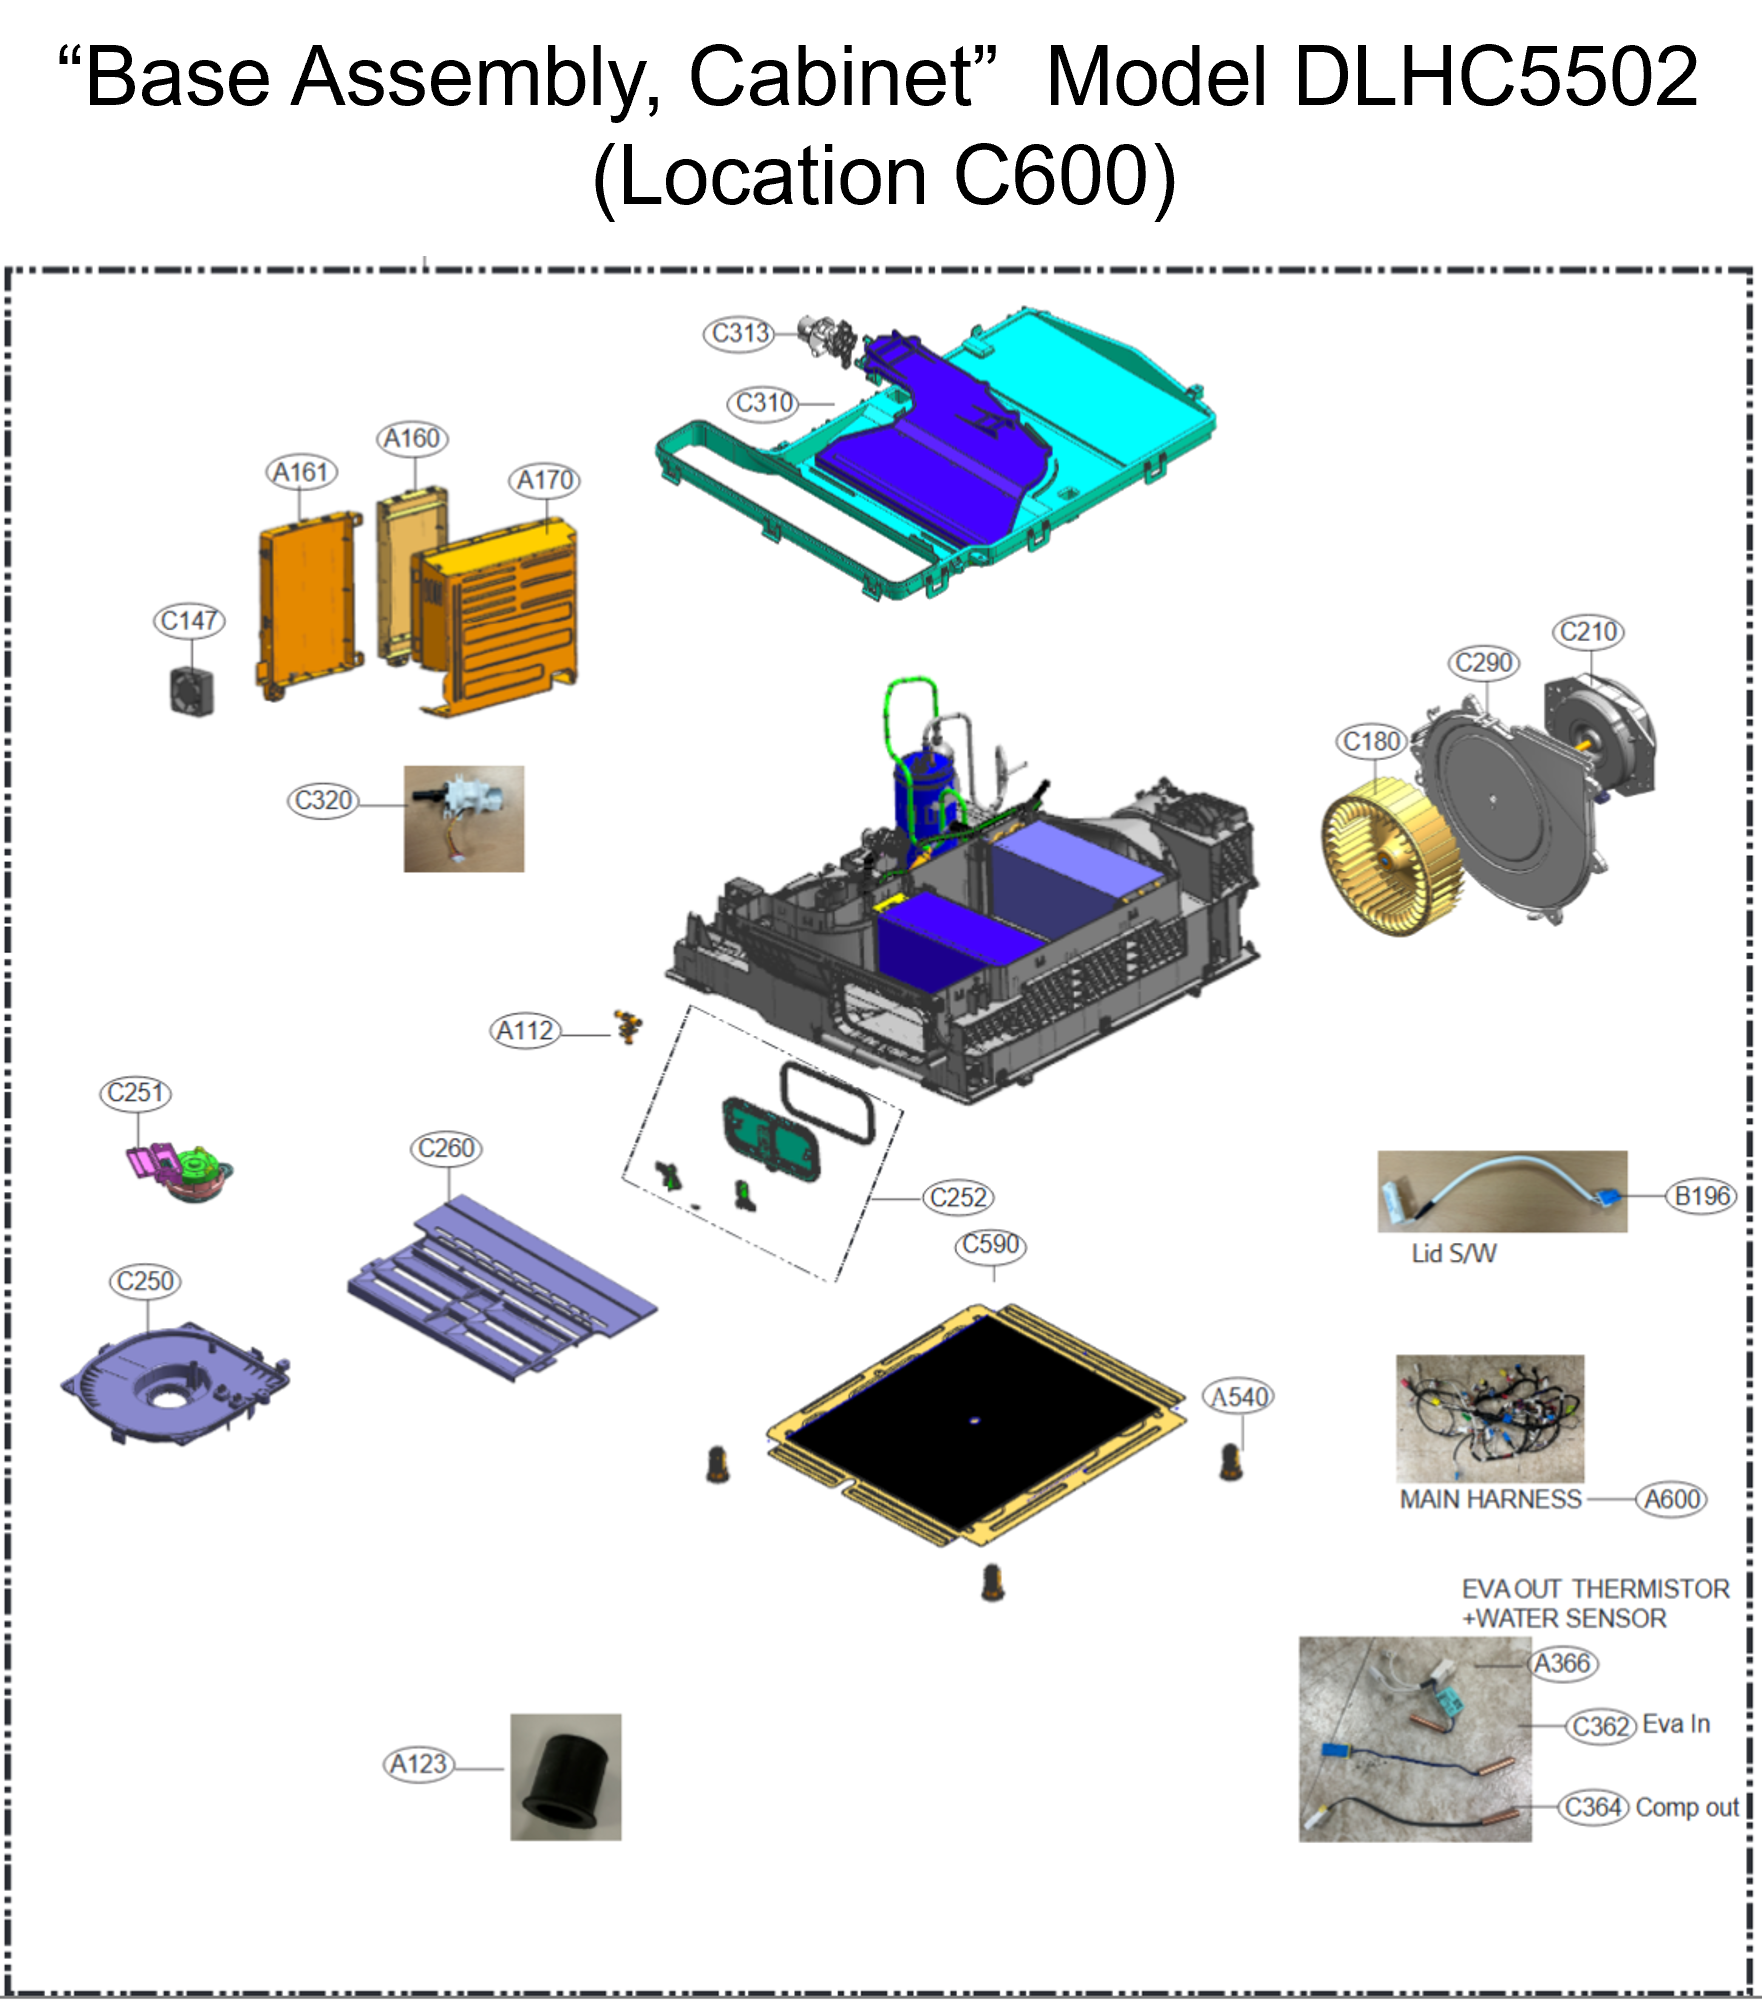
Wiring Colors, Connectors, and Pins will vary by model/product code. Always be sure to download and use the service manual for your specific model.
For Test Mode procedures use this link and input your specific model: https://lgtestmodes.com/
The operating principle of a heat pump dryer is the same whether it is integrated into a WashTower, a washer-dryer combo, or a stand-alone dryer.
Traditional condensation dryers use heating elements and water condensation to dry clothes. A heat pump dryer, on the other hand, uses a sealed system to dry garments more efficiently. However, this process typically takes longer than with conventional dryers, and garments may not always reach the same dryness level as they would in a traditional dryer.
Symptoms and Solutions;
No Heat = (Check the simple things first)
1.) Check cycles.
Some cycles may not use heat, etc. “air dry”“Energy Saver” check this first.
2.) Check the Filters.
Depending on the model you are working on, there may be several lint filters that require maintenance.

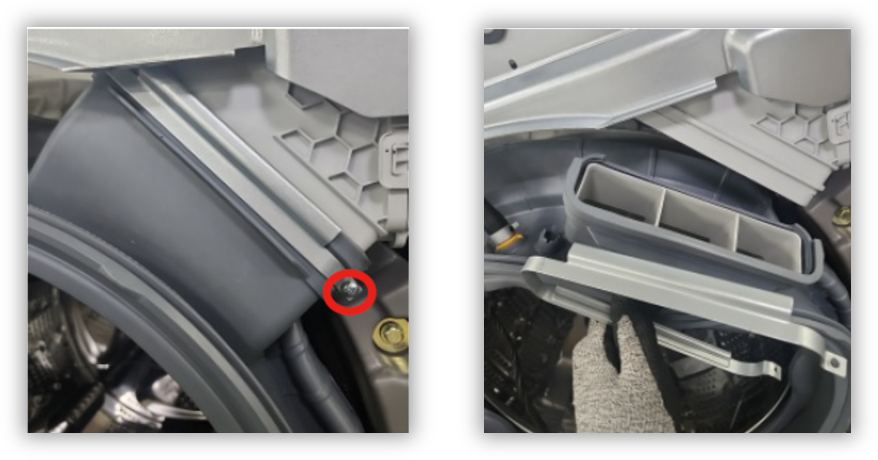
3.) Check the Drum Vent
As on the WM6998, If the ducting into the drum is not connected correctly, there will not be proper air flow into the drum and drying performance will suffer.
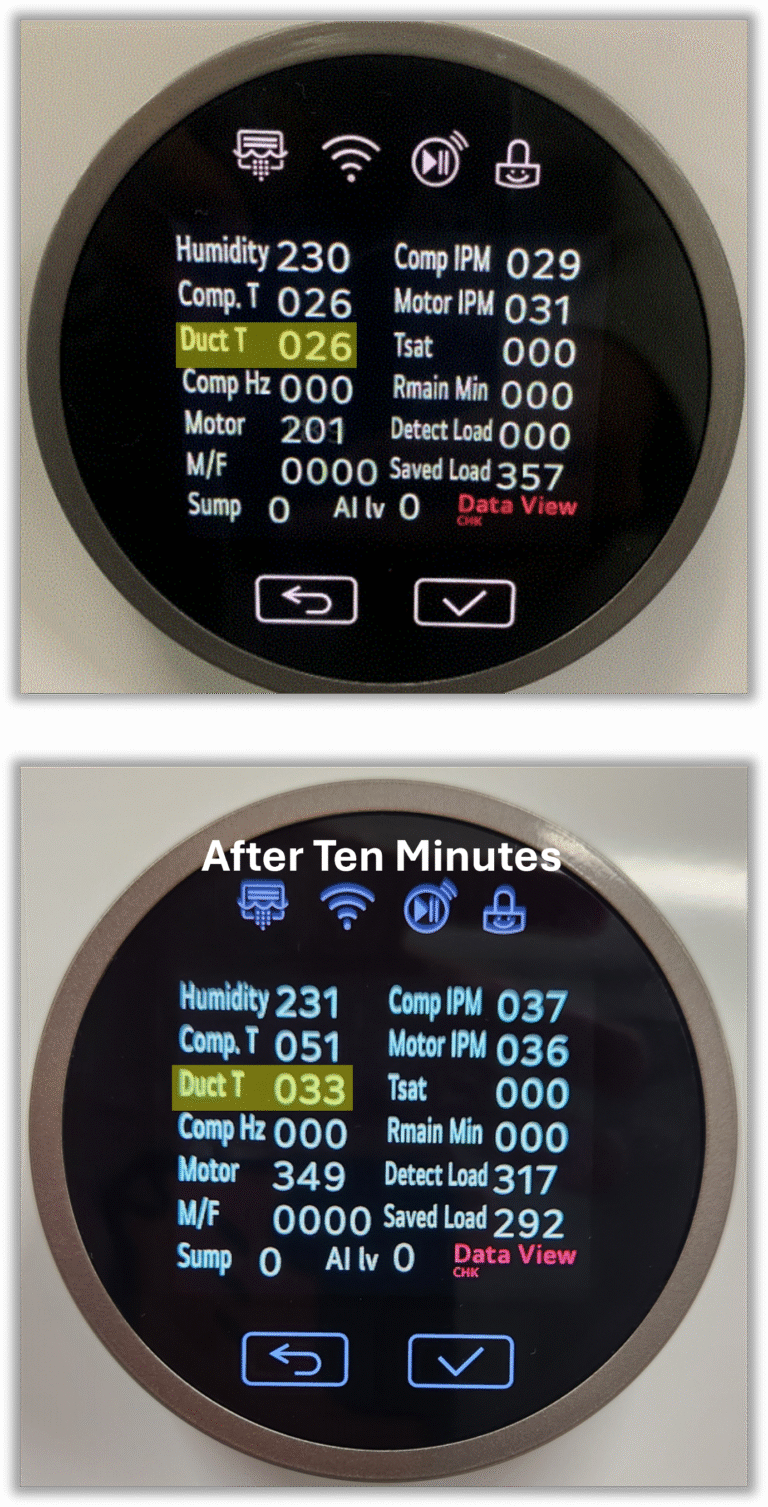
4.) Check the Compressor Discharge Pipe thermistor in LQC mode after the unit has been running for at least 10 minutes. On model DLHC5502, press Dry Level + Signal (see Data View Mode instructions for your model on the Test Mode website). The reading should be approximately 20 without heat. After 10 minutes, if the system is generating heat, the value should rise (e.g., to around 33).
If you suspect a Sealed System leak,
Check The amp draw on the compressor.
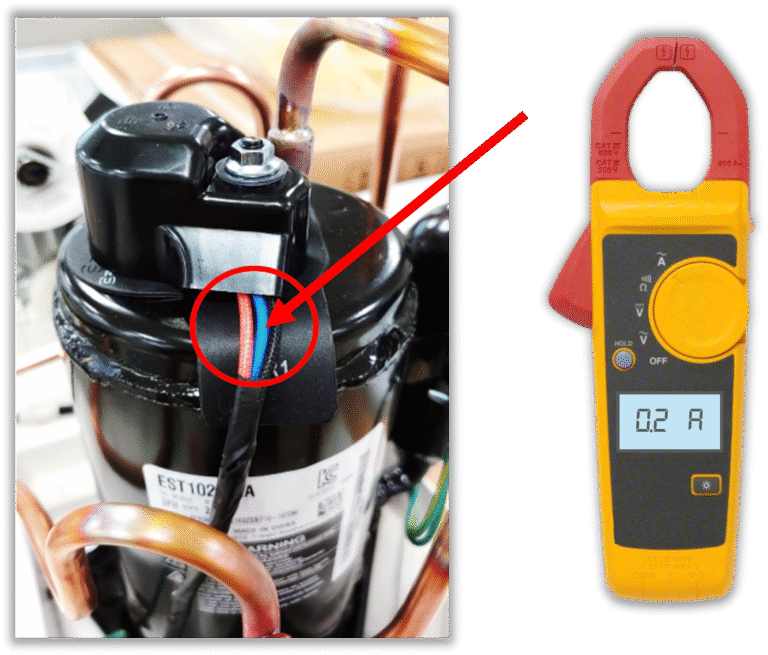
Test Method (Using a meter with an amp clamp.)
1.) Remove the top plate and the cabinet on the right side.
2.) Enter General Test Mode and press the Pause button 3 times. Let the unit operate for 10 minutes.
3.) After 10 minutes, measure the blue harness current value (from the 3 compressor harness wires, blue, red, black).
4.) Check the current reading:
1.Normal: greater than 0.2A
2.Refrigerant leak suspected: less than 0.1A
If there is a sealed system leak or another issue (such as a failed compressor), the entire sealed system assembly will need to be replaced.