Standard Icemaker Water Overfilling Tray
1) If water is overfilling the icemaker tray the first check should be water pressure. Make sure that the water pressure is not too high or too low, either case could cause the tray to overfill. Normal water pressure range is (20-120PSI).
2) Make sure all cubes are ejecting from the tray. If cubes are sticking in the icemaker mold it could cause an overfill situation.
3) Check the service manual to see if the unit you are working on has a fill time adjustment. Some models have dip switch adjustments on the Main PCB, and some newer models have adjustments that can be made from the Display PCB. (If there is no mention in the service manual about a fill time adjustment it most likely does not have one).
4) If there is no fill time adjustment, water pressure is correct, and tray is ejecting all cubes issue will likely be the flow meter on the pilot valve, or the Main PCB, but the Main PCB causing the tray to overfill would be very rare.
If your Model Has Fill Time Adjustment In The Service Manual...
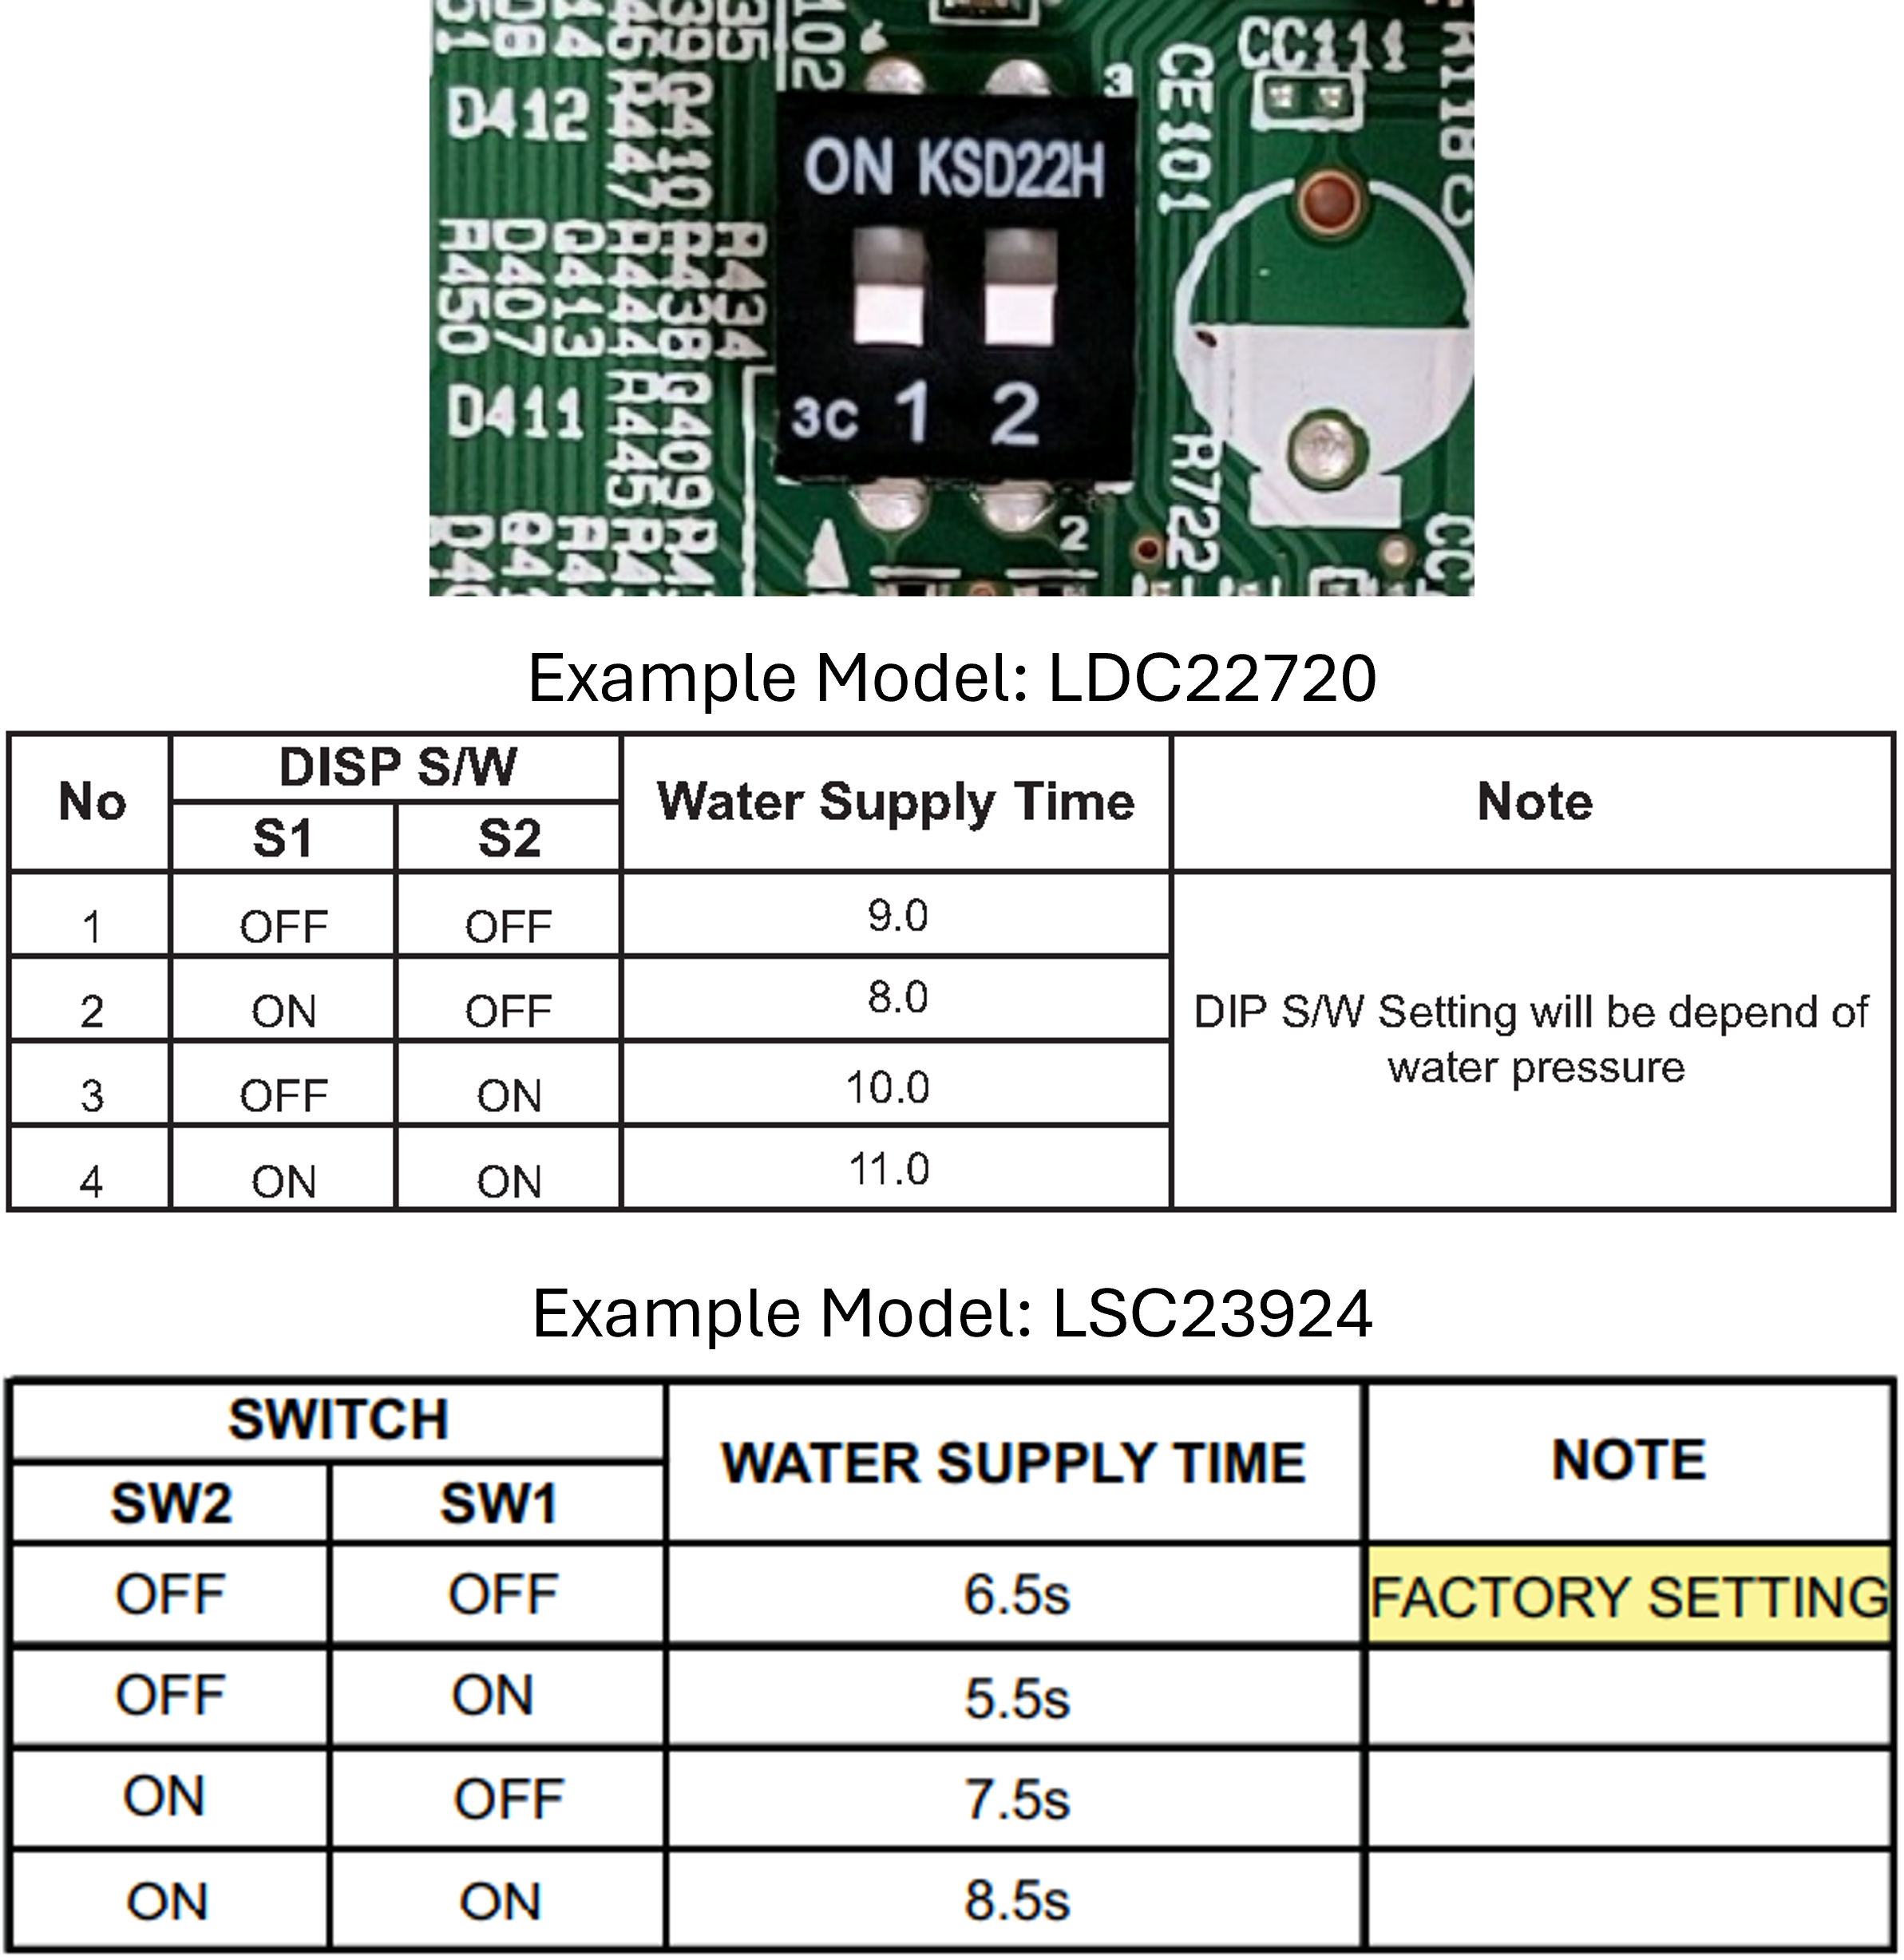
* Some models will use DIP Switches. Depending on the way the switches are set you can increase or decrease fill time.
* Examples are shown below of what you will see in the service manual if your model has this type adjustment available.
* Note: Some Main PCB’s will have DIP Switches physically on the board but no instructions in the service manual. Most likely adjusting the switches on those models will have no effect. But you can always run test mode on the icemaker and time the fill, then adjust the switches and run test again to see if it changed the time. It’s worth a try before replacing parts.
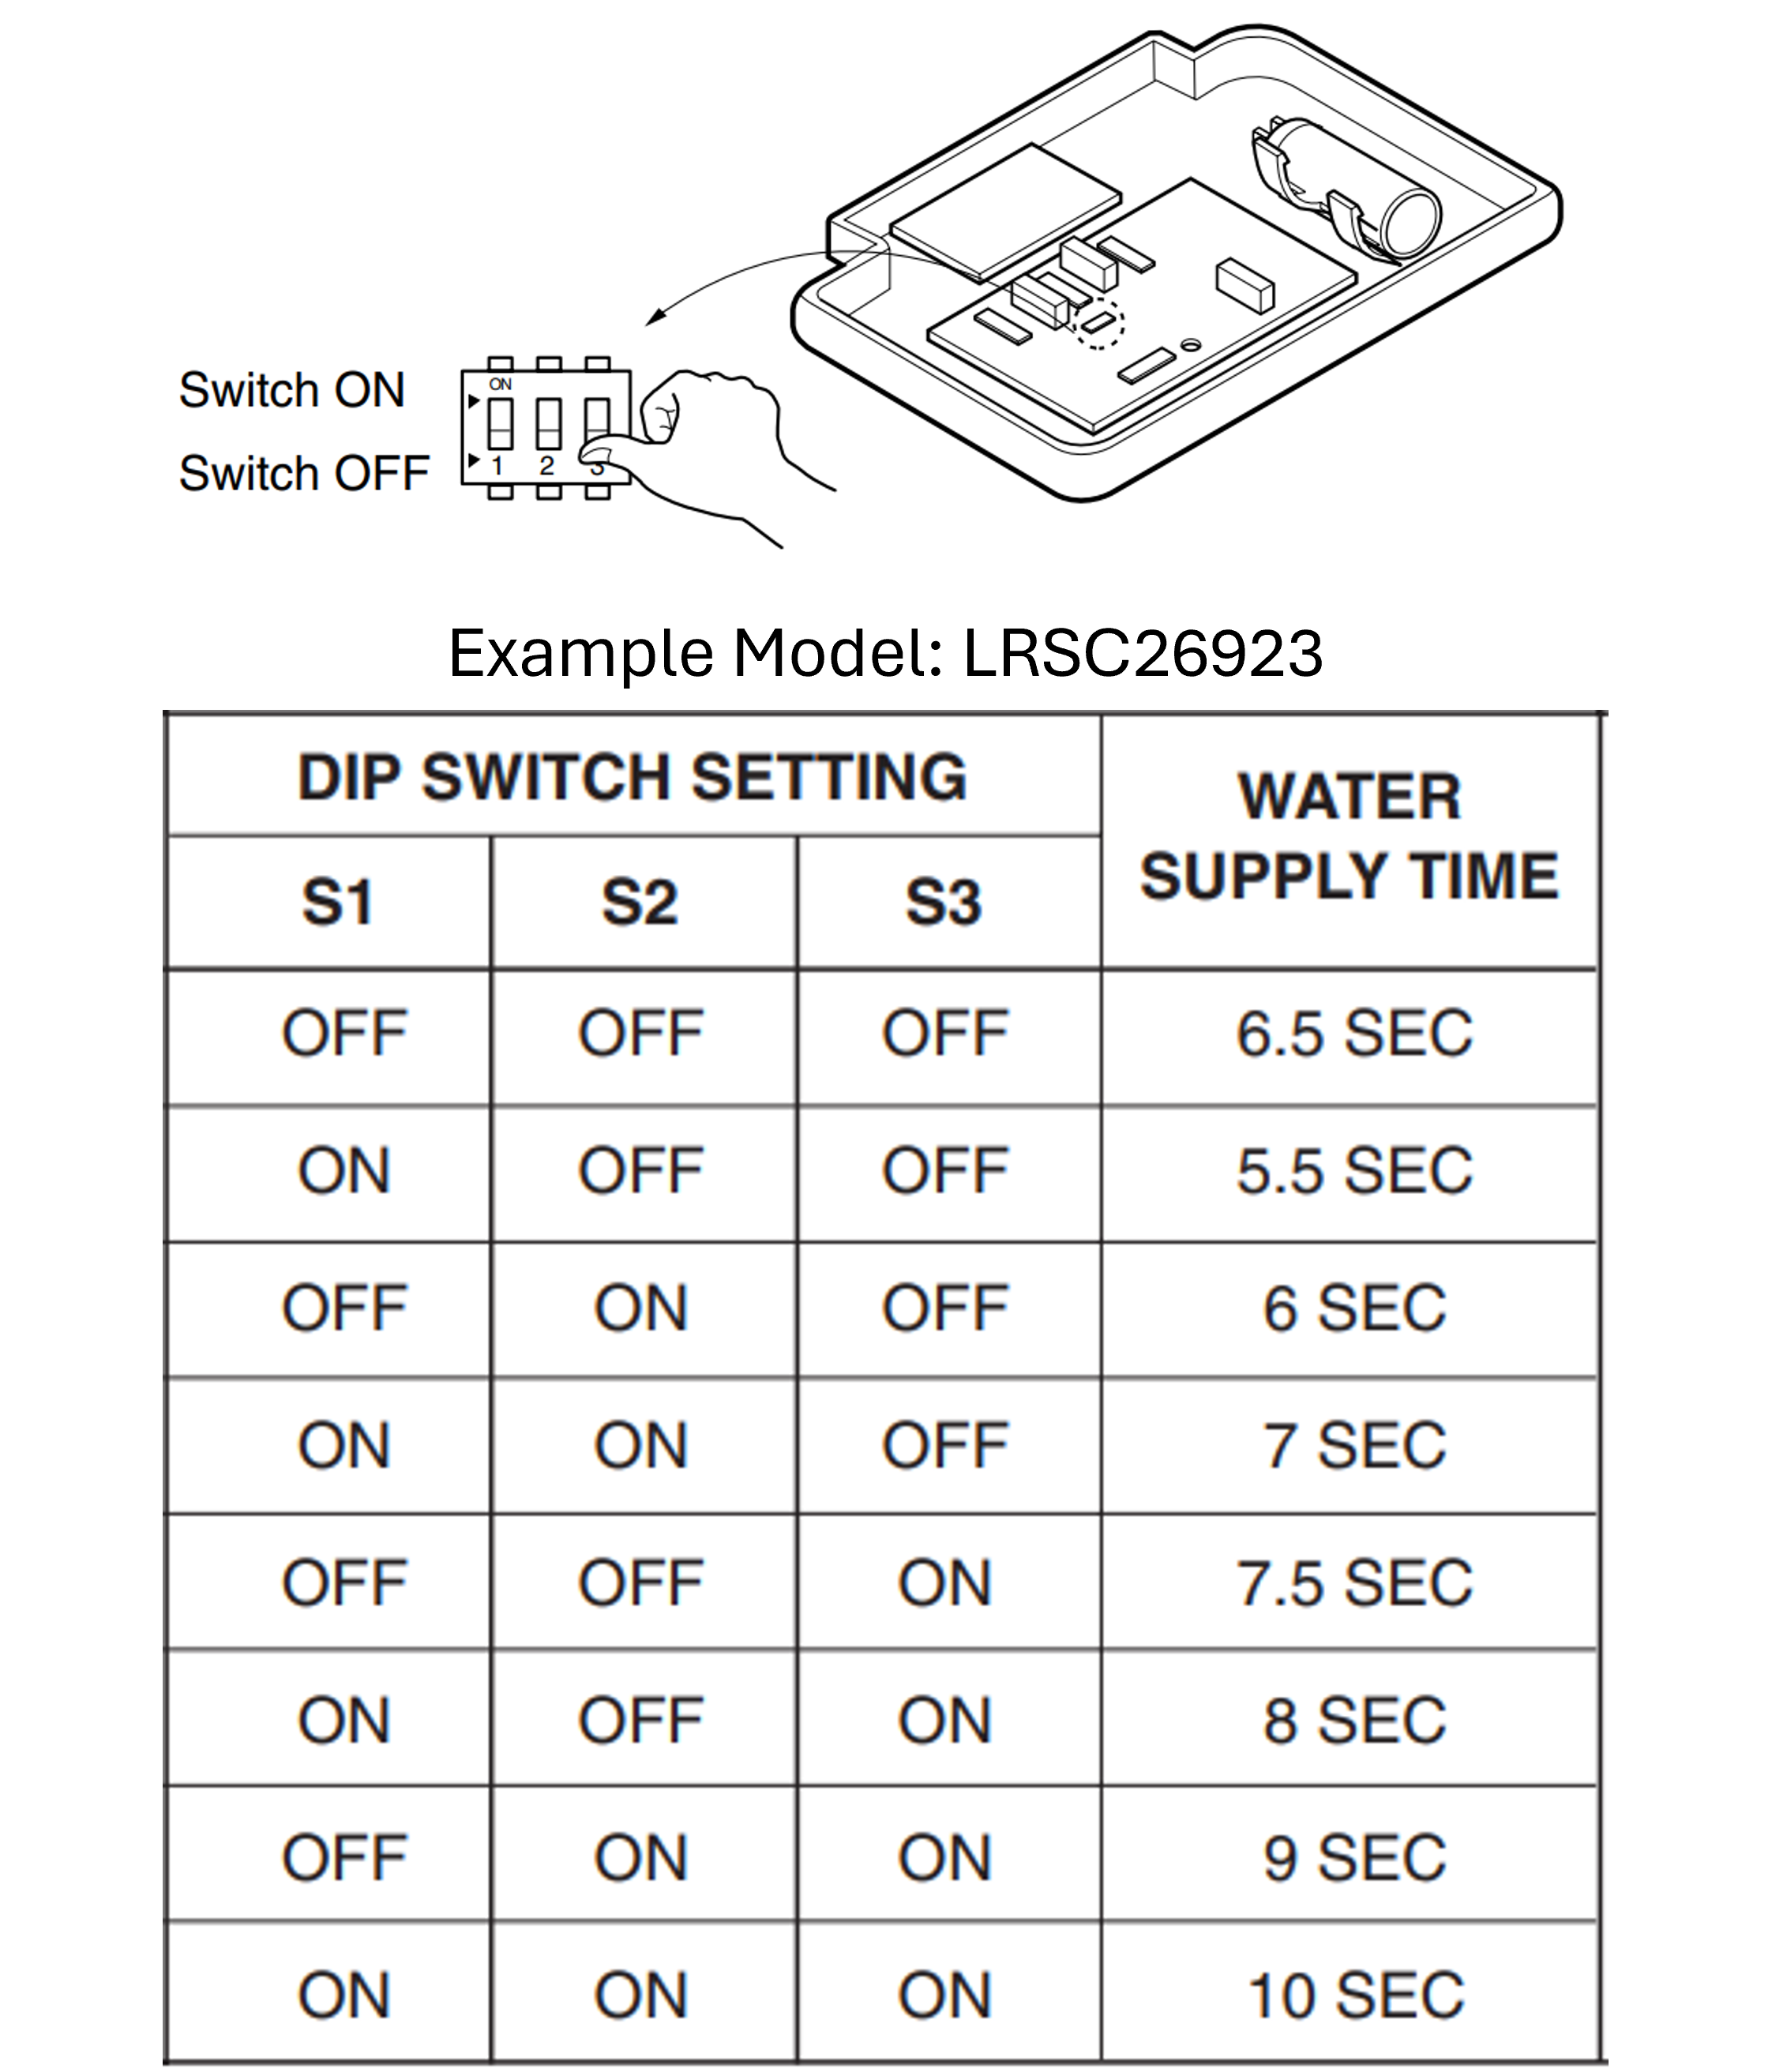
*The DIP Switches come from the factory in the OFF position as pictured below and notice from the charts that the time can vary by model so make sure you are looking in your service manual for your specific model….
2 Dip Switch Setup:
3 Dip Switch Setup:
(Some older models, typically before 2010 might have 3 DIP Switches instead of the more common 2 switch setup)
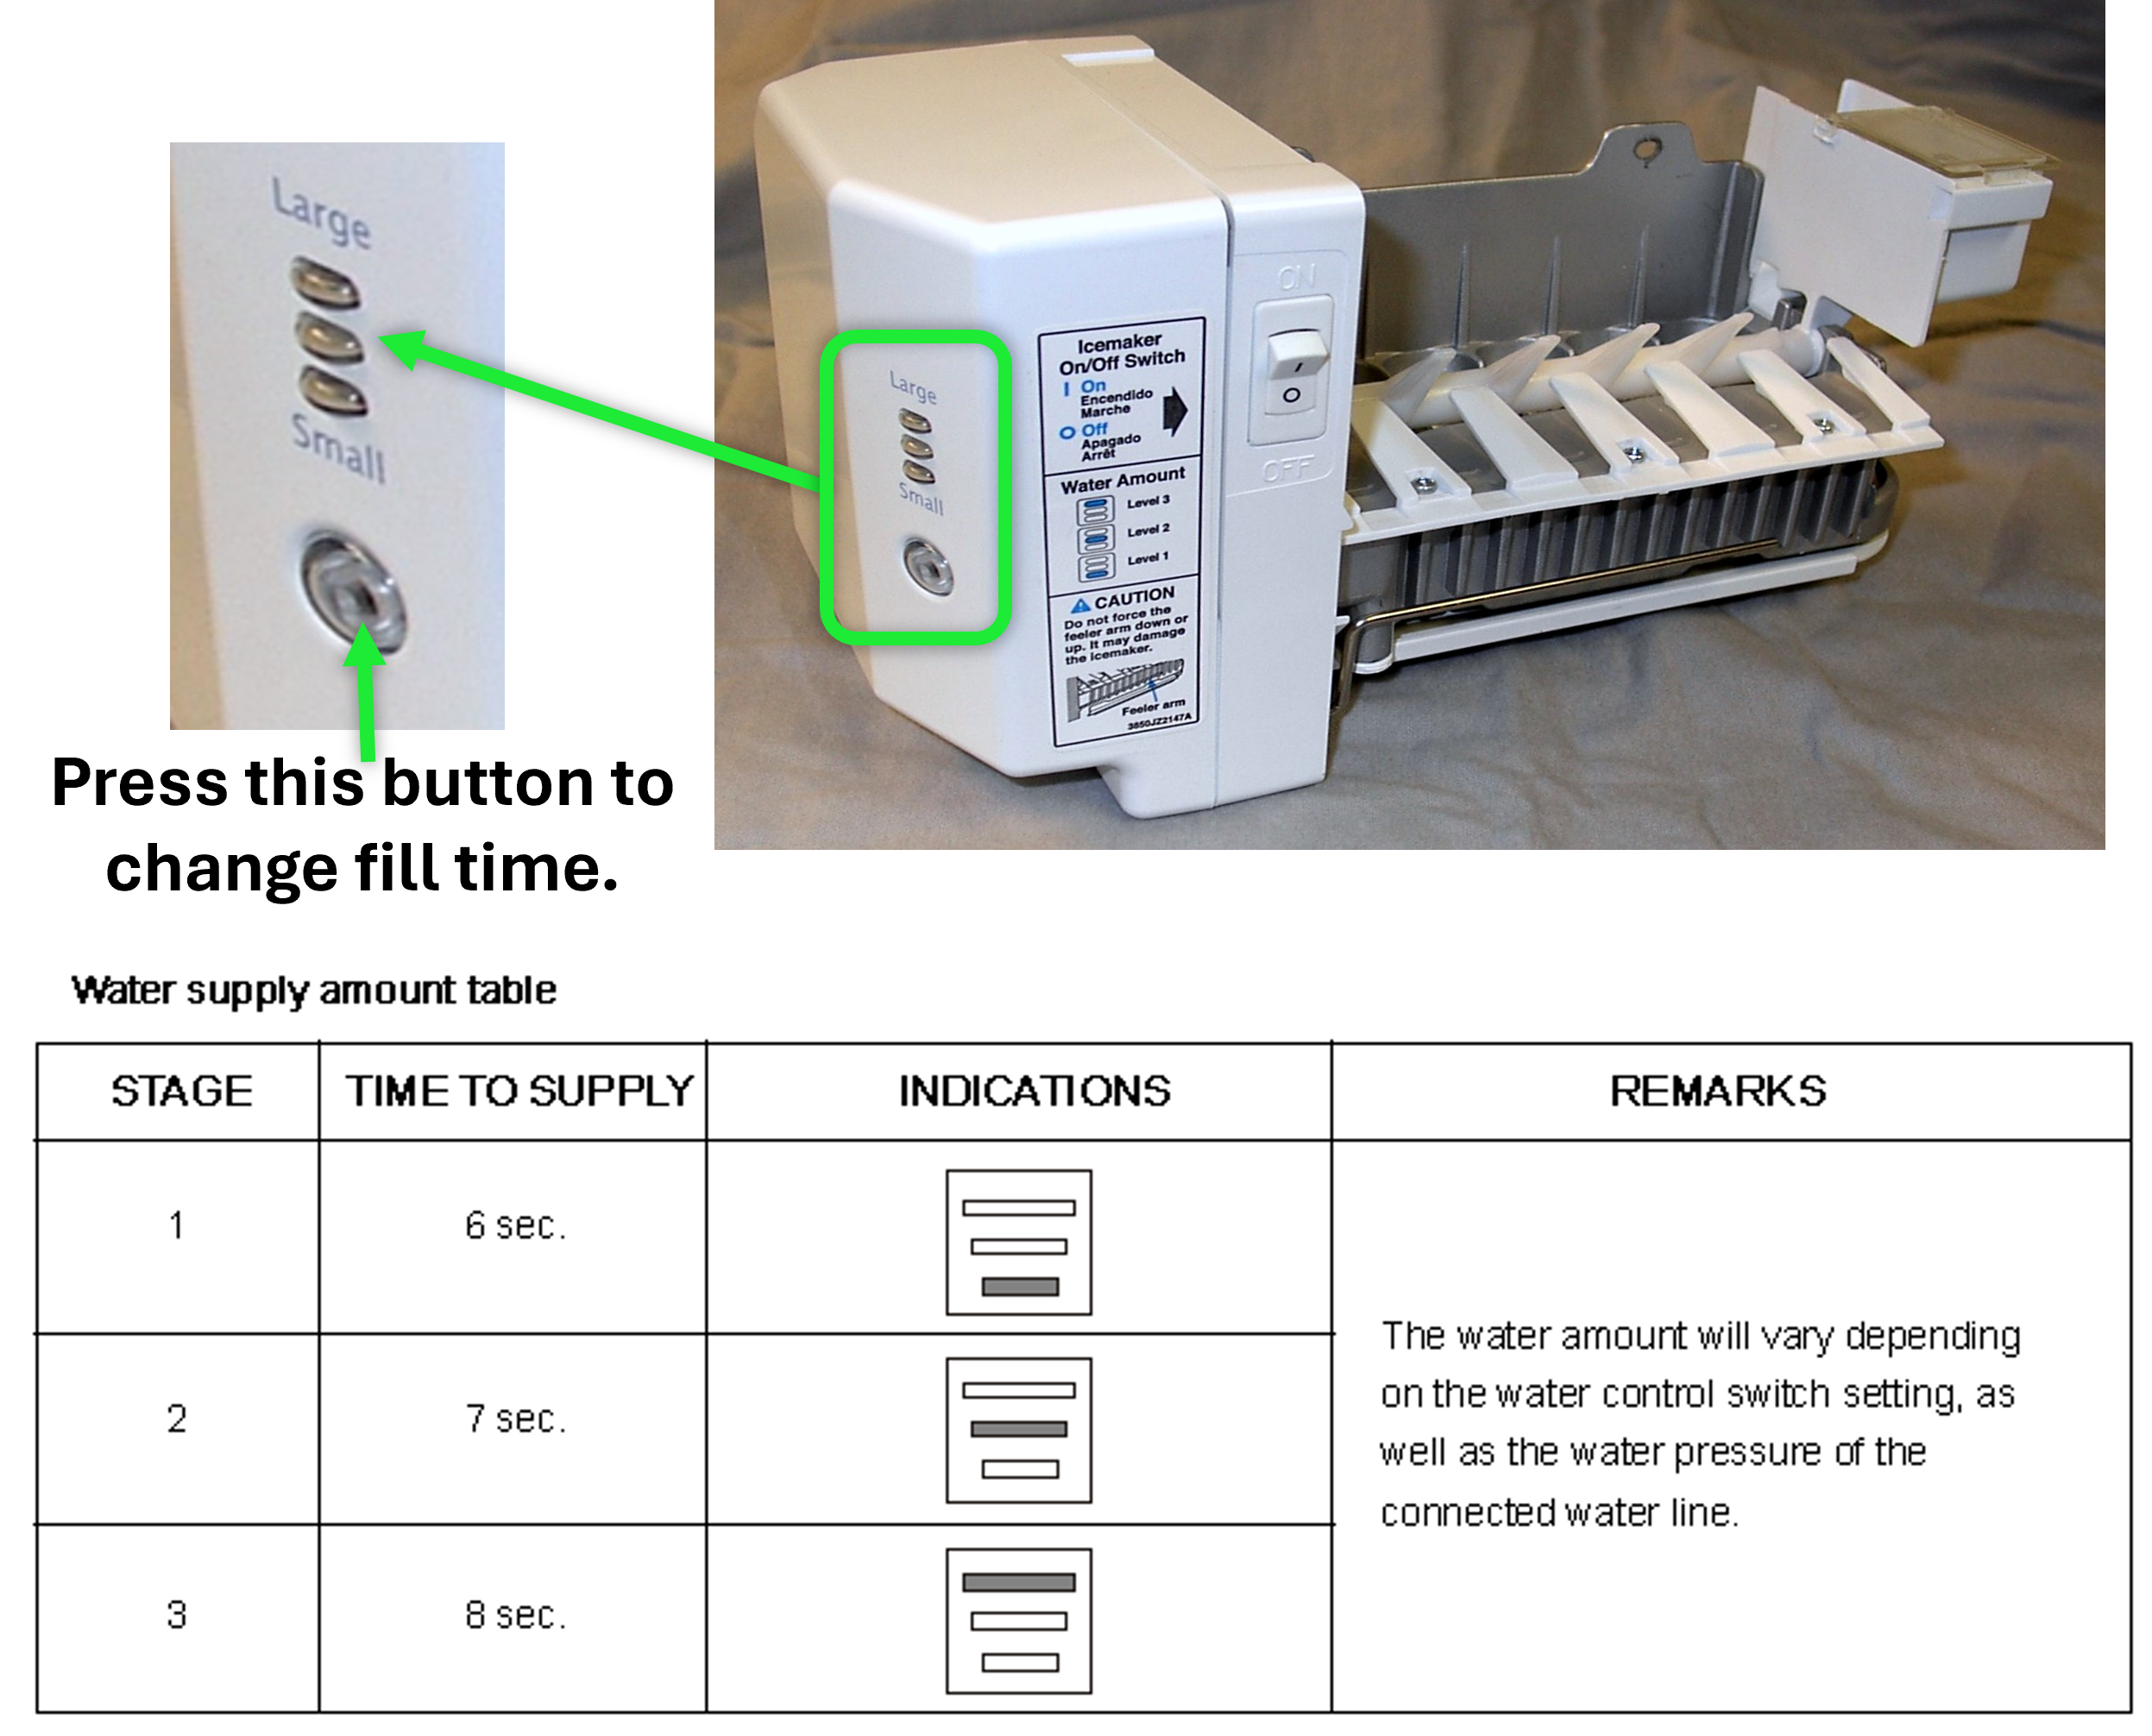
Icemakers with LED's:
Some icemakers have 3 LED’s on the icemaker itself. There will be a button located close to these LED’s and you use the button to cycle between the lights. This is the fill time adjustment for these style units.
Adjusting Fill Time from Display PCB:
Refrigerators with the Display PCB located inside the unit on the right wall of the refrigerator section can often have the fill time adjusted from the control panel itself.
Note: This will only work for models with freezer icemakers only. If the unit has multiple icemakers this setting cannot be changed.
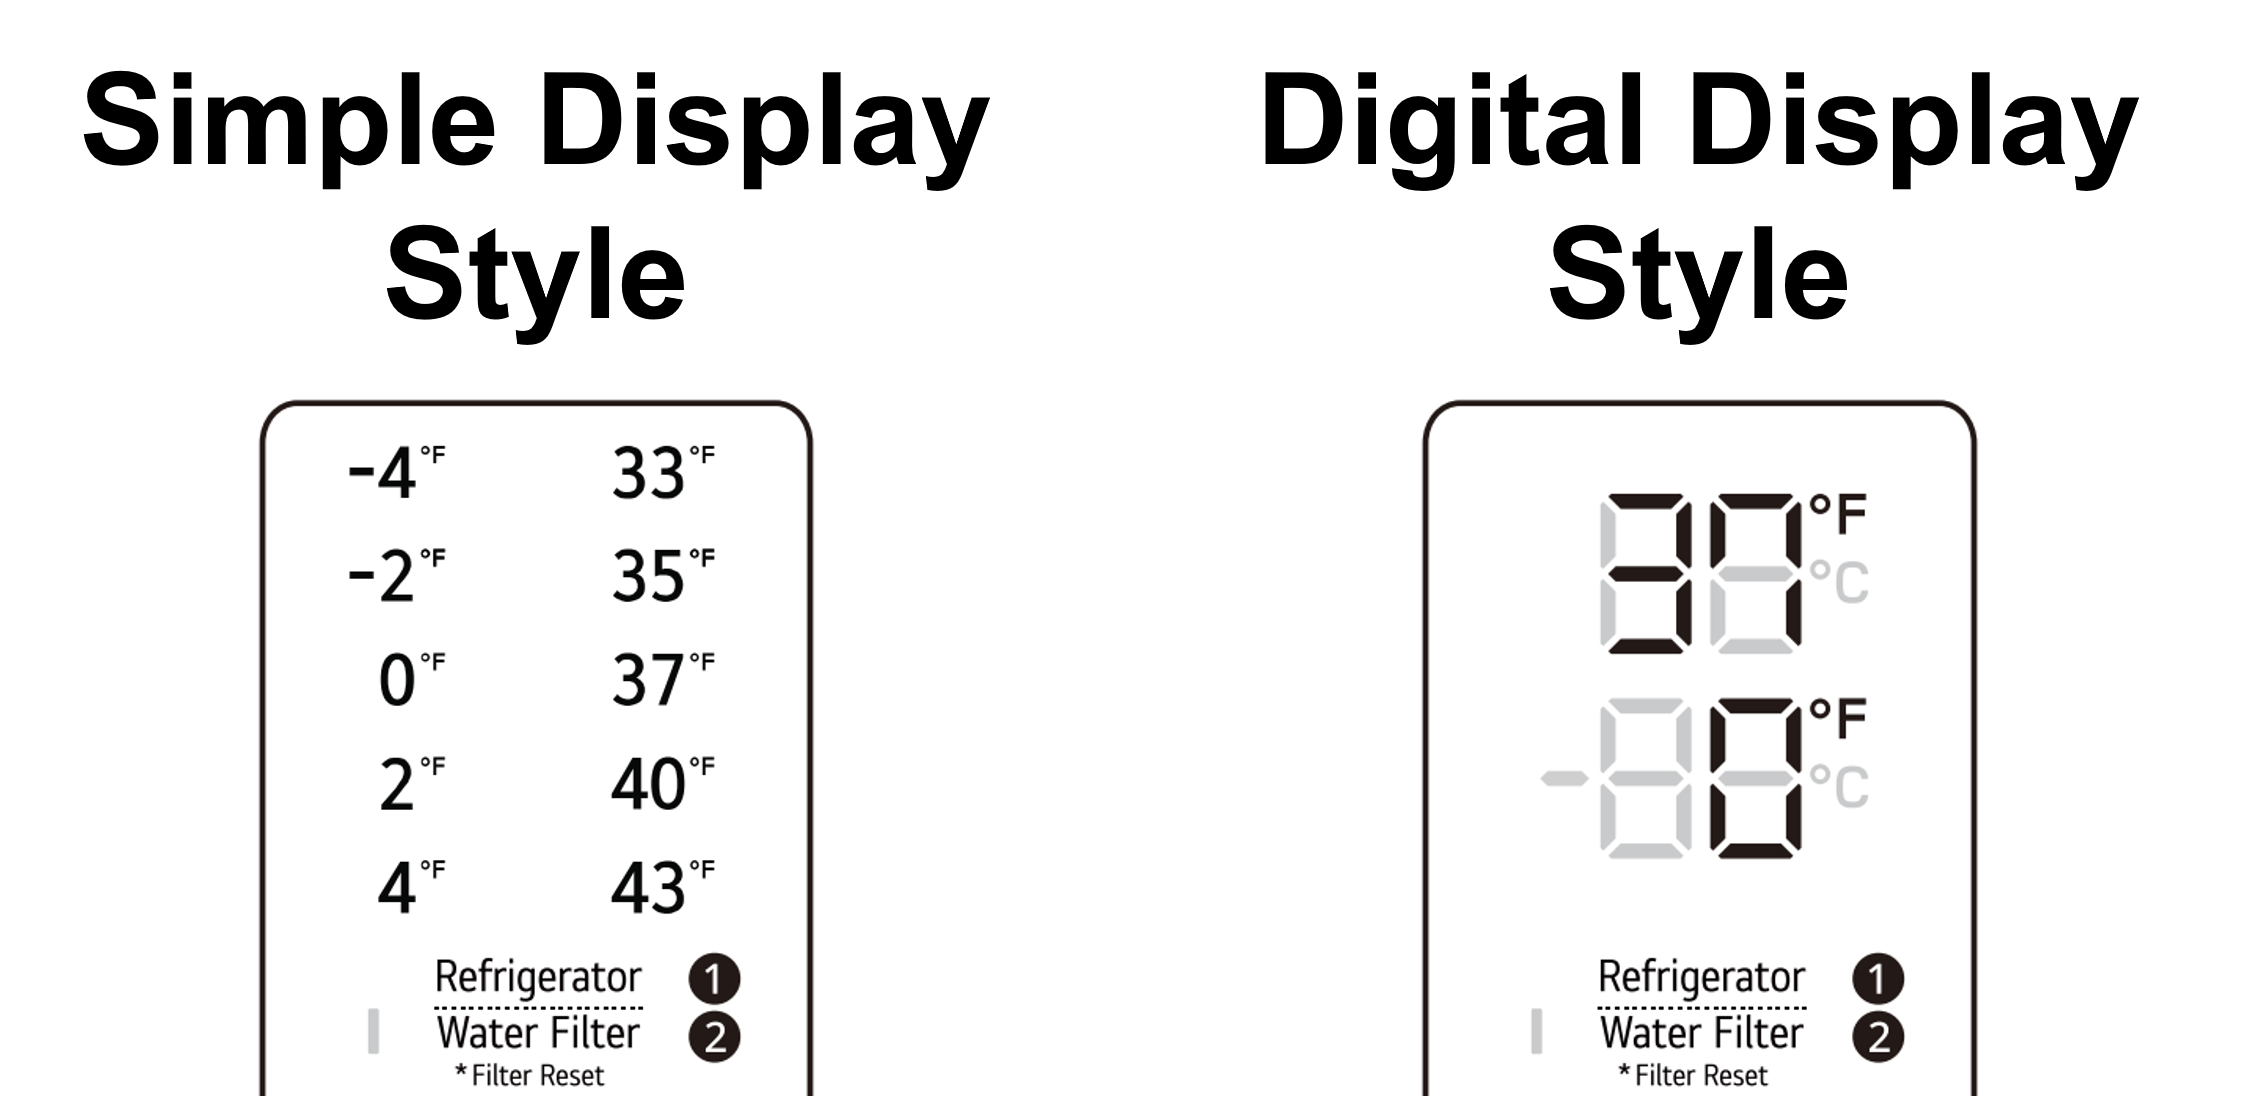
There are two different display types that you will run across. “Simple Display” models and “Digital Display” models. Below will help you identify these…
Adjusting Fill Time from Display PCB (Digital Display):
1) Press and Hold Freezer + Ice Plus for 5 seconds or more and you will see one of the 3 displays below.
F=Freezer Temp Compensation
r= Refrigerator Temp Compensation
St= Icemaker Fill Time Adjustment
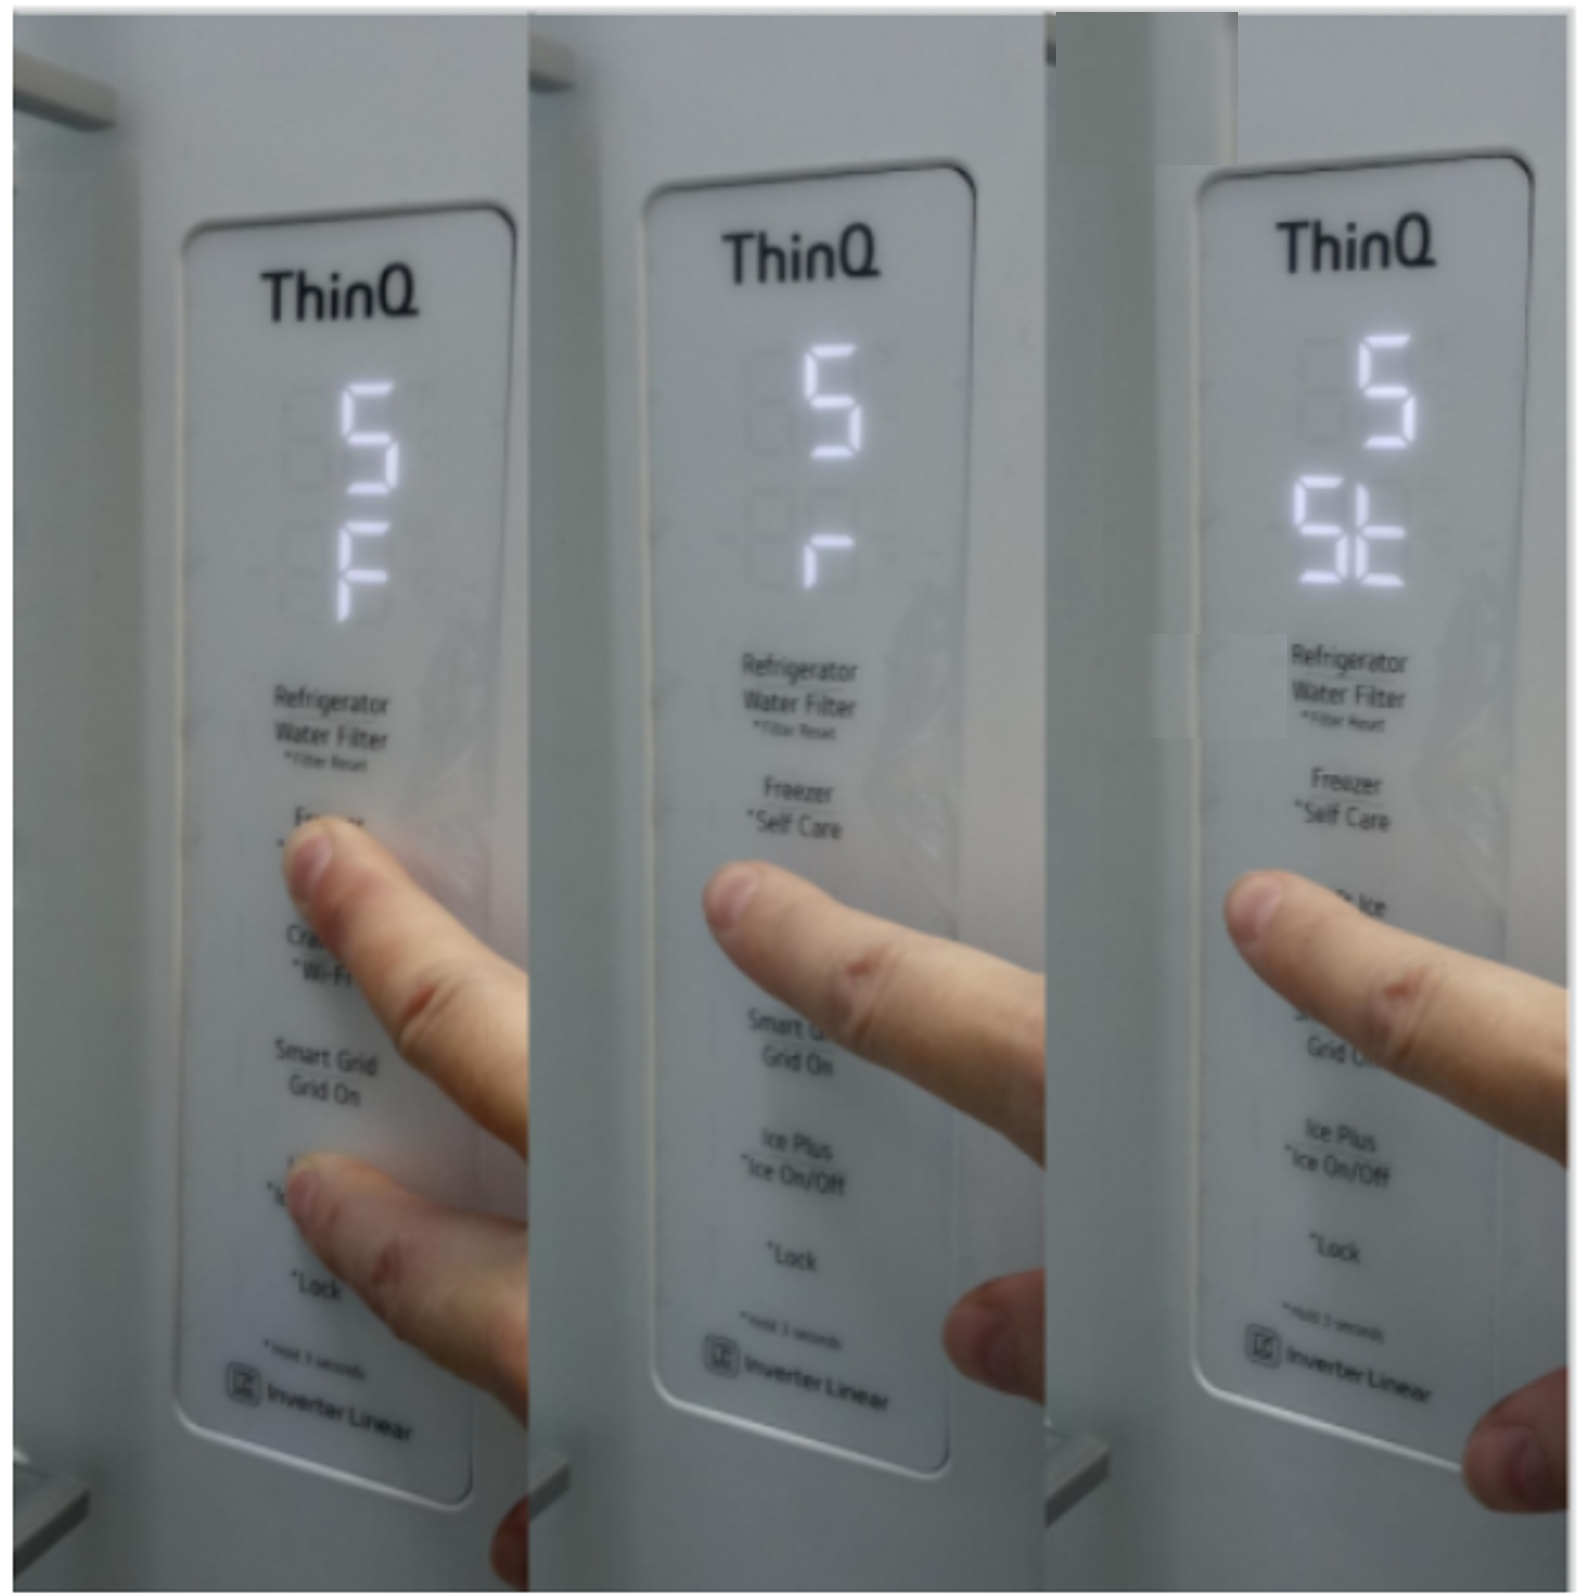
Reminder: If the unit has more than 1 icemaker then you will not have the “St” fill time adjustment option as shown above. It is only for models with 1 icemaker.
2) Press the FREEZER BUTTON to cycle between the 3 screens shown above. To adjust Fill Time set the Screen to “St”.
3) Use the REFRIGERATOR BUTTON to change the fill time (1-9) according to the chart below, unit will be preset to number 5.

4) Once you have the adjustment where you want it press and LONG HOLD the Refrigerator Button and lock in your changes.
Note: If you go a few seconds without pressing any buttons this compensation mode will time out and you will have to start over. Make sure and lock in your changes quickly.
Adjusting Fill Time from Display PCB (Simple Display):
1) Press and Hold Freezer + Ice Plus for 5 seconds or more and you will see one of the top 3 LEDs in the freezer temp section light up.
-4 = Freezer Temperature Compensation
-2= Refrigerator Temperature Compensation
0= Icemaker Fill Time Adjustment
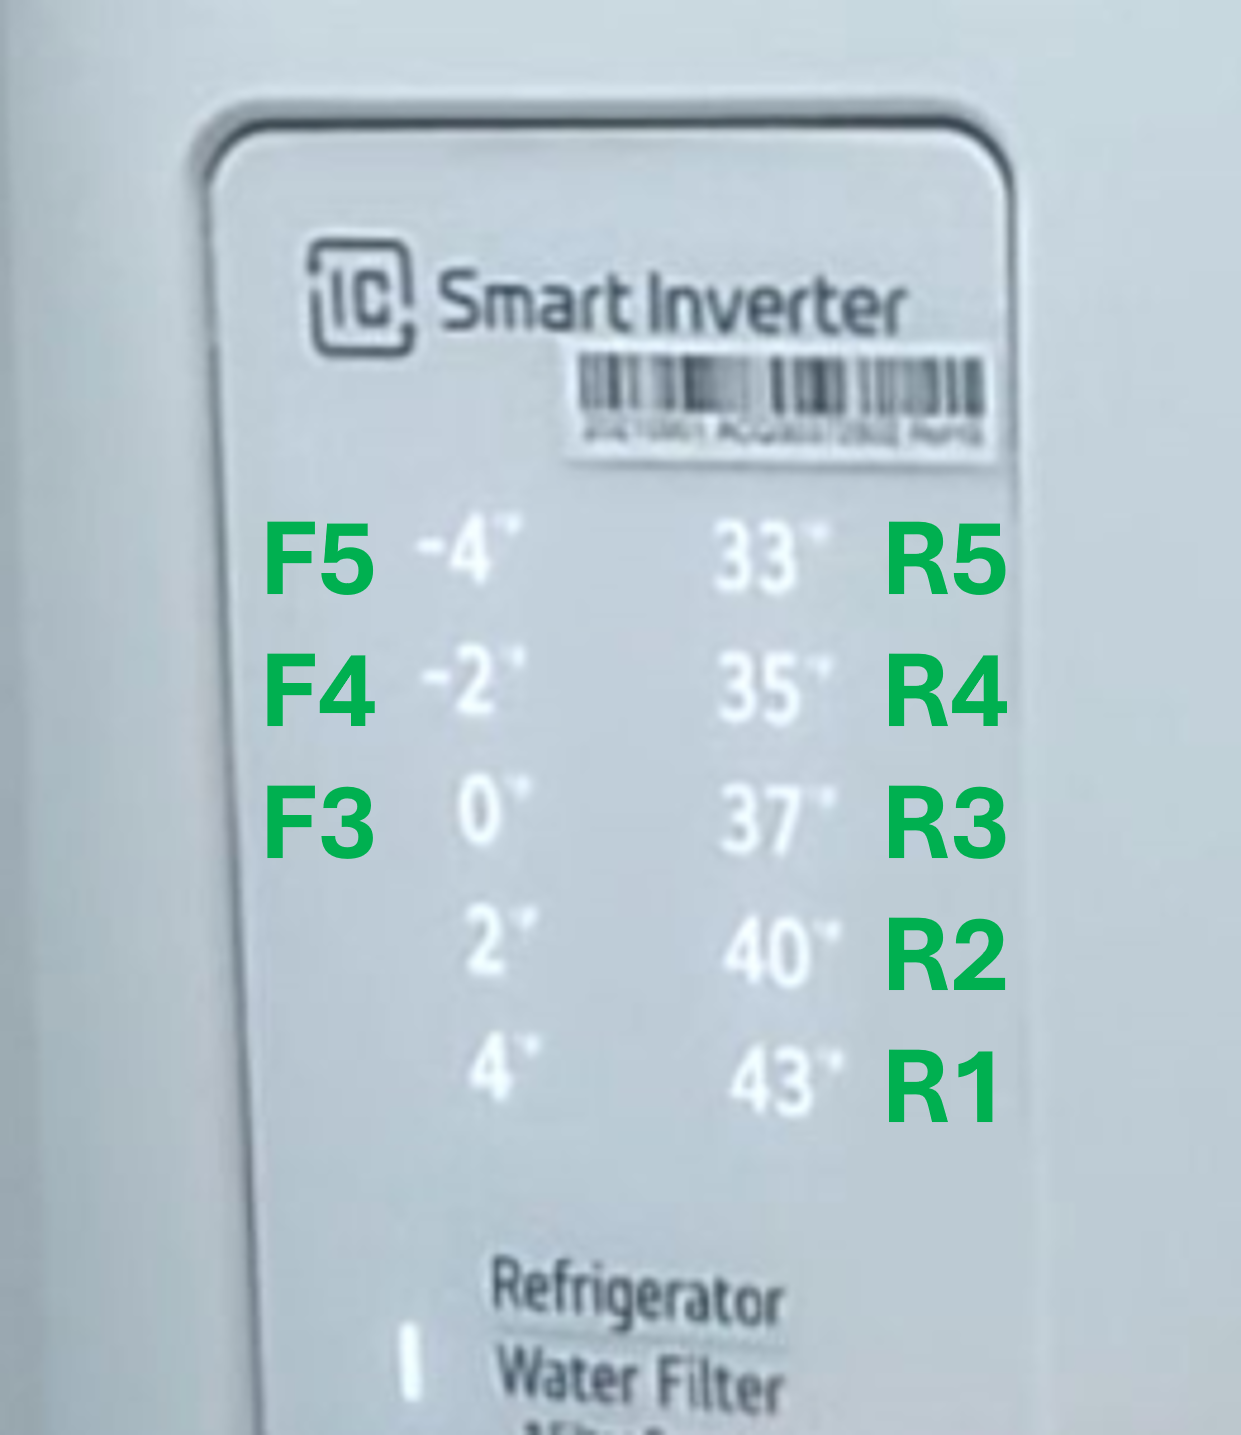
2) Press the FREEZER BUTTON to cycle between (-4,-2,0). To adjust Fill Time set the Freezer Temp to “0”.
3) Use the REFRIGERATOR BUTTON to change the fill time (33-43) according to the chart below, unit will be preset to number 37.

4) Once you have the adjustment where you want it press and LONG HOLD the Refrigerator Button and lock in your changes.
For Example… If you wanted to increase the fill time 2 Seconds… Enter compensation mode, Select “0” on the freezer temp, and “35” on the refrigerator temp, then long hold REFRIGERATOR BUTTON to lock in your changes.
Note: If you go a few seconds without pressing any buttons this compensation mode will time out and you will have to start over. Make sure and lock in your changes quickly.
Please clarify “flow meter on the pilot valve”, thank you!
Most LG water valves have a flow meter at the pilot valve on the back of the unit. (Typically has 3 small gauge dc wires going to it). When the unit calls for waterand opens the valve the wheel inside the flow meter turns and sends a signal to the board to let know water is coming in. If no flow is detected or weak flow is detected the unit will normally give a “gf or 9f” error code.