Error codes are displayed on the display to signal that the unit needs your attention.
If you see an error code you will need to address the reason for the Error code.
Many times, the customer will report that they can unplug the unit and the dispenser will work properly for a time but will eventually stop. If the unit present an error code the dispenser functions will be suspended, till cleared. Example if you have an error code, If (ice fan), the dispenser won’t dispense water or ice, (if the unit dispenses Ice but not water then the issue isn’t an error code or a door switch issue). Once you address the Ice Fan, (or your specific error code), the dispenser should operate correctly.
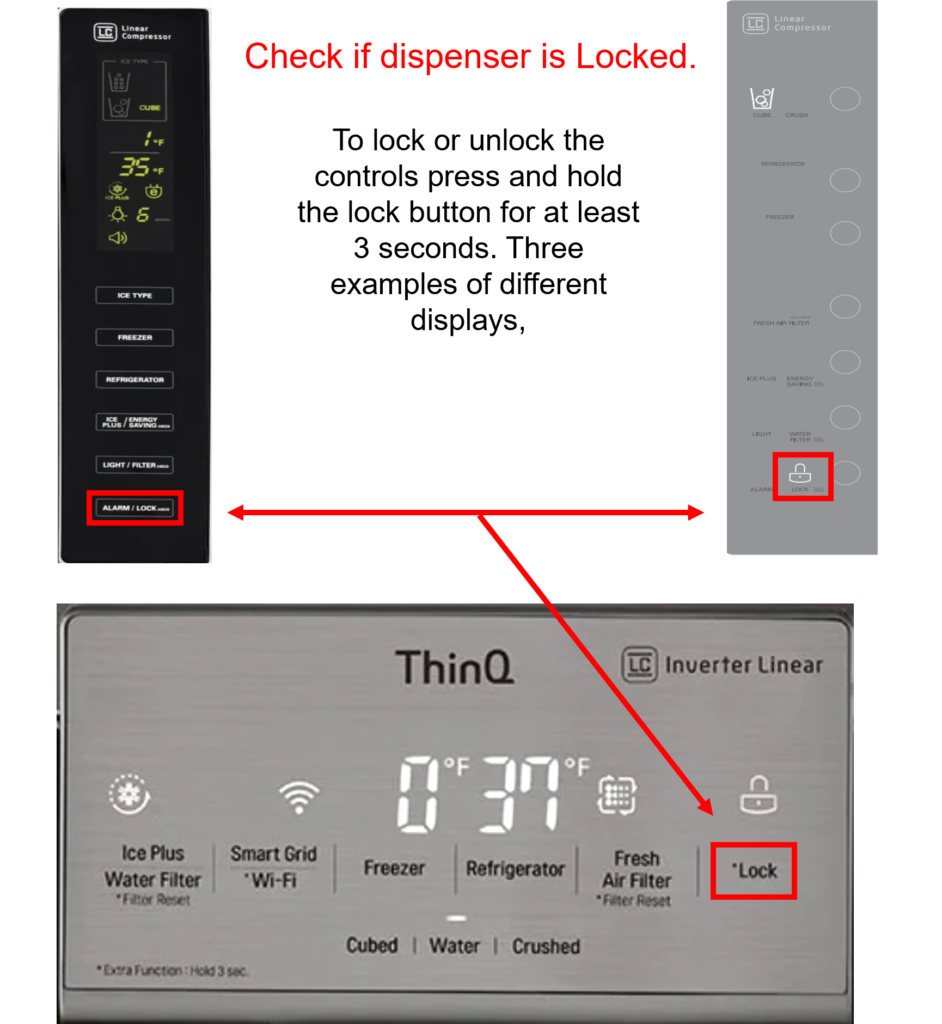
Ensure Control Lock Is Turned OFF
If you do not see an error code, check to make sure the Control Lock is not engaged. Look to see if the locked padlock icon is illuminated on the panel. If it is, press and hold the lock key for 3-5 seconds to unlock, and then try dispensing water again.
Listen For A Humming Sound
Press the dispenser lever down again and listen for a humming noise. If the unit makes a humming noise when trying to dispense water, make sure the home water supply to the unit is connected and turned on. Also ensure the water supply tubing to the refrigerator is not kinked.
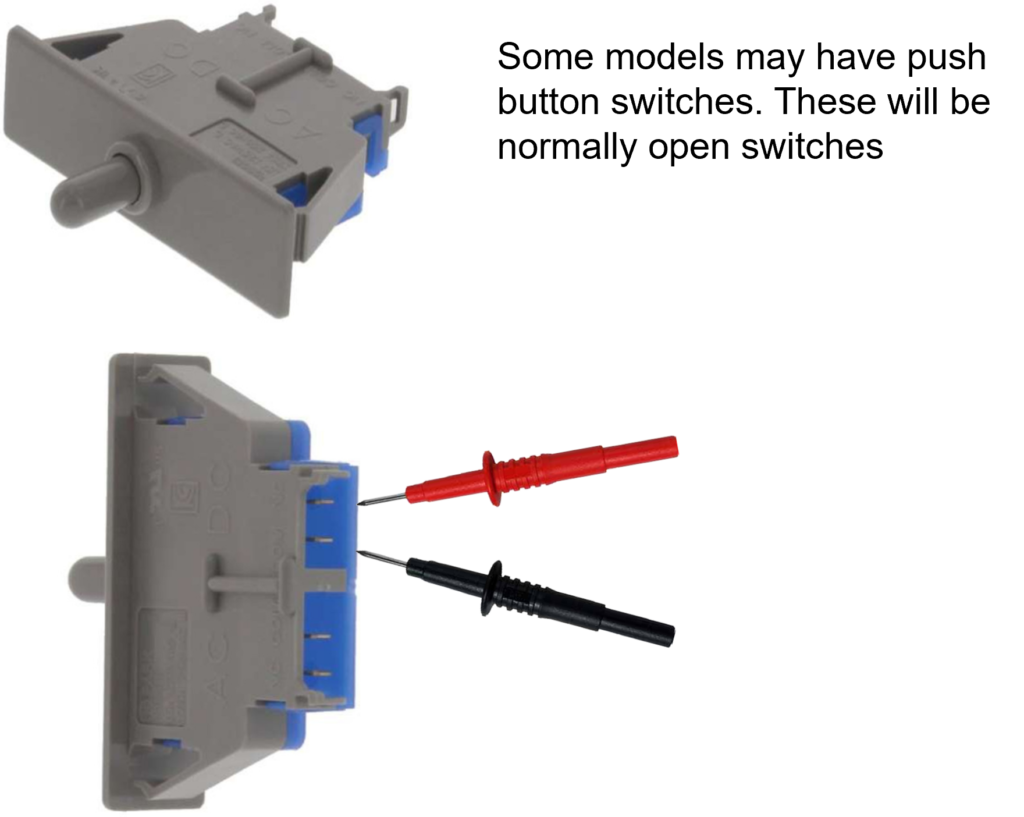
Check the door switches.
If the door is open or the unit thinks the door is open it will not allow the dispenser to operate. Check and see if the lights are going off and is the alarm going off?
If the unit is new and it’s just been installed, check under the hinge covers and make sure all connections are properly secured, if the unit is older and has been working and the doors have not been removed then proceed with troubleshooting.
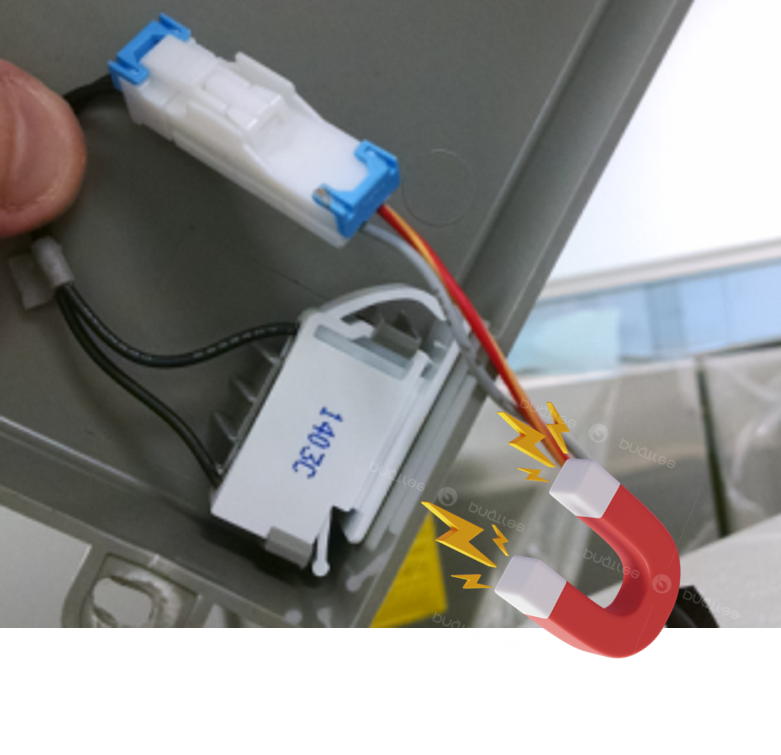
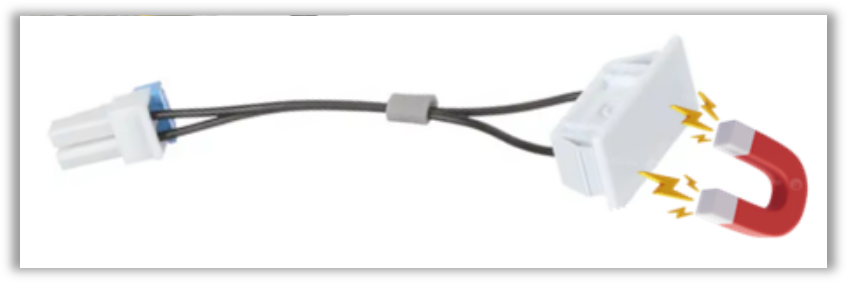
Some models will have Reed door switches (magnetic).These will also be normally open switches.
When a magnet is placed over the door switch you should read continuity on your meter, and no continuity when the magnet is removed. Make sure the switch is installed in the hinge cover properly and connected properly.
The magnet is in the door opposite the reed switch. Some are replaceable and some require a door replacement if the magnet has weakened or moved out of position,
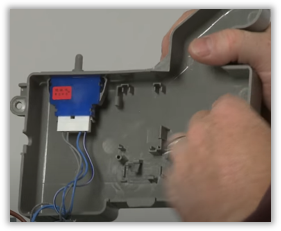
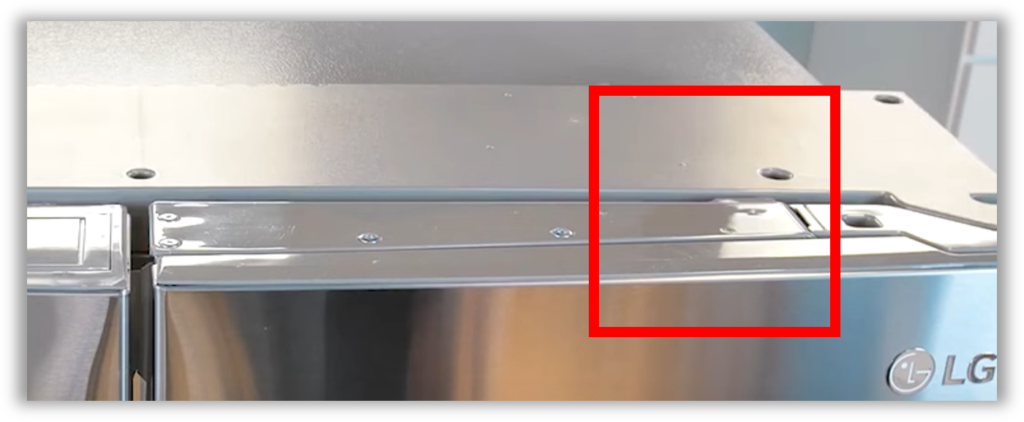
Check for Loose Connections Under Door Hinge
Using a Phillips screwdriver, remove the door hinge cover on one side. Check the connections one at a time by unplugging and plugging them back in. Repeat the process with the other door hinge, removing it and checking the connections one at a time.
Then check the dispenser again.
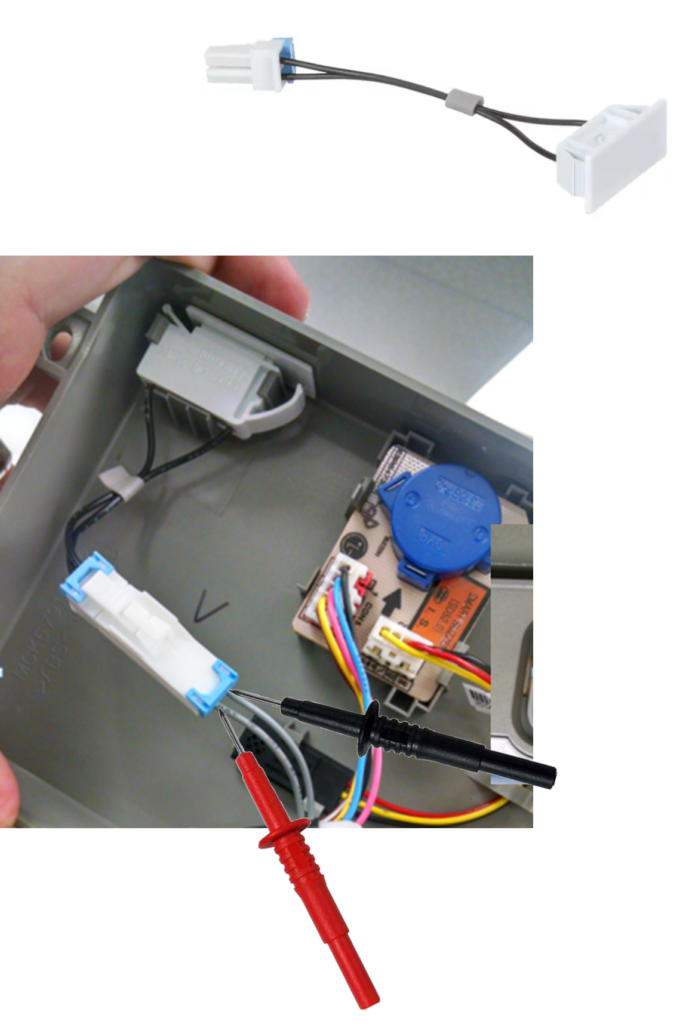
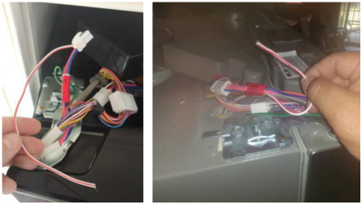
There could be a wiring issue in the door…
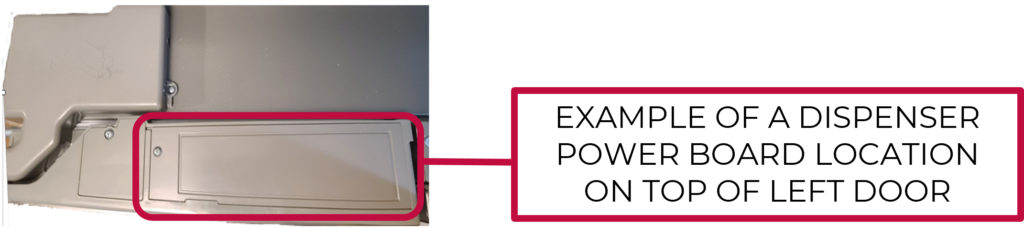
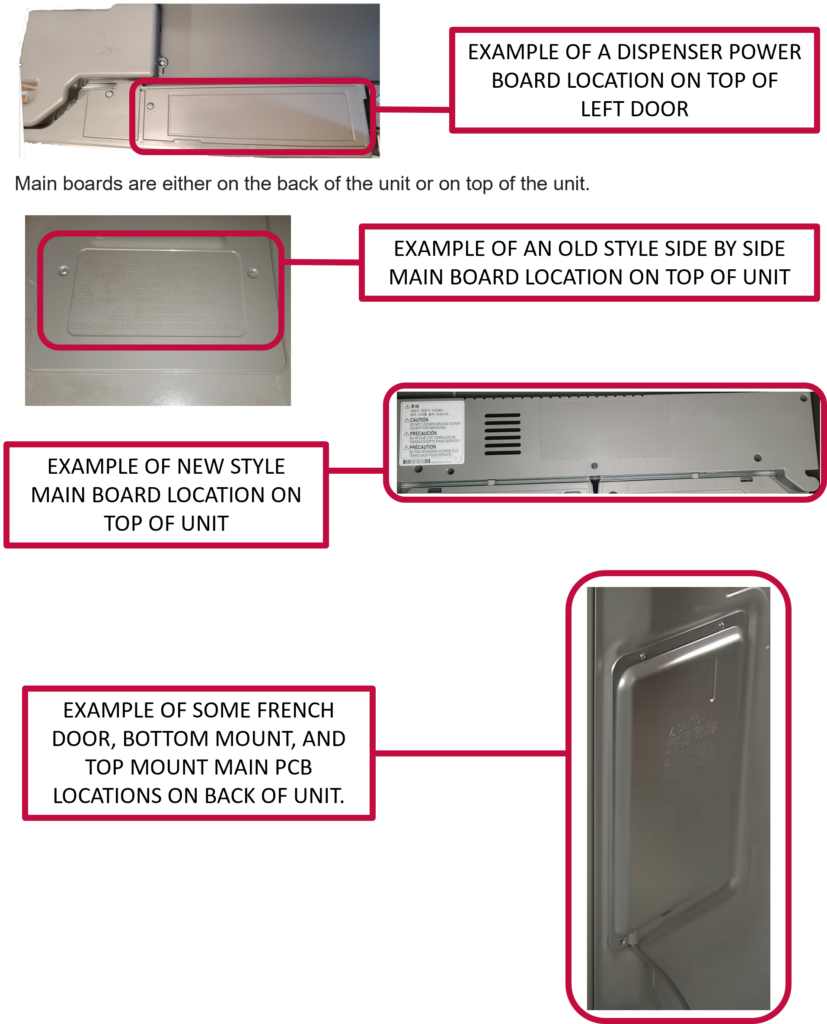
This issue affects mostly models that start with (LMXS30, LFXS30, LMXC24, and LFXC24). But could be any model with the Sub-PCB board located on top of the left-hand refrigerator door as shown below:
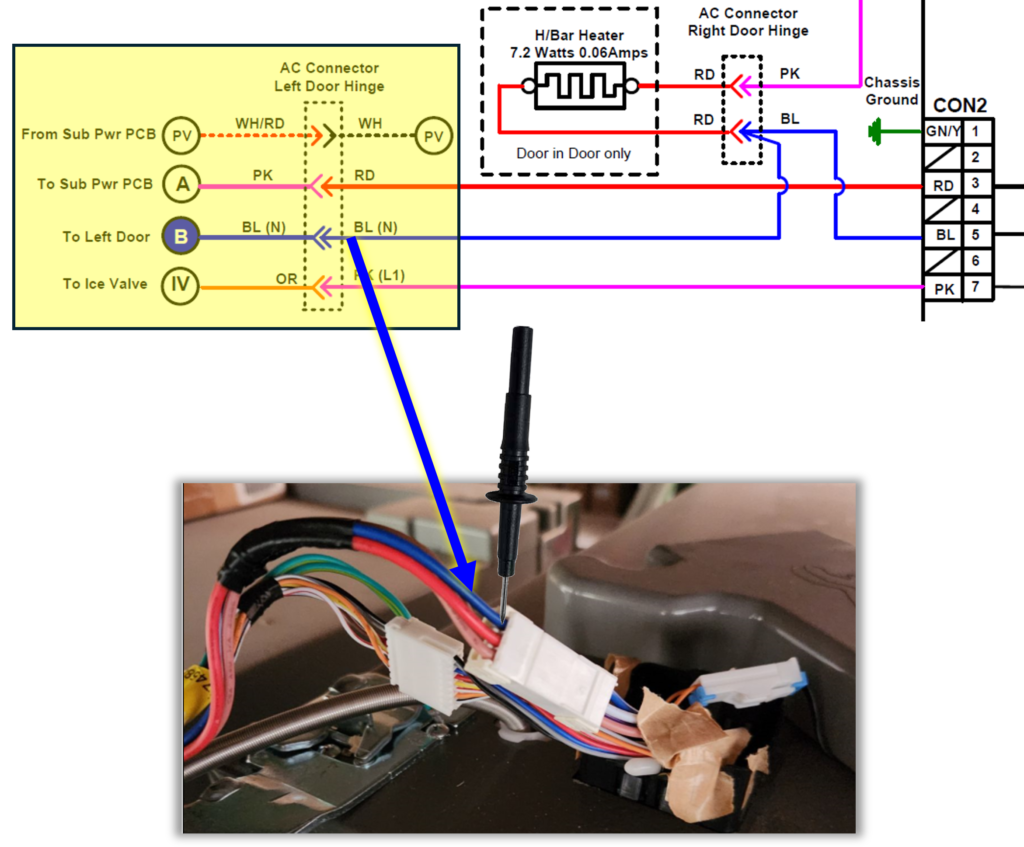
Symptom 1: Neither the ice or water will dispense, the ice flap may open, but no auger function, no error codes. There’s a high probability that the left door Pink wire feeding 120v to the sub board on top is damaged and probably open.
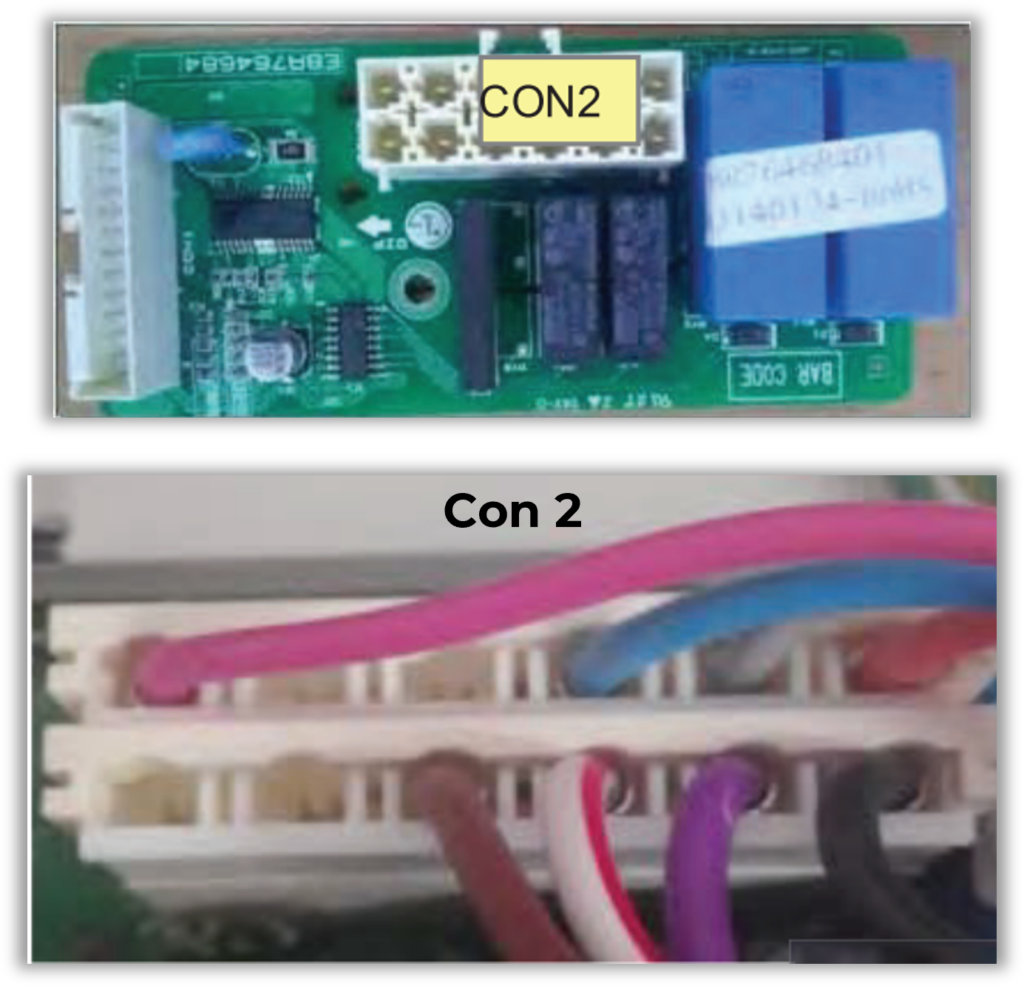
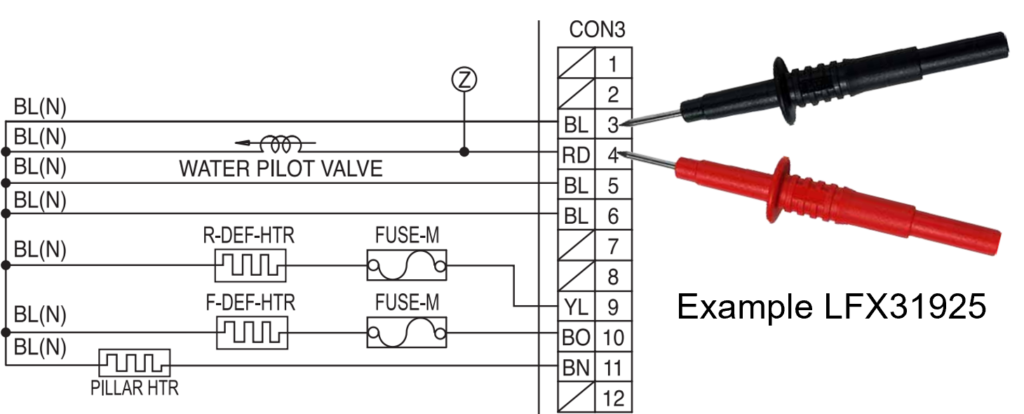
Access the large Blue wire under the left-hand hinge cover, (this is your neutral) place your meter lead on the Blue wire
Place the other lead on Con 2 Pink wire, there should be 120Vac there all the time, if this is your issue, typically you will see 0 voltage, and the Pink wire will be open (inside the door) when checked for continuity, from the sub board to harness connection at left hinge cover. To repair this issue, you will need to replace the left door.
Symptom 2: No Water Dispensed. has ice dispensing, and auger function, but no water.
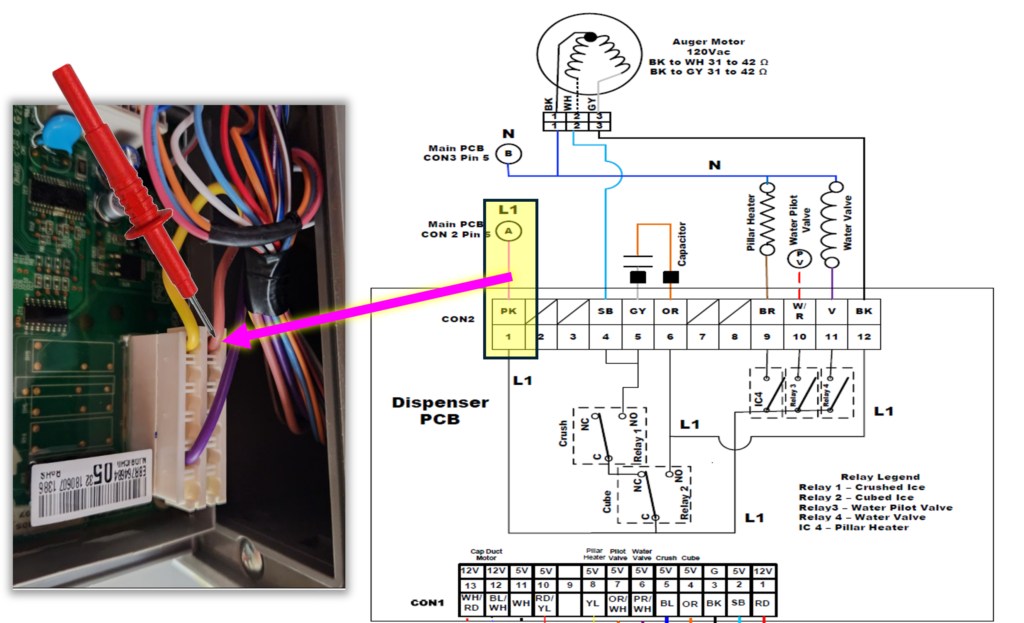
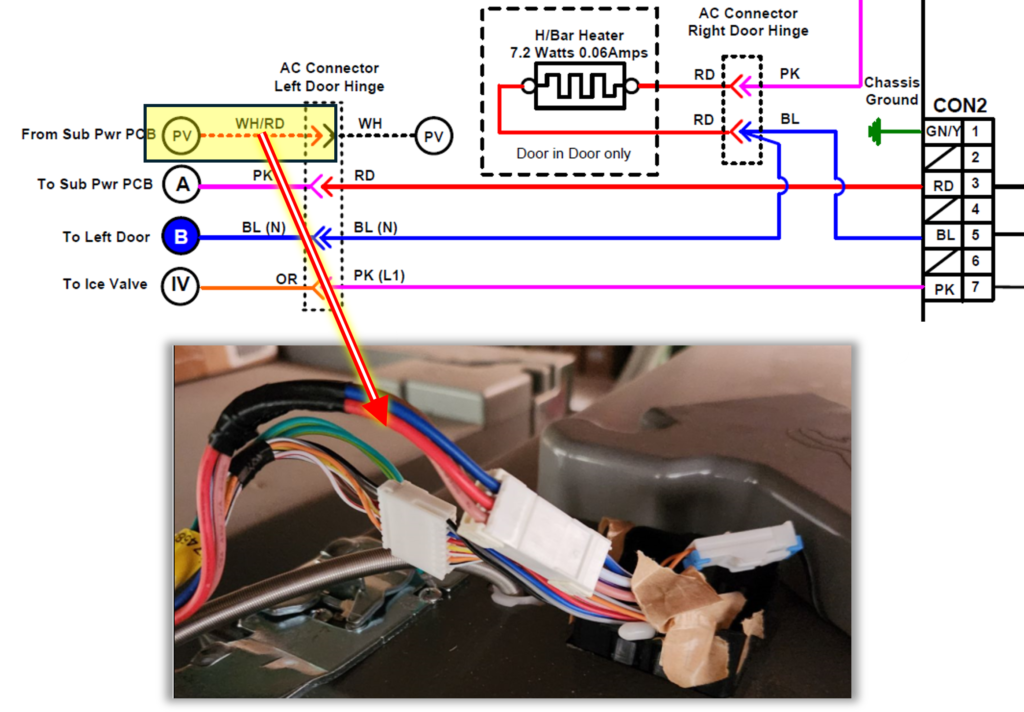
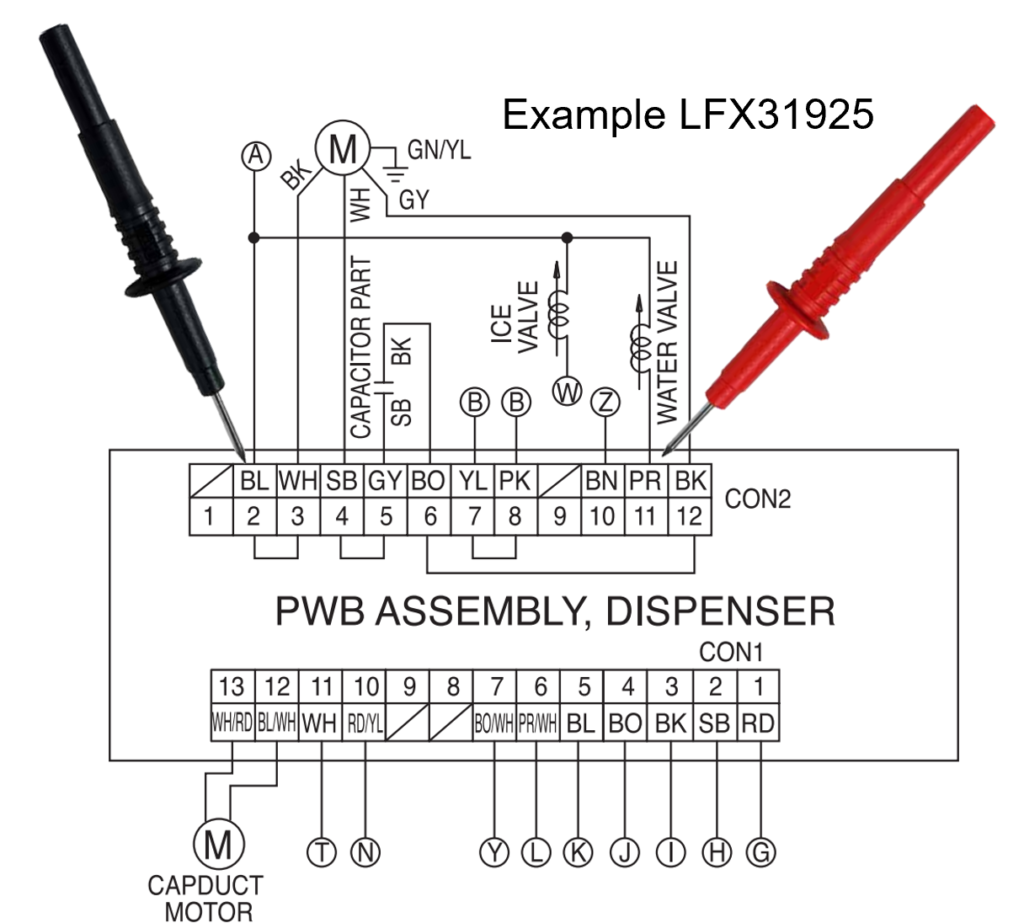
The sub board on top of left door feeds 120v back through door on WH/RD wire, to pilot valve in rear, sometimes this wire will be open in the door or the connector may be the issue, to confirm you may check continuity of the wire from sub board to left hinge connector, or check for 120v at con1 pin 10 on the board and then back to hinge WH/RD
To test continuity on the White/Red wire, set your meter to continuity and find the WH/RD wire at the left door hinge connector ….
Next find the WH/RD wire on the Sub PCB located in the top of the left door and place your other meter lead there.
On the Sub PCB locate the White/Red wire (Con 2 Pin 10 on the example below.) With one meter lead touching the WH/RD wire at the hinge and the other at the Sub PCB you should read continuity on the wire or hear an audible beep if your meter has that feature.
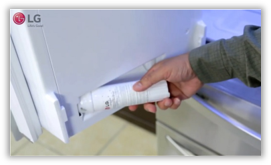
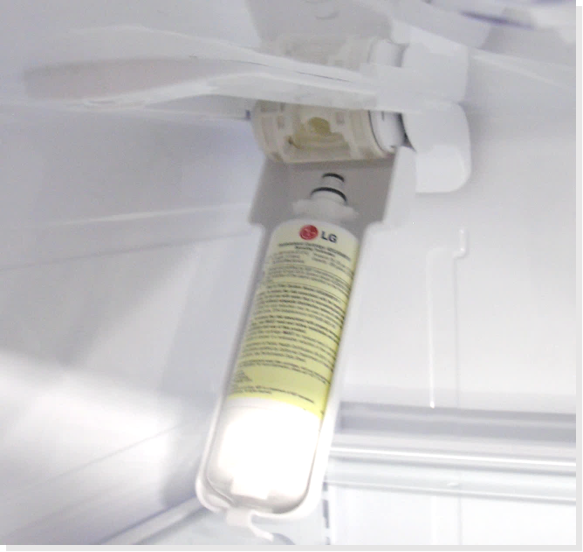
Check the water filter
Overtime, the refrigerators water filter can become clogged with contaminants, water flow at that point will be restricted to the dispenser. LG refrigerator water filters need to be replaced every six months to keep clean water flowing freely. Also check to make sure that the filter is installed properly, an improperly installed water filter can cause dispenser issues. Make sure it is an LG branded water filter, aftermarket water filters will be a common cause of leaks and dispenser malfunction.
On some models the water filter will in the left-hand door, others will be in the roof of the fresh food area.
Some older models will need to have a bypass installed to dispense water without filter, most newer models have an internal by-pass.
You might try dispensing water without a filter installed to verify it’s not the issue.
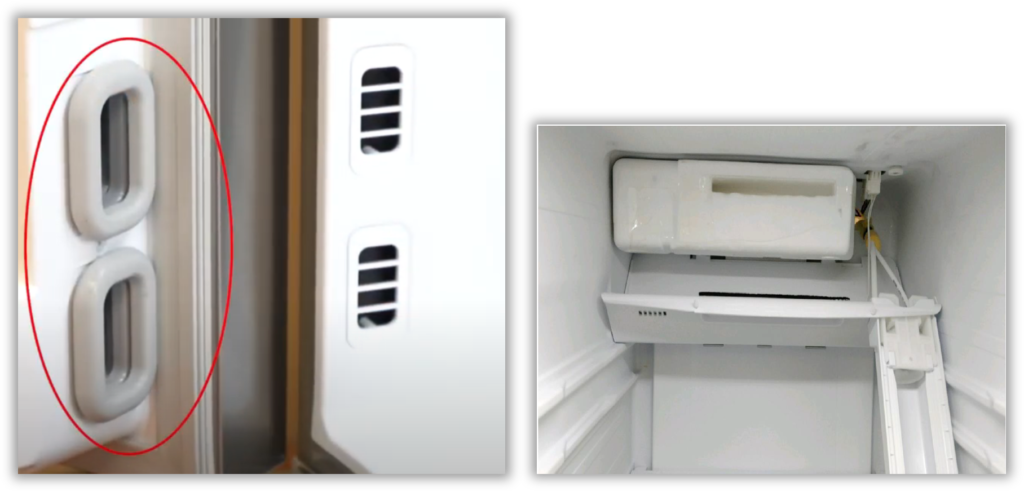
Check for frozen water filter/ lines / water tank
given the right conditions the water filter, or tank, and possibly water lines can become frozen.
Make sure the Beta gaskets are intact and installed correctly.
In some side by sides the damper can stick and freeze the water filter, keeping the water from dispensing.
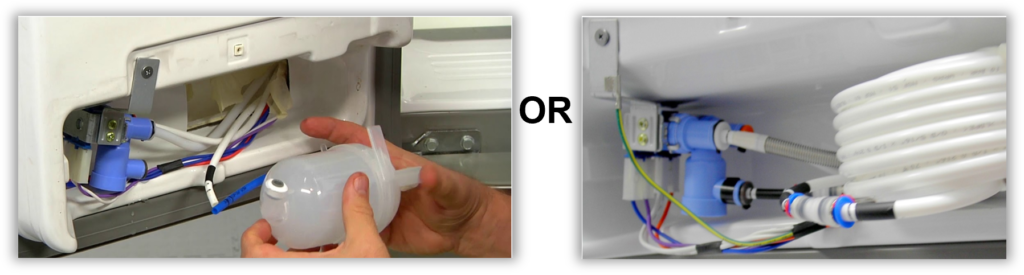
Check water solenoid valves
The pilot valve is located in the back of the unit in the machine compartment and is the valve that the customer’s water supply tubing is connected to. Check to see if the pilot valve is being energized. If it is being energized then disconnect the out going tubing from the pilot valve and insure water does flow out of the valve. If it does have water flow out of it then check to see if the water dispenser valve is also being energized. The water dispenser valve will be in the left door for French door models. Side by side models will have both the pilot and water valve in the machine compartment. If either water valve does not energize then you will need to verify if the valve is getting voltage from the electronic board.
Board locations
Most water valves will be getting voltage from the main board but some will get voltage from the dispenser power board on top of the left door
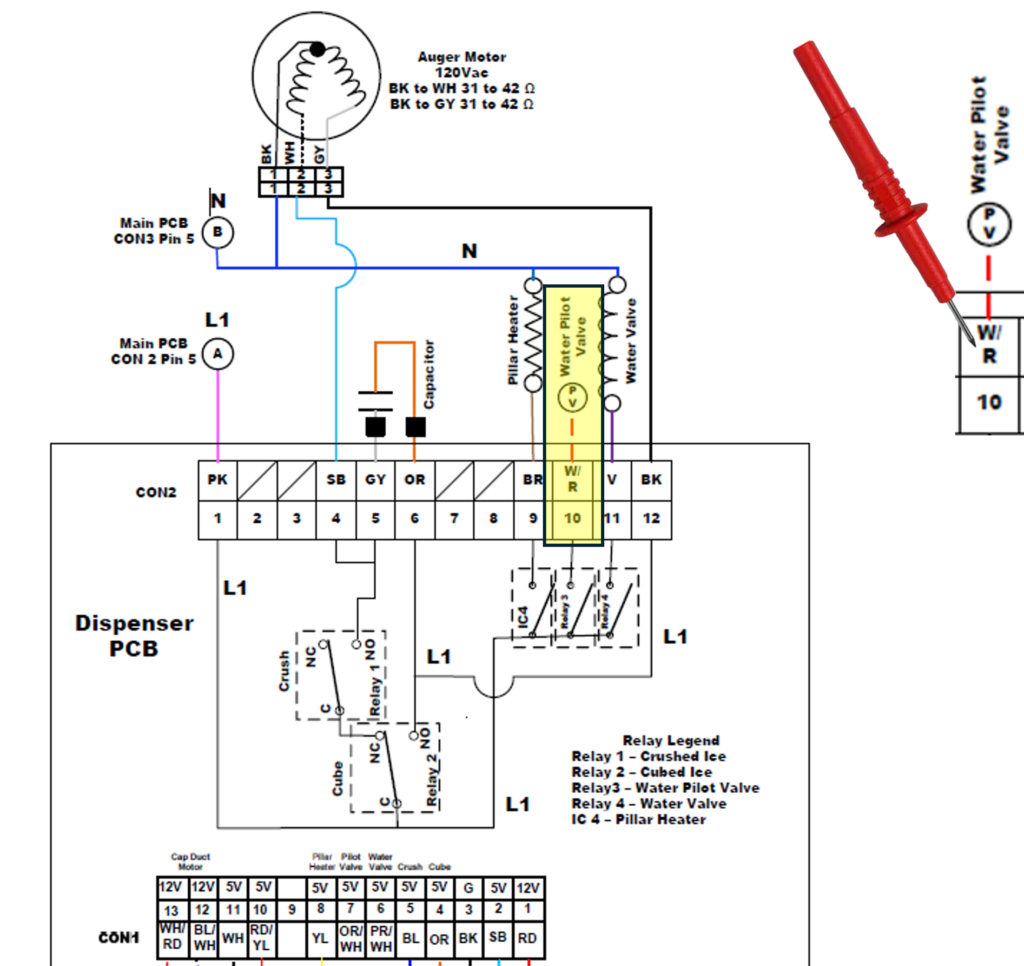
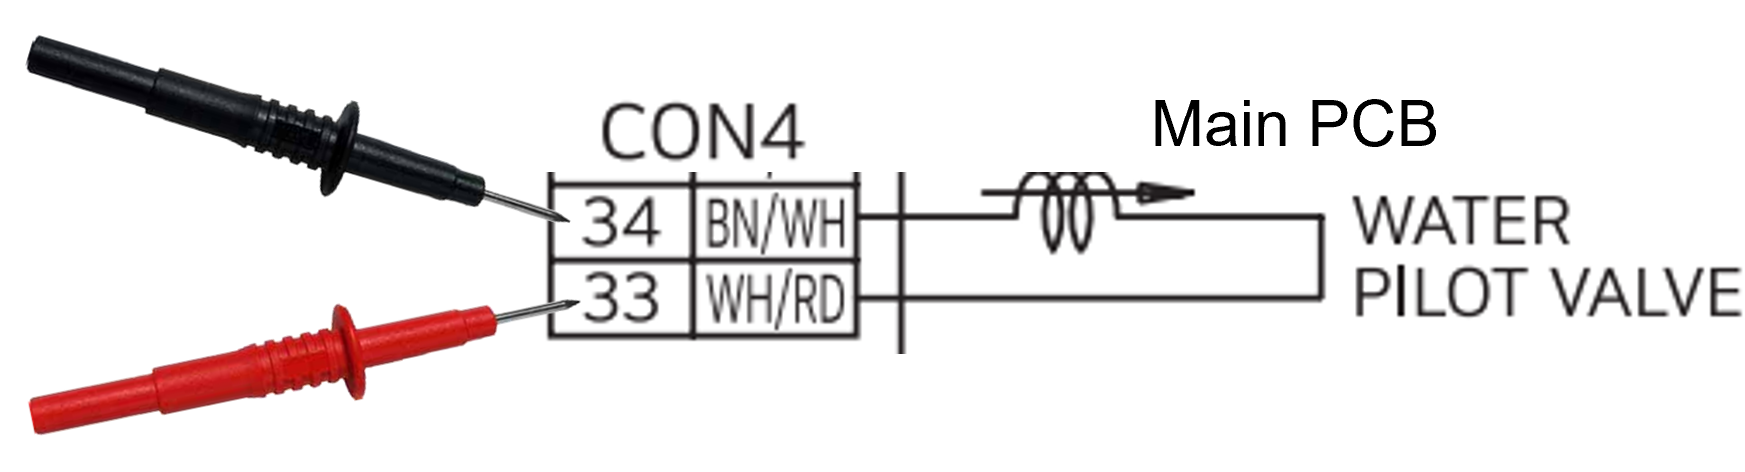
Pilot / Secondary Valves 120Vac
The Main PCB should be sending 120Vac to the Pilot valve when the water is called for.
The Dispenser PCB (located in the dispenser area on this model),should be sending 120Vac to the secondary valve, in door, when the water is called for.
Remember the valves won’t activate if the Main PCB thinks the door is open. You may have to put a magnet over the door switch if you have the cover off to test the PCB for voltage.
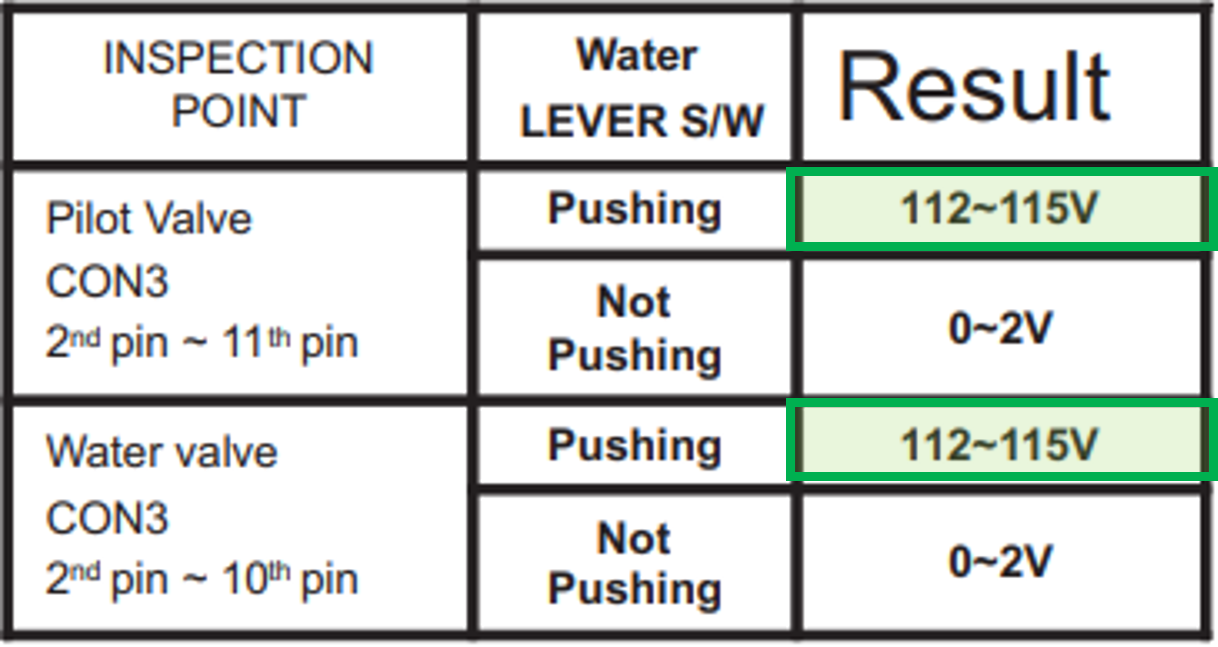
Troubleshoot the Water Valves
Example from LSXS26326 Water Not Dispensing Troubleshooting in Service Manual:
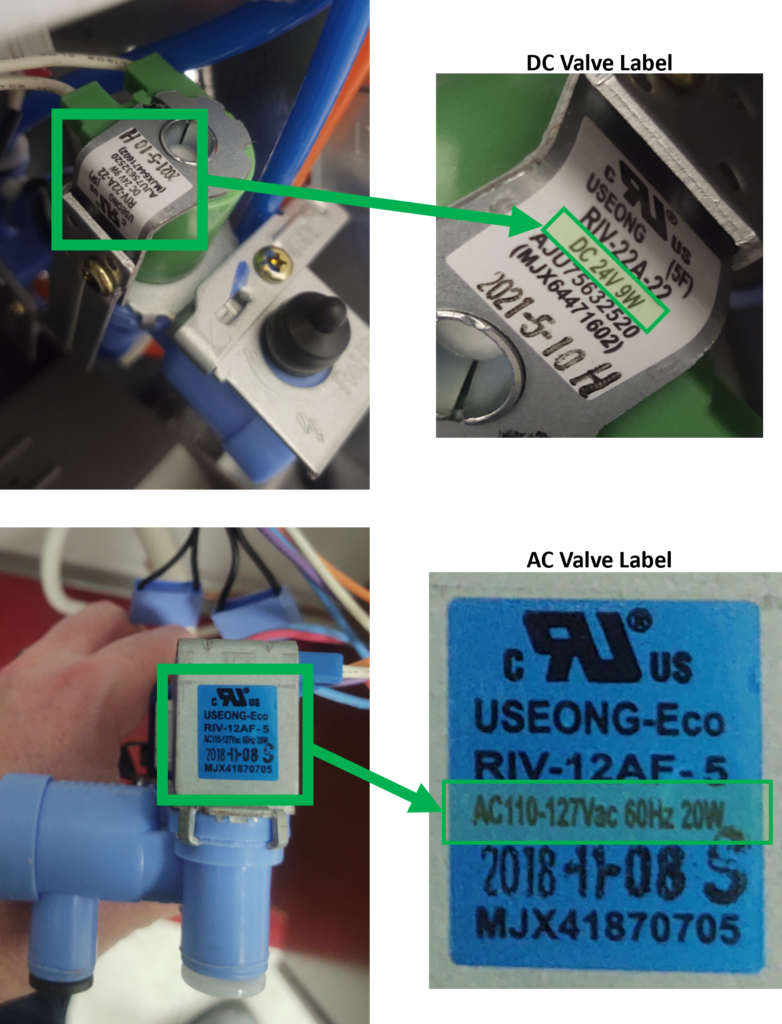
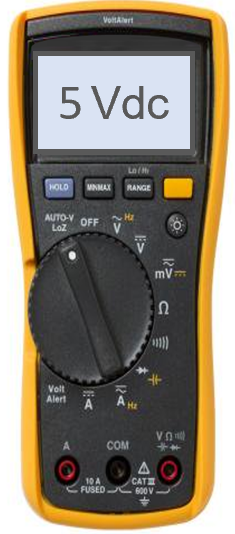
Pilot / Secondary Valves 24Vdc
Example from LRFXC2606
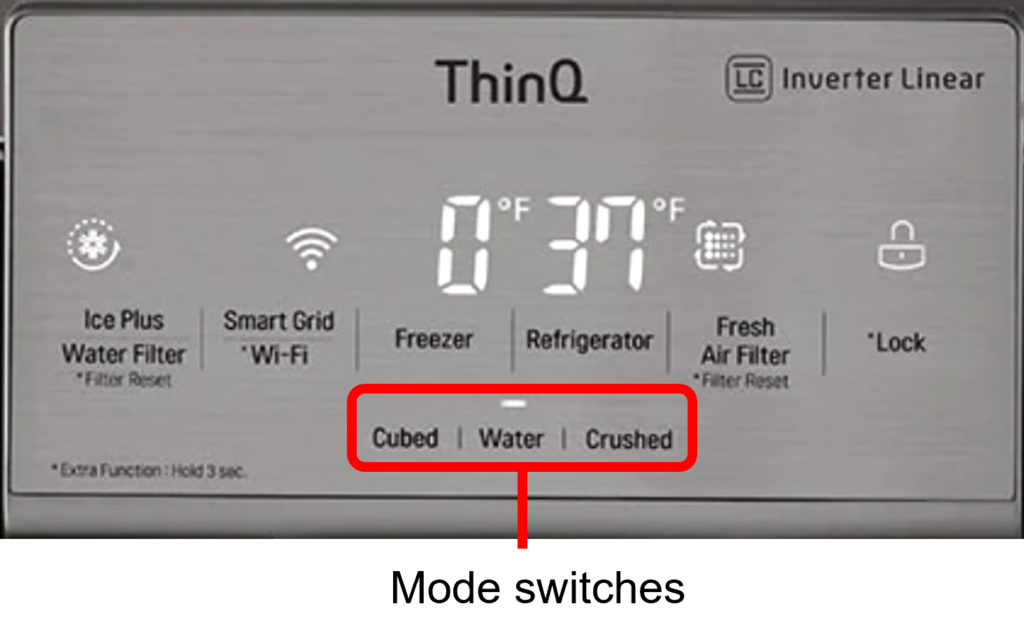
Check the water dispenser switches, paddles. If your unit has a single switch for Ice and water, and the unit will dispense ice, the switch is good, the display board that switches modes is bad. Check your unit’s schematic or parts breakdown to verify.
Example from LFXS26972
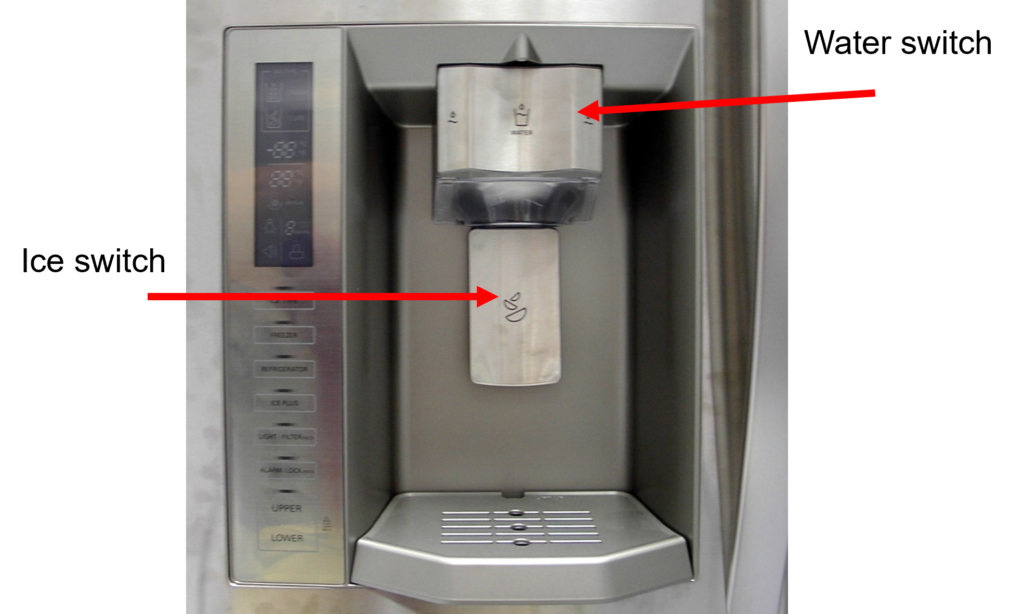
Two independent switches type
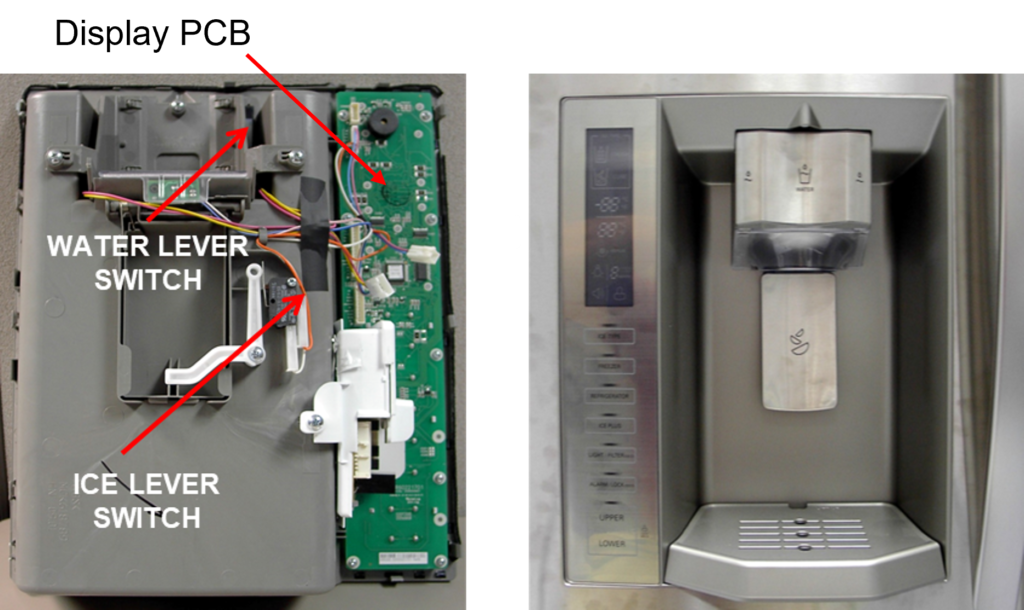
Water Switches
Check the water dispenser switches, paddles. If your unit has a separate switch for Ice and a separate switch for water, and the unit will dispense ice, but not water the switch could be the issue. Depending on your model of dispenser it may be easier to check the switch from the board that controls it. Check your unit’s schematic or parts breakdown to verify location.
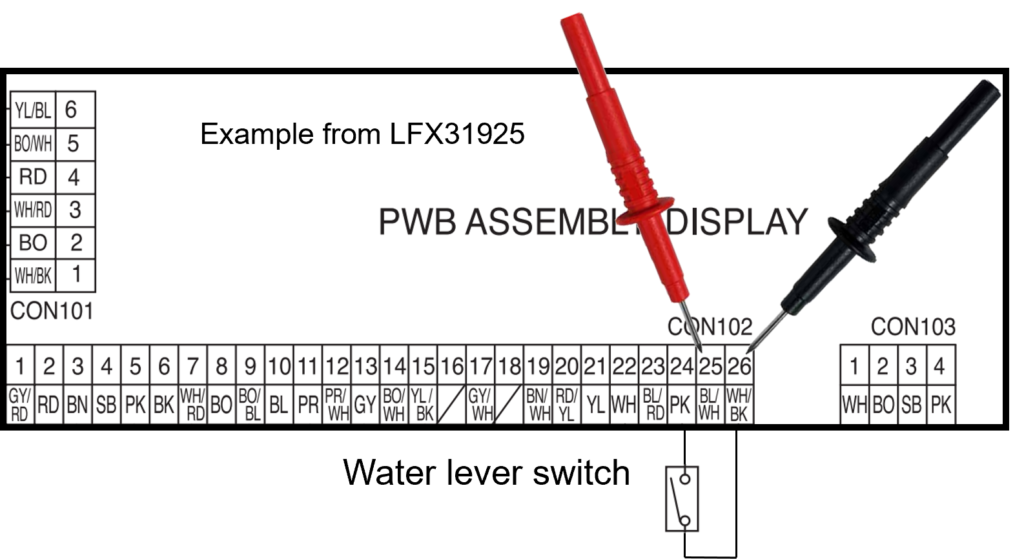
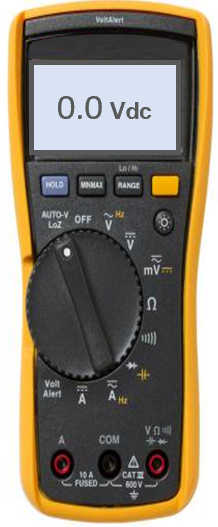
5 Vdc should be present from the PCB without pressing water lever. If not, the PCB is bad
Voltage should go away when switch is pressed, you have just verified both the PCB and the switch.
Kevin, if you will submit a ticket through https://csportal.lge.com/ go to “Tech Troubleshooting (New Ticket)”, fill out a ticket and request a call back.
Thanks

2 Responses
I need to talk to a tech
Kevin, if you will submit a ticket through https://csportal.lge.com/ go to “Tech Troubleshooting (New Ticket)”, fill out a ticket and request a call back.
Thanks