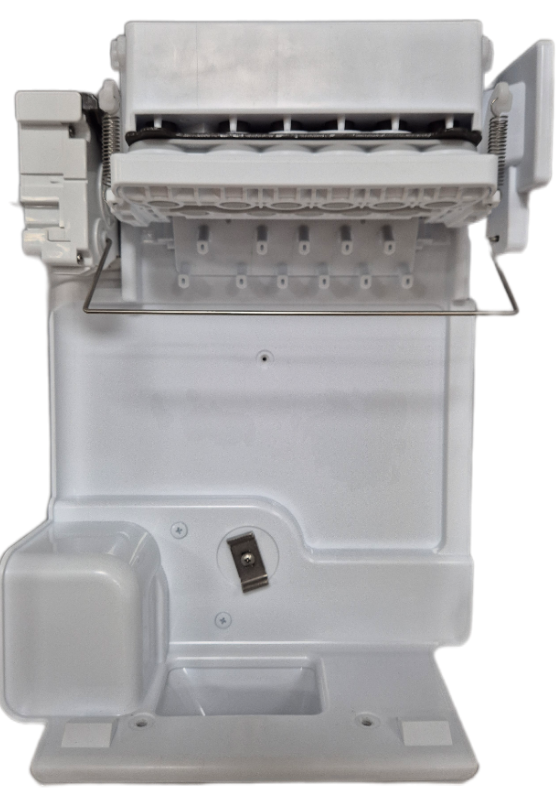
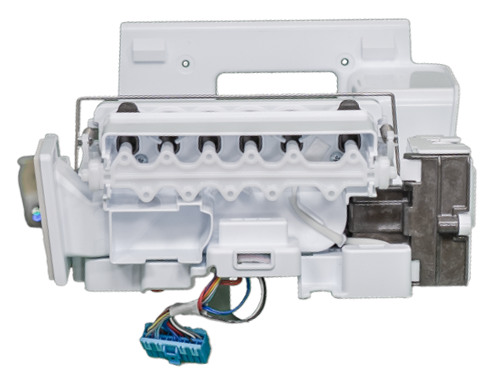
The Mini Craft Icemaker is an option in some models.
The icemaker produces up to 170-180 mini craft ice pieces in a 24-hour period, depending on freezer compartment temperature, room temperature, number of door openings and other operating conditions.
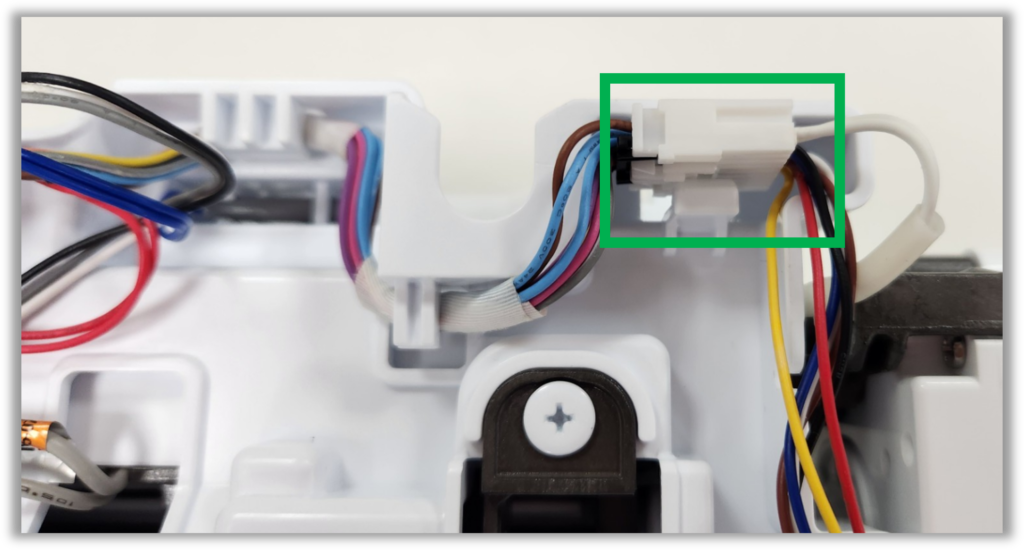
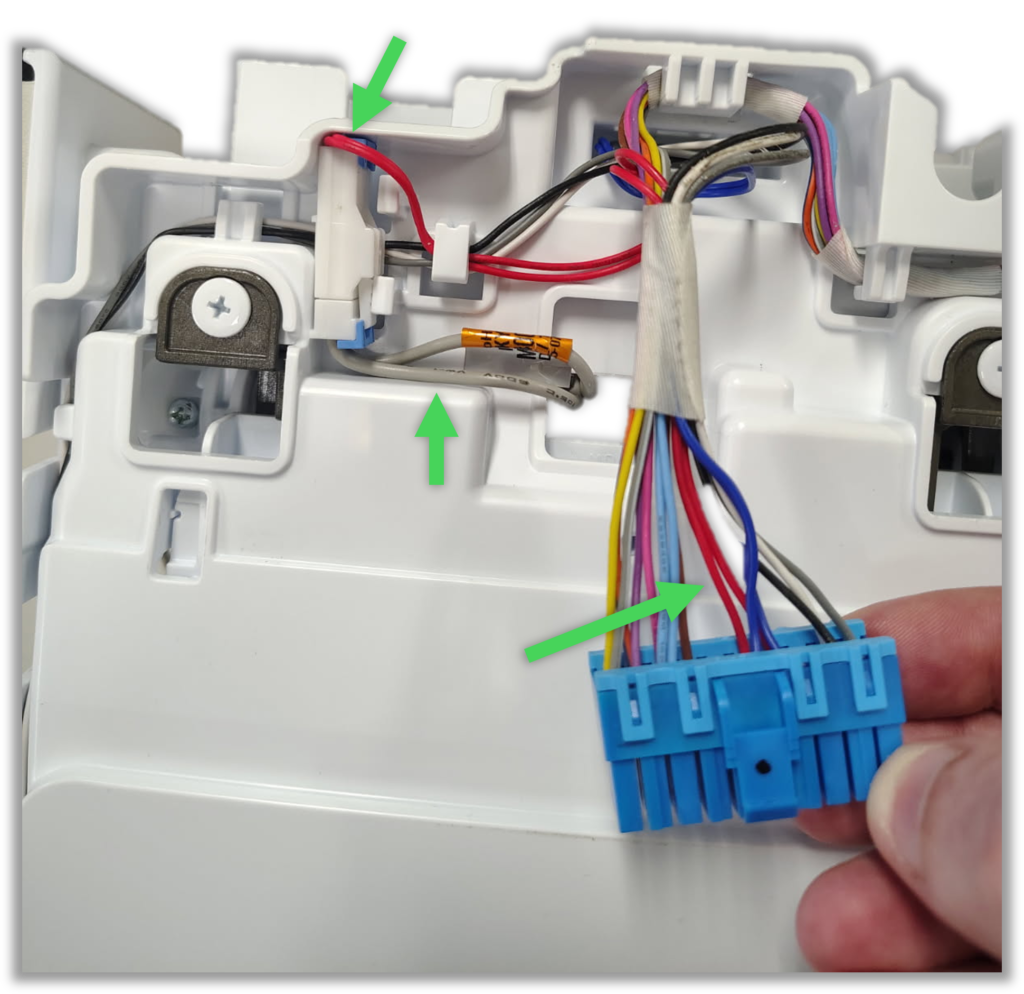
Check the wiring using this smaller connector. We have found that its wire colors and destinations are consistent, while the larger connector that plugs into the door does not remain consistent from model to model.
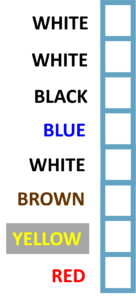
MINI CRAFT ICE MAKER PINS
(On Large Connector)
Ice Release Heater 13Ω Red to Red
Auger Motor 2.6Ω White, Black, Gray (Any Combination)
(See examples at the bottom of this article)
(On Small Connector)
Ice maker motor 18-20Ω Red to White
Test switch Black to Brown (Should read continuity only when pressing the test switch)
Black to Yellow is hall sensor 3.95 MΩ
Black to Blue is hall sensor 4.30 MΩ
White to White is icemaker thermistor use existing icemaker temperature chart:
TEMP ºF | ICE ROOM SENSOR Resistance kΩ | VOLTAGE DC |
-21 | 39.66 kΩ | 3.55V |
-14.8 | 31.37 kΩ | 3.30V |
-13.0 | 29.62 kΩ | 3.23V |
-11.2 | 27.97 kΩ | 3.17V |
-7.6 | 24.98 kΩ | 3.03V |
– 4.0 | 22.30 kΩ | 2.89V |
-0.4 | 20.00 kΩ | 2.76V |
3.2 | 17.94 kΩ | 2.63V |
5.0 | 16.90 kΩ | 2.56V |
6.8 | 16.11 kΩ | 2.49V |
10.4 | 14.49 kΩ | 2.36V |
14.0 | 13.00 kΩ | 2.23V |
17.6 | 11.76 kΩ | 2.10V |
21.2 | 10.62 kΩ | 1.98V |
23.0 | 10.10 kΩ | 1.92V |
24.8 | 9.60 kΩ | 1.86V |
28.4 | 8.69 kΩ | 1.75V |
32.0 | 7.80 kΩ | 1.63V |
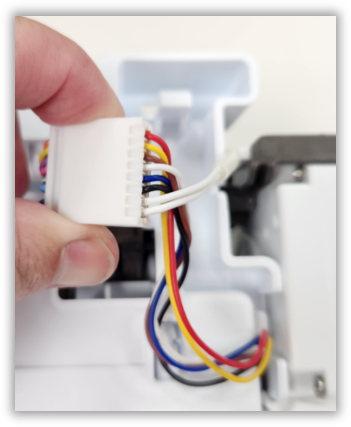
Picture below shows an example of the heater wiring. Heater wiring starts as two red wires at the main icemaker plug (Large Connector), and then routes to another connector where it changes to gray wires before entering the heater itself. If you check resistance across the red wires, you should read around 13Ω.
The Gray, White, Black wires on the right side of the connector are for the ice bucket Auger Motor. Any combination should read 2.6Ω.