*Note: Some Craft Icemakers require a Software Update be performed to the Main PCB. Be sure to check the Service Bulletins for your specific model to see if a Software Update is necessary.
Step 1: Unplug the refrigerator from the wall or turn off the circuit breaker to the refrigerator. Make sure power is disconnected from the refrigerator before continuing.
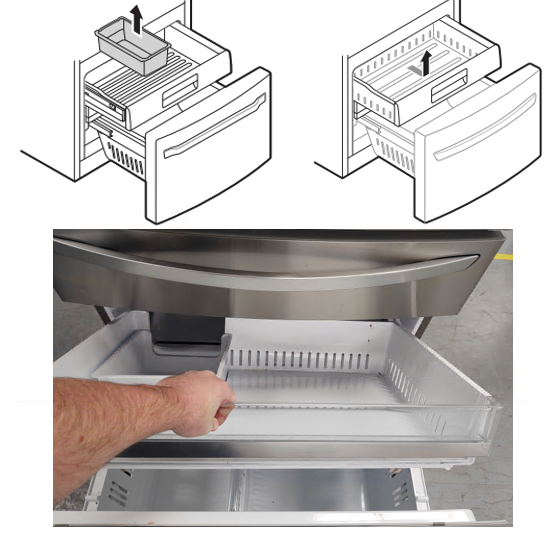
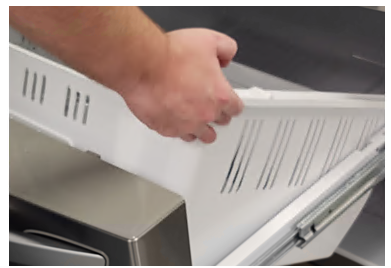
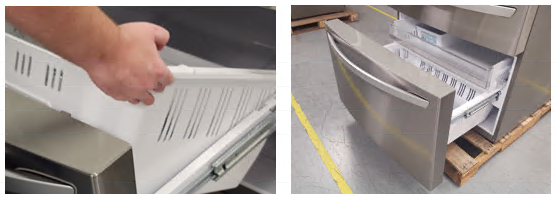
Step 2: Open the freezer door and remove the ice bin and the upper drawer from the unit. Pull toward you and up to remove the drawer:
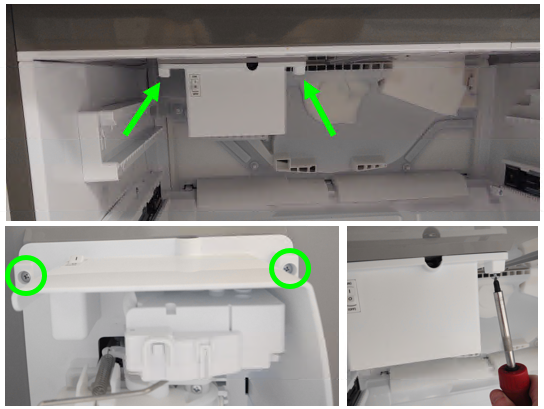
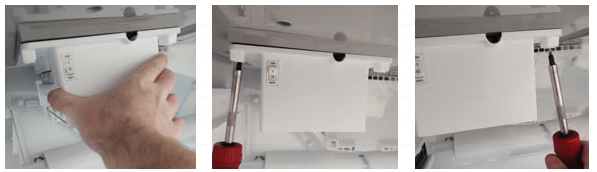
Step 3: Locate the Craft Icemaker which is mounted to the ceiling of the freezer section on the left side. It is held in place with 2 phillips head screws which will need to be removed first:
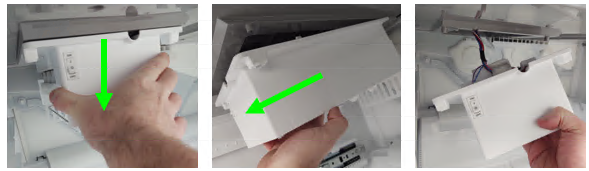
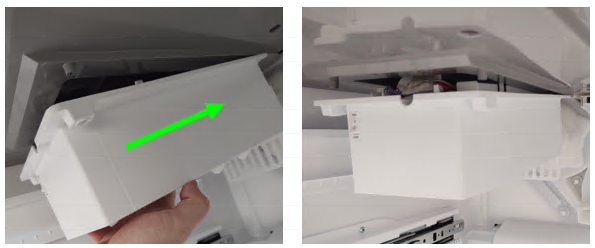
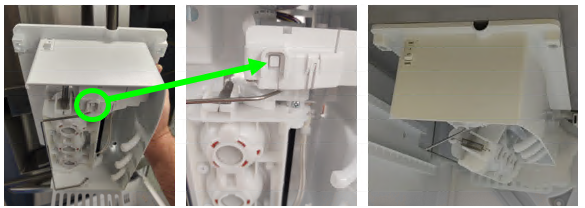
Step 4: After removing both screws pull the icemaker straight down from the front and once the front is loose pull the icemaker forward to uninstall from the rear mounts:
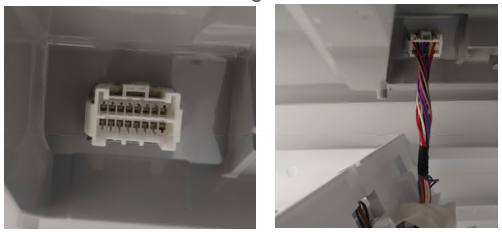
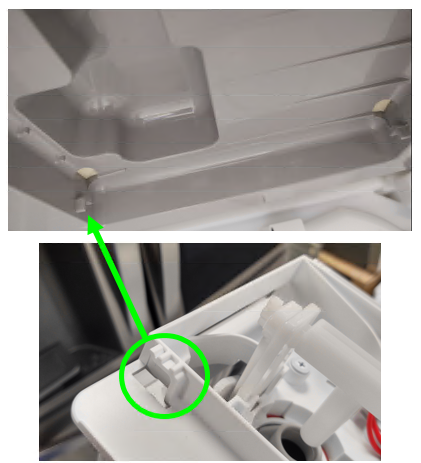
Step 5: There is only 1 wiring harness that will need to be disconnected. The release tab is located on top of the connector. Press down on the release tab and the harness can be disconnected:
Craft Icemaker Installation:
Step 1: Start by plugging the new Craft Icemaker into the receptacle where you just unplugged the old icemaker. Be careful to line the connector up properly with the release tab on top. (If you have difficulty the freezer door may need to be removed and steps for that will be added to the end of this presentation):
Step 2: Install the back of the Craft Icemaker onto the hangers. There is one on both sides of the icemaker at the back. To do this the icemaker will need to be held at an angle as shown below:
Step 3: Push the front of the icemaker up flush with the freezer liner and reinstall the 2 screws that were removed earlier:
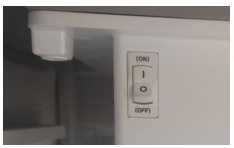
Step 4: Plug the refrigerator back in or turn on breaker, Make sure the icemaker power switch is in the “ON” position:
Step 5: Run Test Mode on the icemaker to force the icemaker into a harvest mode. The test button is located on the bottom of the icemaker as shown below. Press and hold for 3-5sec or until icemaker begins to move. During test the icemaker will open and close (sometimes multiple times) and fill with water if working correctly:
Step 6: Reinstall upper freezer drawer and ice bin.
Craft Icemaker Replacement is complete.
How to Remove and Install Freezer Door
If you find any of the above steps to be difficult then you may need more room to work. Removing the freezer door is an easy way to make more room for yourself. Please follow the steps below….
Step 1: Remove the freezer door bin by pulling it up and out:
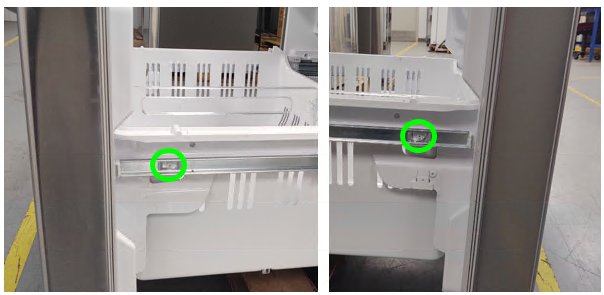
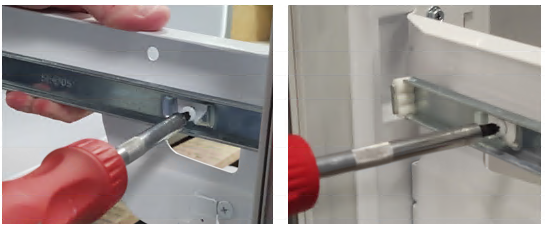
Step 2: Remove the 2 phillips screws from the door railing. There will be one located on each side of the railing close to the door:
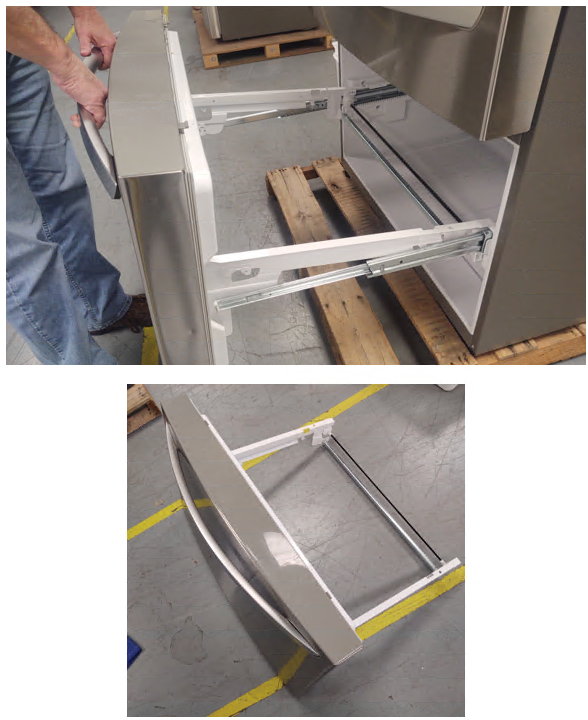
Step 3: After removing the 2 screws pull straight up on the handle to remove the door and white railing. The metal, non painted railing, that is attached to the freezer liner will stay in place:
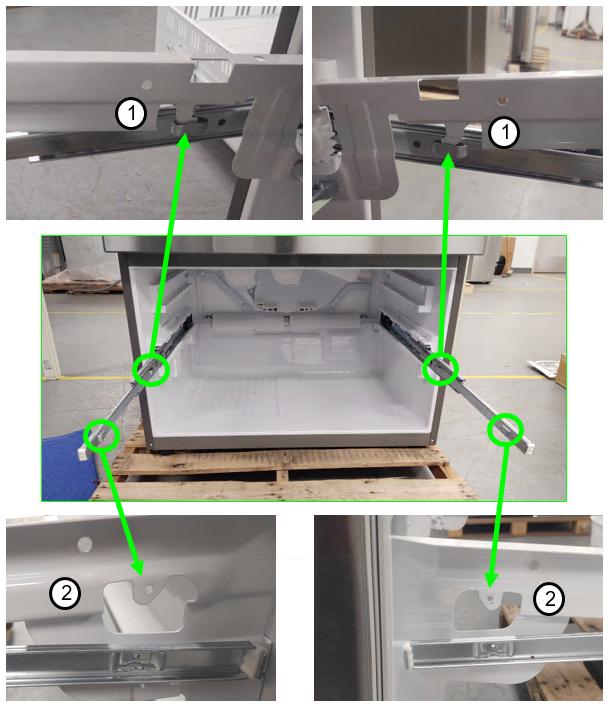
Step 4: To reinstall the freezer door…
Extend the cabinet railing fully out.
Hold the door at a slight angle and install the rear hooks. (1)
Install the front tabs into the railing. (2)
Step 5: Now that the door and railing have been connected back together you can reinstall the 2 screws that were removed earlier, one screw on each side:
Step 6: Reinstall the freezer door bin and make sure the door opens and closes correctly. You have successfully removed and reinstalled your freezer door: