Tools Needed: #2 Phillips Screwdriver.
Step 1: Unplug the refrigerator from the wall or turn off the circuit breaker to the refrigerator. Make sure power is disconnected from the refrigerator before continuing.
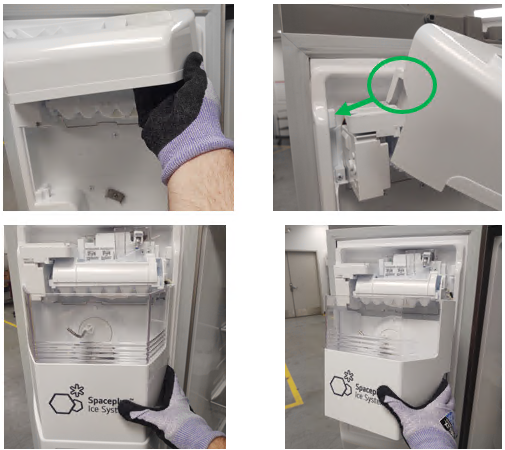
Step 2: Remove the upper icemaker cover and the ice bin. To remove the upper cover push straight up on both sides and it will pop out of place. To remove the ice bin pull the bottom toward you and it will pop out of place:
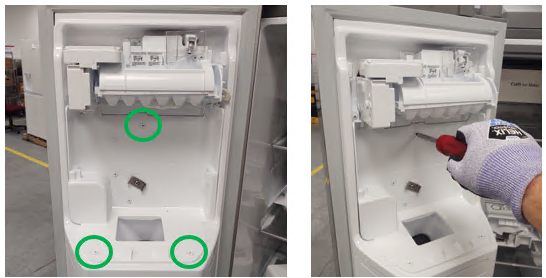
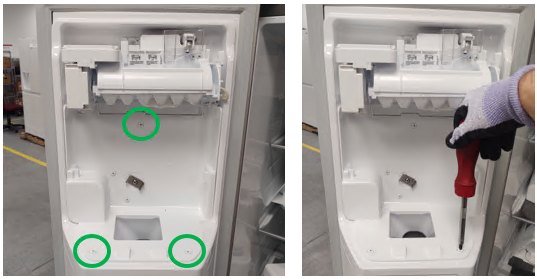
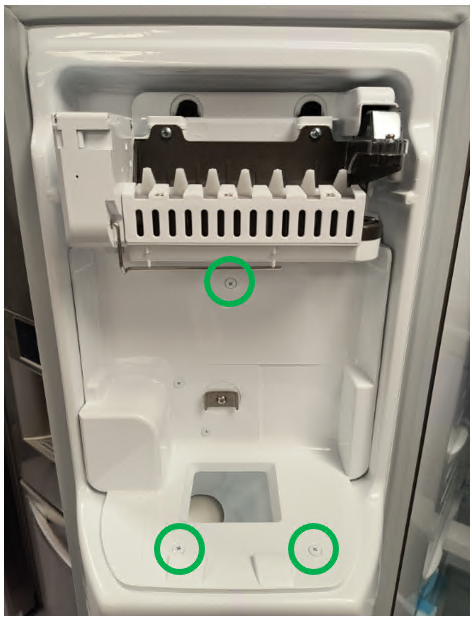
Step 3: Remove the 3 Phillips screws as indicated below:
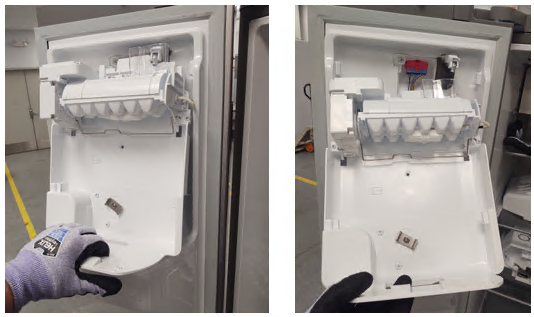
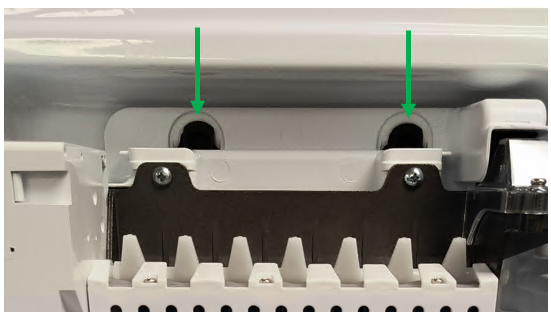
Step 4: Pull the bottom of the icemaker assembly toward you and the whole assembly will move forward and drop down exposing the wiring harness at the top:
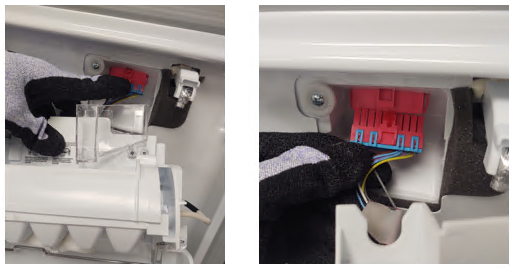
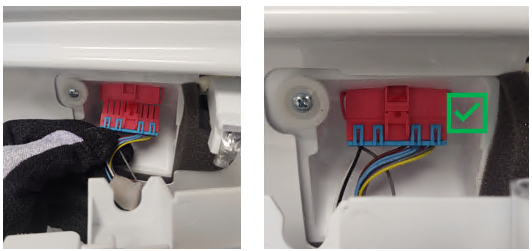
Step 5: Press down on the release tab located on top of the wiring connector and unplug the connector from the door:
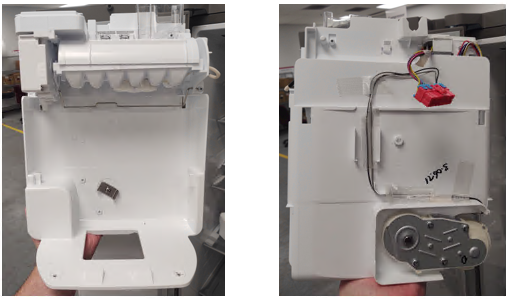
You have now successfully removed the old icemaker assembly from the unit…
Icemaker Assembly Installation:
Step 1: Plug in the wiring harness making sure the locking tap is facing up, when the harness is fully seated you will hear an audible click:
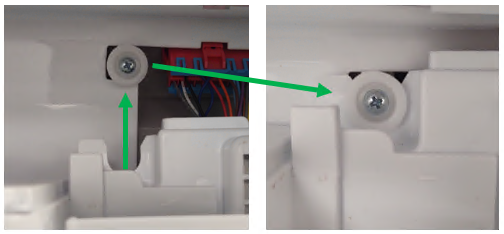
Step 2: Push the icemaker assembly back into place. Notice that there is an alignment tab at the top. The U-Shaped cutout in the top of the icemaker will slide behind the tab. To install, push the icemaker up and back into place:
Step 3: Now that the icemaker is seated back into the door, line up the screw holes and insert the 3 screws that secure the icemaker assembly to the door:
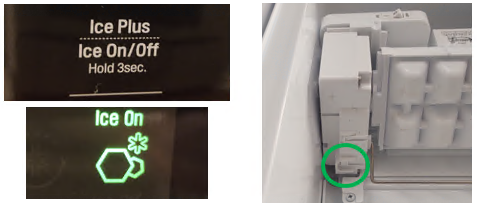
Step 4: You have now successfully installed the Icemaker Assembly. After plugging the unit in you can turn the icemaker to the “ON” position and run test mode to make sure the icemaker cycles and moves. **Note: Most newer model Side-by-Side refrigerators have an on/off selection on the control panel. Older models will have a physical switch on the icemaker. The Test Button location is shown below (Location can vary by model). To activate test mode, hold the button 3-5 seconds or until the icemaker starts to rotate. During the test, the icemaker should cycle and fill with water:
Note: Some Side-By-Side Refrigerators may have a Heat Release style icemaker instead of a twist tray icemaker. But the good news is the process to replace the icemaker assembly is still very similar. Remove the 3 screws from the icemaker assembly and unplug the 1 wiring harness from the top that plugs into the door. The only difference is the heat release may have 2 hangers at the top. Here is an example:
Note: Some icemaker assemblies may have 2 hangers at the top. To remove the assembly first take out the 3 screws shown on the previous slide, then pull the bottom of the icemaker assembly out first, then lift the assembly over the hangers. Install in reverse order: