

If the unit has a dispenser, you can press the paddle and verify you have proper water flow through the unit.
Then you need to check for water supplied to the icemaker. Most icemakers you can simply look into the ice tray and visually inspect for water or cubes.
If there is no water making it to the icemaker there could be issues with water valve(s), frozen fill tube, kinked water line, bad wiring connection, etc.
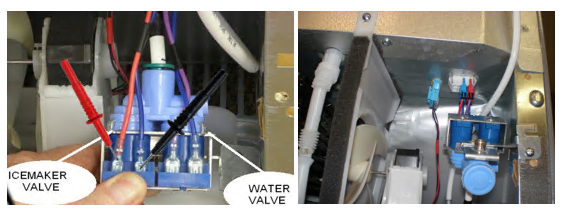
Water Valves… On almost all models there will be a Pilot Valve on the back of the refrigerator in the machine room. Then there will also be a secondary water valve, the location of the secondary valve can change by model and layout. The secondary valve will typically be found in the left refrigerator door on French Door models. On SxS refrigerators the secondary valve is typically found in the machine room with the pilot valve or in the water tank area in the refrigerator section. Both the Pilot and Secondary valves must energize together for the icemaker to fill.
A quick way to see if the valve circuits are working is to run test mode on the icemaker. At the end of the test mode the valves should energize, and the icemaker should fill with water. If you listen closely, you can hear the valves humming if the circuit is being energized.
Looking at your wiring diagram, the Pilot Valve is almost always found on the Main PCB. The Secondary Valve can also be on the Main PCB but are often located on the Sub PCB as well. Make sure you look at the wiring diagram on the unit itself or download a service manual specific to your model and product code.
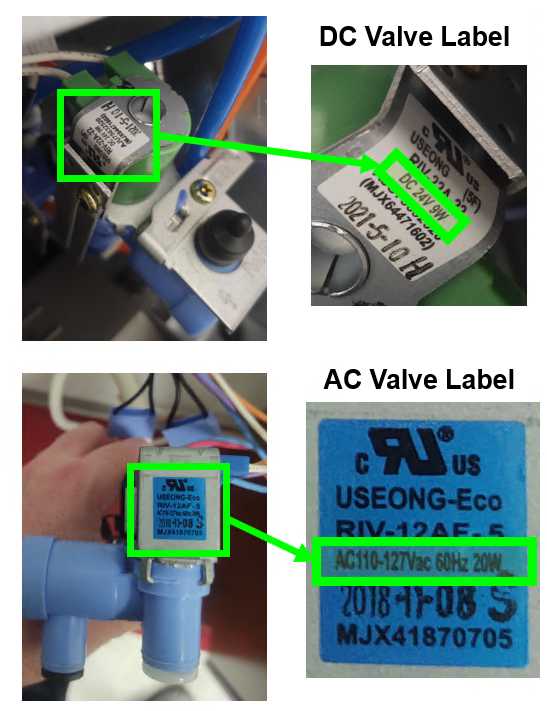
Water Valves used to all be 120Vac but around 2018 LG started using 24Vdc valves. If you are ever in question about what type valve your unit has, there are labels on the valves that show the voltage rating. You can look in the service manual in the troubleshooting portion for water dispenser issues and the voltage will typically be shown there.
Examples Below:
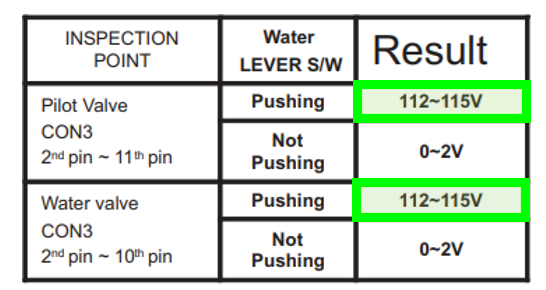
Example from LSXS26326 Water Not Dispensing Troubleshooting in Service Manual:
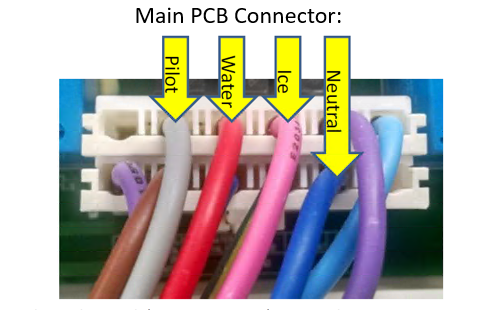
Wiring for different models will be different colors and on different connectors. But if you will look at the diagram on the unit or in the service manual you will clearly find the Pilot Valve and Secondary Valves. Also, the board that energizes the valves can vary. Make sure and download a wiring diagram for your specific model and product code. Or use the diagram on the unit itself.
Cycle the ice maker and either start at the water valves or main PCB and verify voltage is getting to the valves, if it is, replace the water valve, if no voltage replace the Main PCB.
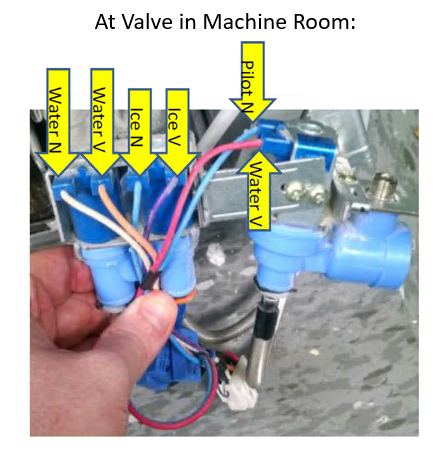
Example Below from LSXS Side-by-Side Refrigerator:
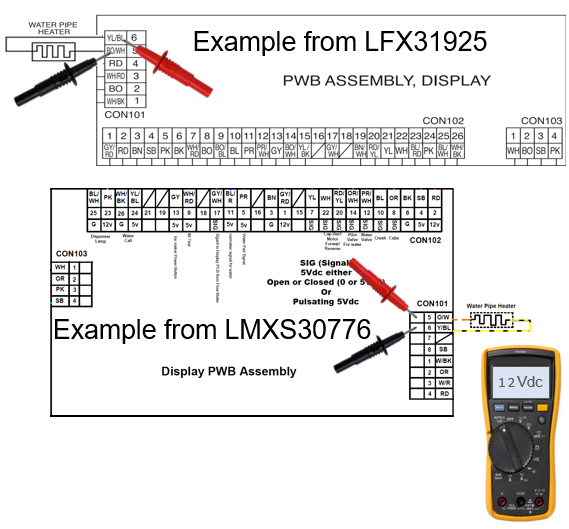
Example from LFX31925
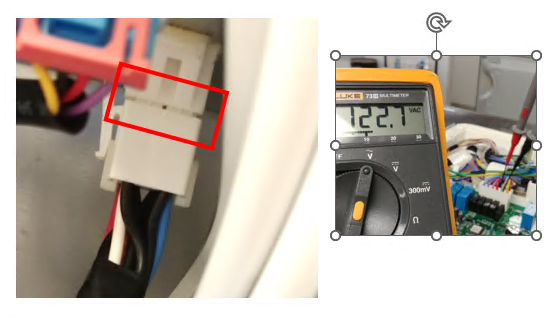
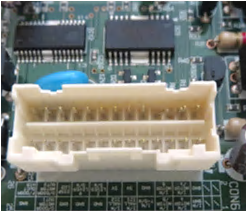
If you have found no voltage to the water fill valves for Ice maker, but the PCB is outputting the voltage, you might think that there is a broken wire in the cabinet. This is very rare, so let’s slow down and consider other scenarios. Everywhere the wire harness connects is a potential failure point.
However, on further inspection the connector for the water valve, at the cabinet, looks abnormal, its not seated properly. You have 120 Vac at PCB.
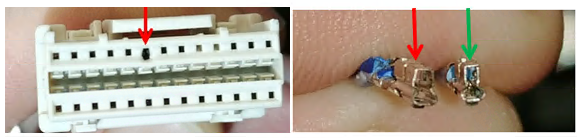
It may be necessary to use an inspection mirror or your phone to see at the angles some of these connectors are located.
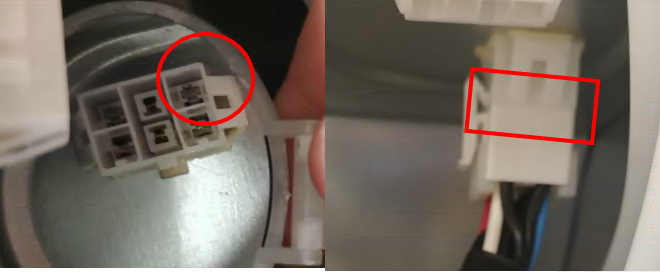
After the pin was bent back into original position, and the connector inserted properly, the valves started working as designed.
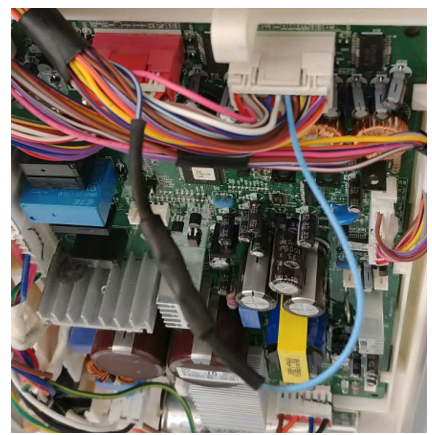
Another Example: This unit was turning awkwardly, and sometimes the complaint will be the icemaker rotates all the time, this will most always be a wiring or connector issue.
The harness connector looks good.
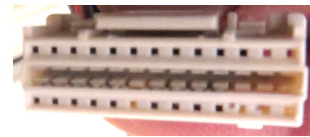
If the pins on the PCB are bent and can’t be straightened, replace the PCB.
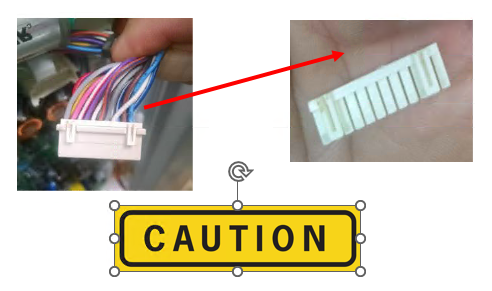
Another connector issue to be aware of is if someone has tried to troubleshoot the unit and put a meter probe in the wrong end of the connector and damaged the wire. (This is wrong! Go from the other end with needle leads). Now the pin on the PCB either won’t connect or be intermittent.
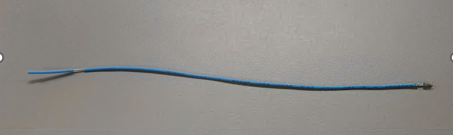
This is repairable. You will need a fresh undamaged wire and splice it into the harness as shown.
The best method to splice these wires is to solder them together and use heat shrink.
Using a butt splice is acceptable also.
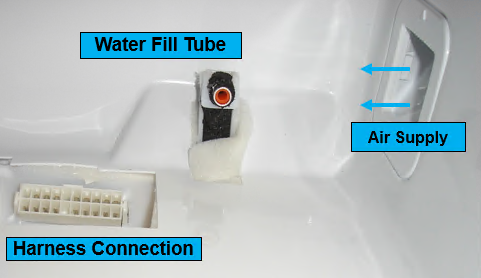
Frozen Fill Tube
Check the fill tube for the icemaker, (in door or freezer). If the water can’t flow and fill the mold, it can’t produce ice.
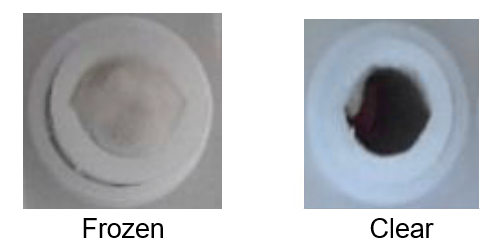
You may have a “gF” error code. This is a water flow meter error code and is reporting the valve opened but no water flowed out. If the freezer icemaker fill tube is frozen, you may have a leakage complaint and see water on the floor in the back of the unit.
After confirming the fill tube is frozen,
The first thing to check is the Pipe Heater. (in Freezer)
The heater should receive 12Vdc constantly to keep it from freezing. If your ice maker is in the freezer this voltage will come almost exclusively from the main PCB. If the issue is with the in-door fill tube it may come from various sub-PCB locations, such as, the top of the left-hand door, dispenser board, display board.
Test points for 12Vdc on some freezer icemaker units.
Some Main PCB locations.
The first thing to check is the Pipe Heater. (in Door)
The Pipe Heater should receive 12Vdc constantly to keep it from freezing. If your ice maker is in the Door, with the in-door fill tube it’s voltage may come from various sub-PCB locations, such as, the top of the left-hand door, dispenser board, display board
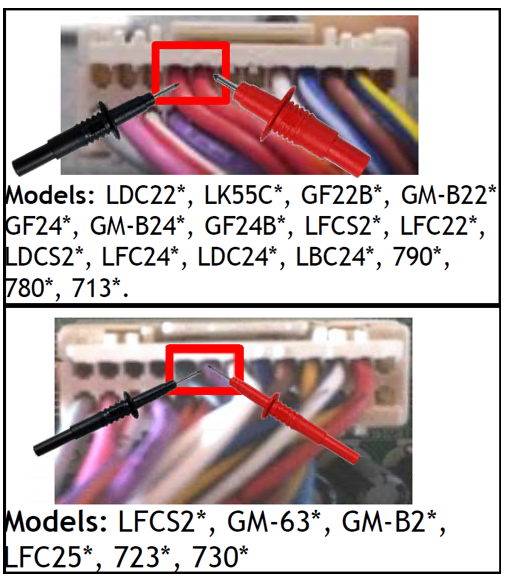
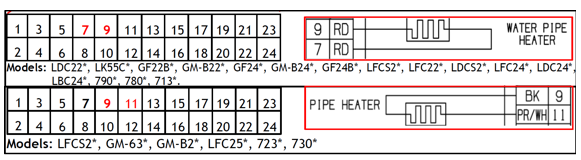
Next unplug the connector from the PCB and check for an OHM value of the pipe heater circuit, the fill tube heater should read 120-180 Ω ± 7%.
Note; You must be using needle leads for these measurements, standard leads will not make good connections inside the connector. You can also remove the connector shields if needed.
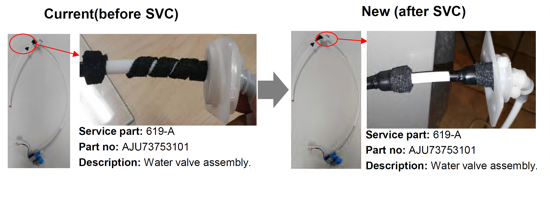
Even if you have tested the Pipe Heater circuit and you’ve determined it has an open circuit, you will be advised to follow the following steps before an RA can be considered. Many have been brought back to LG that were considered open that weren’t.
Remove all the ice in the fill tube and replace the valve assembly it will have an updated insulation wrap.
Frozen Fill tube
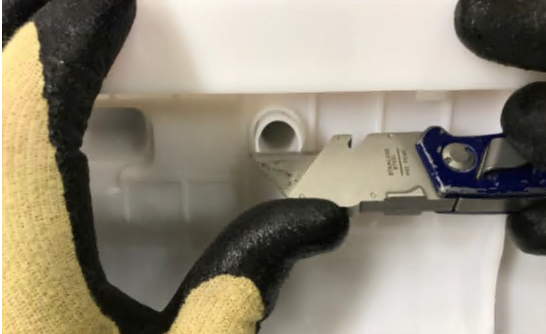
Next make an angle cut in the fill tube housing (Guide Tube) above the icemaker, its recommended to use a razor knife with an overall length of under 6 inches. Make a 35 to 45 degree angle cut.
Be very careful of the sharp knife you use; you should wear cut resistant gloves for this process.
Frozen Fill tube
If you have now determined 12Vdc is getting to the Pipe Heater, and have replaced the water valve assembly, and made a cut into the guide tube, but you are still experiencing a frozen fill tube, you have one more option that generally repairs this issue if the other procedures didn’t.
There is a kit that can be mailed to you. There is no part number for this kit. You will need to contact TCC to have it sent from our office to you.
From the pipe flange to the end of the blue elbow should be approximately 16 1/4 inches. Extra clear tubing has been given to make adjustments as necessary. Now using the provided extension tube with elbow, slide the clear tubing over the white fill tube approximately 1/2 inch, lubricating the white tubing with water can make this easier. After installing, make sure the elbow is pointing straight down into icemaker.