
1) Temperature in the Ice room.
The first thing you should always verify if a unit is not producing any ice is the temperature at the icemaker.
While water freezes at 32°F the LG Icemakers require a much colder temperature to operate and harvest. For an LG Icemaker to harvest the temperature will need to be below 15°F.
If the freezer icemaker is having issues then the first check to make would be verifying the temperature in the freezer section. If the icemaker is in the left refrigerator door, then you would want to verify the temperature in your ice room area. The best method to read the temperature is with a thermocouple.
If the temperatures are warmer in these areas when tested, then you would want to check for cooling or airflow issues instead of an icemaker failure.
If the temperatures are reading correctly (below 15°F) and there are cubes in the tray, but the icemaker just will not cycle on its own, then you would want to check your ice maker sensors to make sure they are reading correctly.
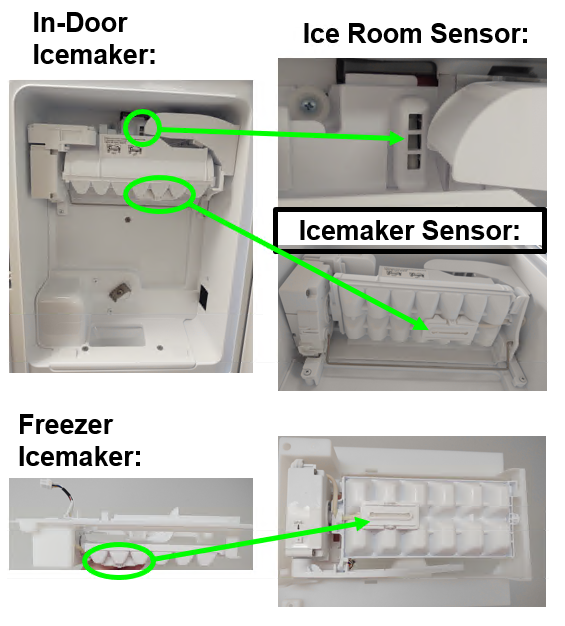
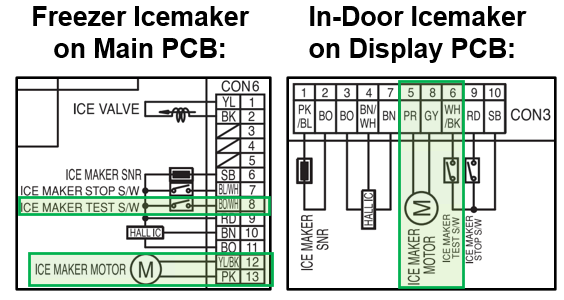
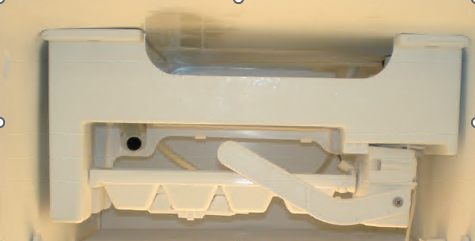
These Icemaker sensors can be labeled differently from model to model, but the key will be the word “Ice” when looking for the sensors on the wiring diagram. The sensors can be located on the Main, Display, or Sub PCB depending on model. Examples below from model LRFVS3006.
Below are some examples of the locations of the sensors…
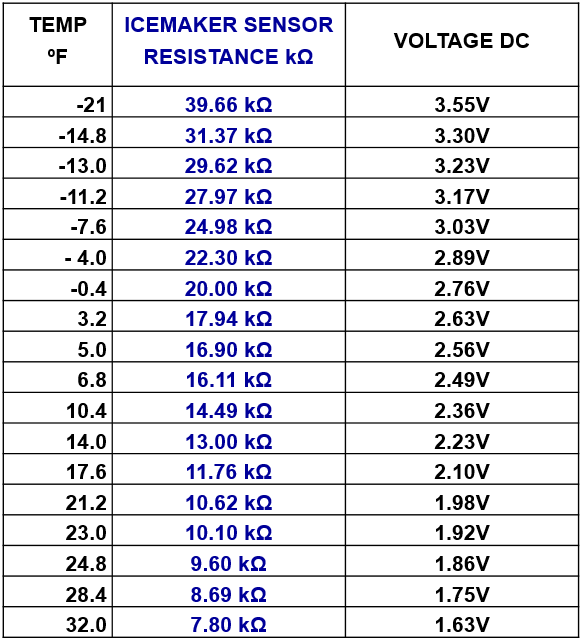
The good news is that the icemaker sensors ohm out the same for all models regardless of what board they are connected to. The below chart can be used to determine if your sensor is reading correctly…
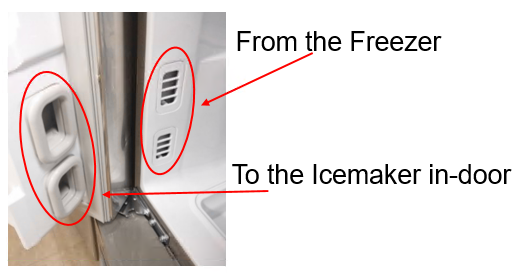
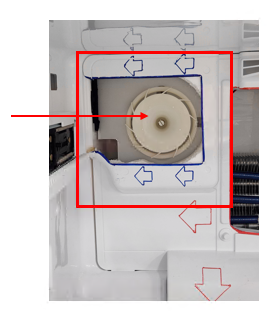
If the freezer temperature is correct and you have an in-door icemaker, and the temperature is warmer than It should be, verify that your ice fan is turning and if so, the return duct could be blocked.
One of the vents in the cabinet is the input of Freezer air, to the door icemaker, the other is the return, back to the Freezer. The input / return can be on top or bottom, there’s no consistent way to know which is which on an individual model. But there should be air coming from one of the vents when the icemaker fan is operating.
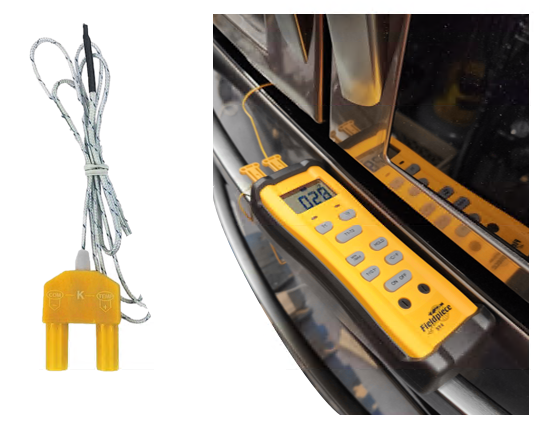
The way to check is measure the temperature in the Freezer, then place a temp probe in the in-door icemaker.
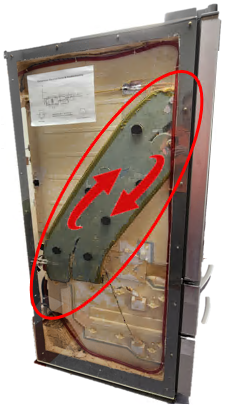
Cut away view of the left side of a French door model. Notice the gray area that goes from the Freezer to the doughnut (Beta) gaskets. The air must flow in then out circulating to keep the ice room at proper temperature.
If there is a blockage in the return duct, it will probably be here at the Ice fan (behind the evaporator cover).
2) Is the Icemaker Functional?
Once you have verified temperature is correct, the next thing to check would be to see if the icemaker is turned on. This seems very simple but is sometimes overlooked by customers.
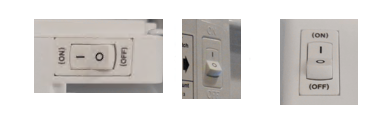
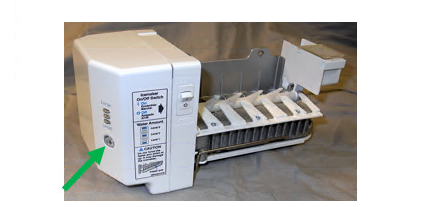
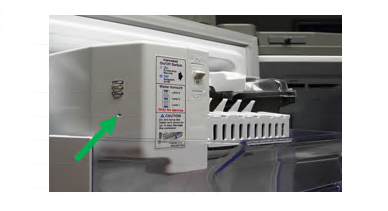
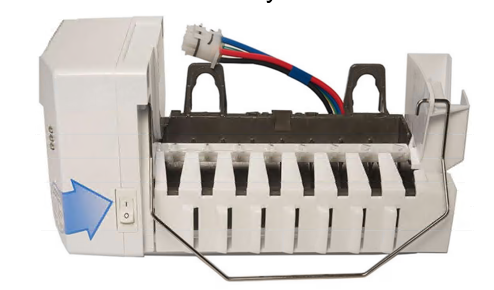
If the icemaker has a physical on/off switch located on the icemaker, make sure it is turned to the ON position:
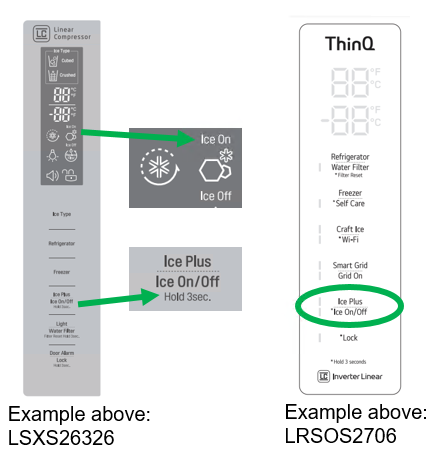
Some Icemakers do not have a physical on/off switch. Instead, the on/off function will be found on the Display.
Examples Below:
Make sure the Icemaker is Powered ON then continue to next step… Test Mode.
Every Icemaker has a test button that makes checking functionality easy. Simply hold the test button for 3-5 seconds or until the icemaker starts to move. The icemaker should then go through a full harvest cycle. Note: If there is water or ice in the tray you will need something catch the water / ice during the test cycle.
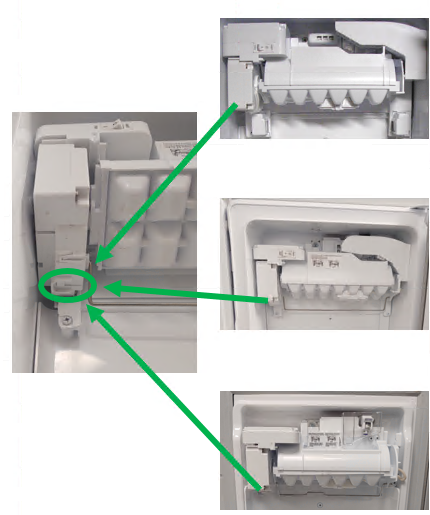
The test button can be in different places on different icemakers. If you have trouble locating the test button, please check the service manual for your specific Model / Product Code. Below are some examples of the common test button locations:
For Test Mode press and the cube size selector button for 3-5 seconds or until the icemaker starts to move.
For Test Mode press and the cube size selector button for 3-5 seconds or until the icemaker starts to move:
For Icemakers with small holes instead of large buttons like the below example, use a toothpick, paperclip, or similar object to press the cube size selector button for 3-5 seconds or until the icemaker starts to move:
Newer Twist Tray Icemakers have the motor and test button located on the left side of the icemaker. Press and hold 3-5 seconds or until icemaker starts to move for test mode:
If the icemaker will not cycle in test mode, try resetting the whole unit by disconnecting power. If the icemaker still will not cycle in test mode after reset, you will need to check for harness connection issues. In-Door Icemakers will have 3 connection points (Main / Display / or Sub PCB, Left Door Hinge, Icemaker). Freezer Icemakers will have 2 connection points (Main PCB and Icemaker). Reseat all connectors in the icemaker circuit and try test mode again.
If the Icemaker still does not cycle in test mode after resetting all connectors, you will need to see if there is any voltage being output by the PCB that powers the icemaker. For this you will need to refer to the service manual for your specific model and product code as the icemaker could be powered from the Main PCB, Sub PCB, or the Display PCB.
Examples from LRMVS3006 dual icemaker model:
Check the test switch circuit and for voltage to your icemaker motor. 3-5 seconds after holding the test switch you should see 12Vdc being supplied from your board to run the icemaker motor. This is the most common setup LG has used for 2010 and up models. You will need to check your specific service manual for your model and product code to know exactly what voltage you should be seeing during this test.
Test Switch Voltage Check:
Pressing Button= 0Vdc
Not Pressing Button= 5Vdc
Test Switch Continuity Check:
Pressing Button= Continuity
Not Pressing Button= No Continuity
“2 Wire” Icemaker Motor Voltage Test:
12Vdc while holding test switch 3-5sec
(Most LG Icemaker Motors are 12Vdc)
“2 Wire” Icemaker Motor Ohm Test:
DC Motor= 17-20Ω
With all the above icemaker layouts, if the Main PCB cannot output the voltage needed for the icemaker to operate then you would need to replace the Main PCB. If the Main PCB is outputting the necessary voltage and the icemaker will not operate and all wiring has been verified good, then you would replace the icemaker.
Reminder, all the above diagrams are examples, please refer to the service manual for your specific model and product code to see how the icemaker circuit is drawn for your unit.
3) Full Sensor.
Once you have verified temperature is correct and the icemaker will function, check for an issue with the bucket full sensor, or bail arm. If the unit thinks the Ice Bucket is full it wont harvest.
One type of icemaker with a bail arm.
Another style bail arm.
If your unit has an icemaker with a bail arm and that is the issue replace the ice maker.
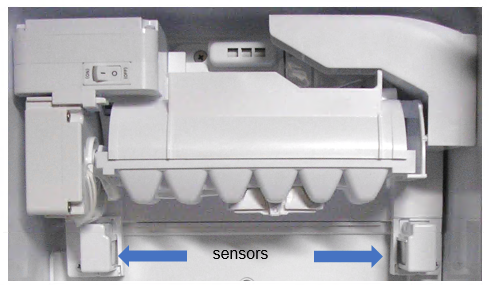
If the sensors think the ice has broken the IR beam it will not let the icemaker harvest. This can be tested.
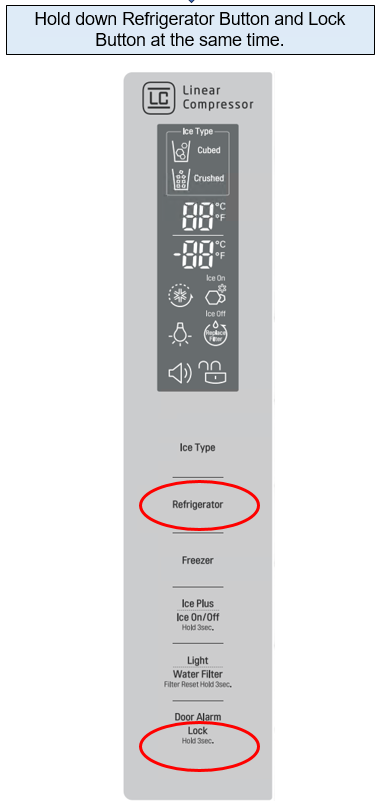
Ice bin sensor model, this model has a test sequence.
If “ETY” is shown on the display after the procedure above, Ice-detecting sensor is NORMAL.
If “FULL” is shown on the display after the procedure above, Ice-detecting sensor is ABNORMAL.