Run the unit in a quick cycle or test mode to see you can duplicate the leak the customer is complaining about. (For future cases it would be best practice to call the customer on the way to their home and have them start a cycle to reduce waiting time).
If the leak cannot be duplicated have the customer point out where they are seeing water on the floor and look for water trails that lead to that area.
Step 2
Check for Installation Issues
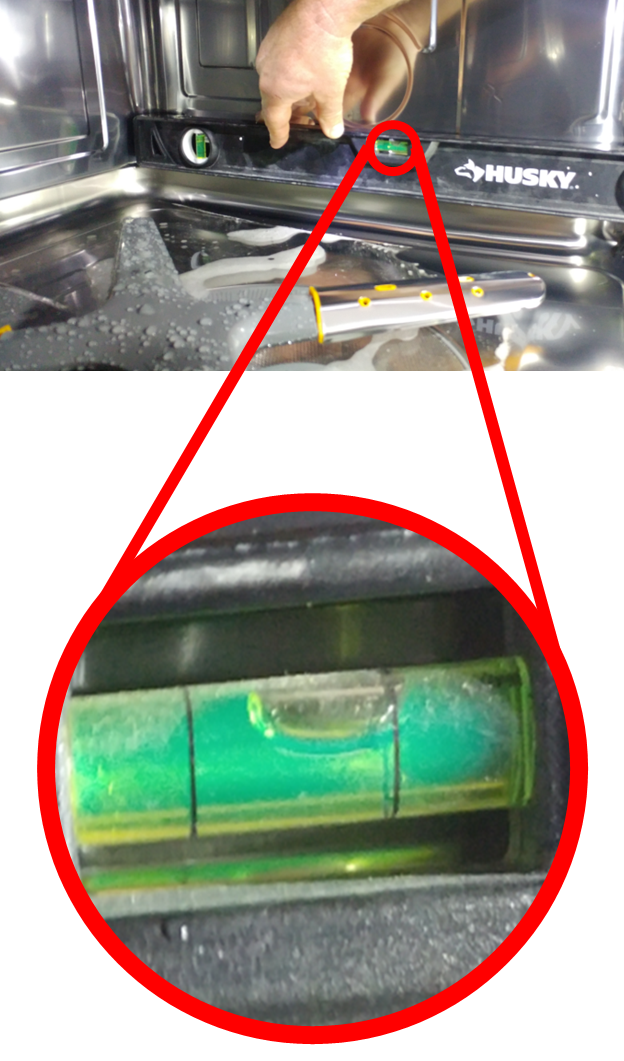
Sometimes a leak is due to an installation issue especially improper leveling. Use a level to check for this common leaking issue. See below:
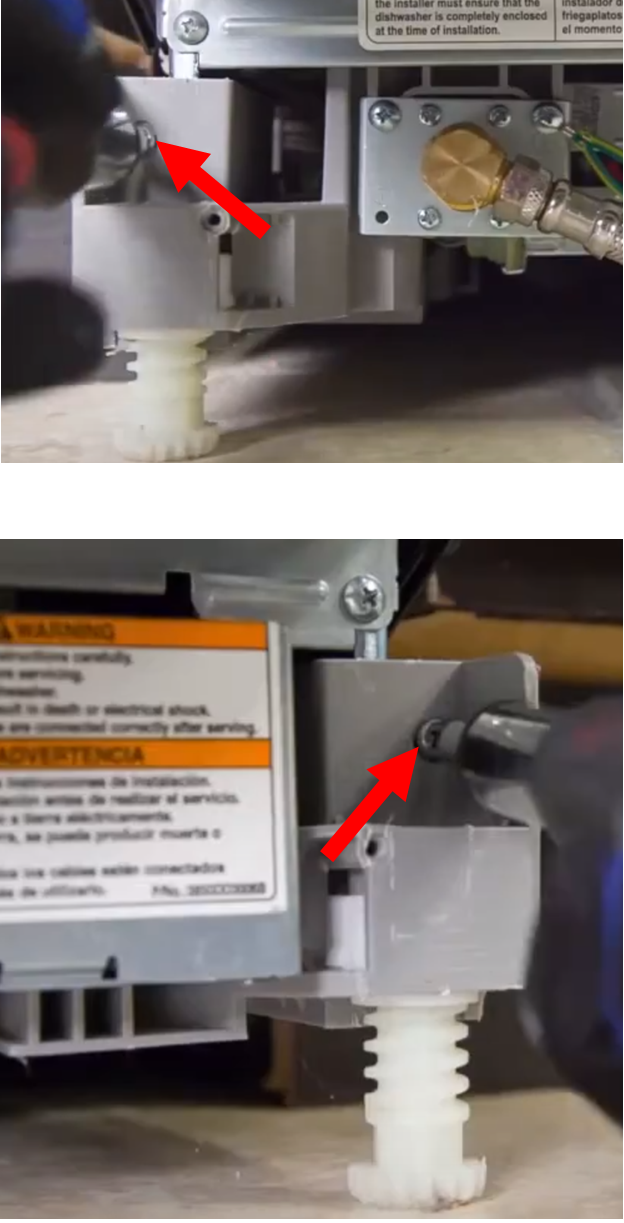
FRONT LEVELING LEG
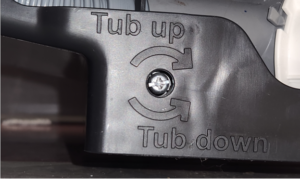
REAR TUB ADJUSTER SCREW (Located in the center of bottom frame)
Some models will have screws for the left and right rear individually.
Step 3
Check for Physical Damage
When the customer complains of leakage, first check for visible water trails or other evidence of the leak.
This issue may be caused from physical damage.
You will need to determine the location of the leak by pulling the unit out and inspecting. If you discover physical damage this is un-repairable.
DENTED ON THE BOTTOM
DENTED ON THE TOP LEFT SIDE
DENTED FRONT LOWER RIGHT
FRONT SEAL TRIM PIECE PULLED OUT
Step 4
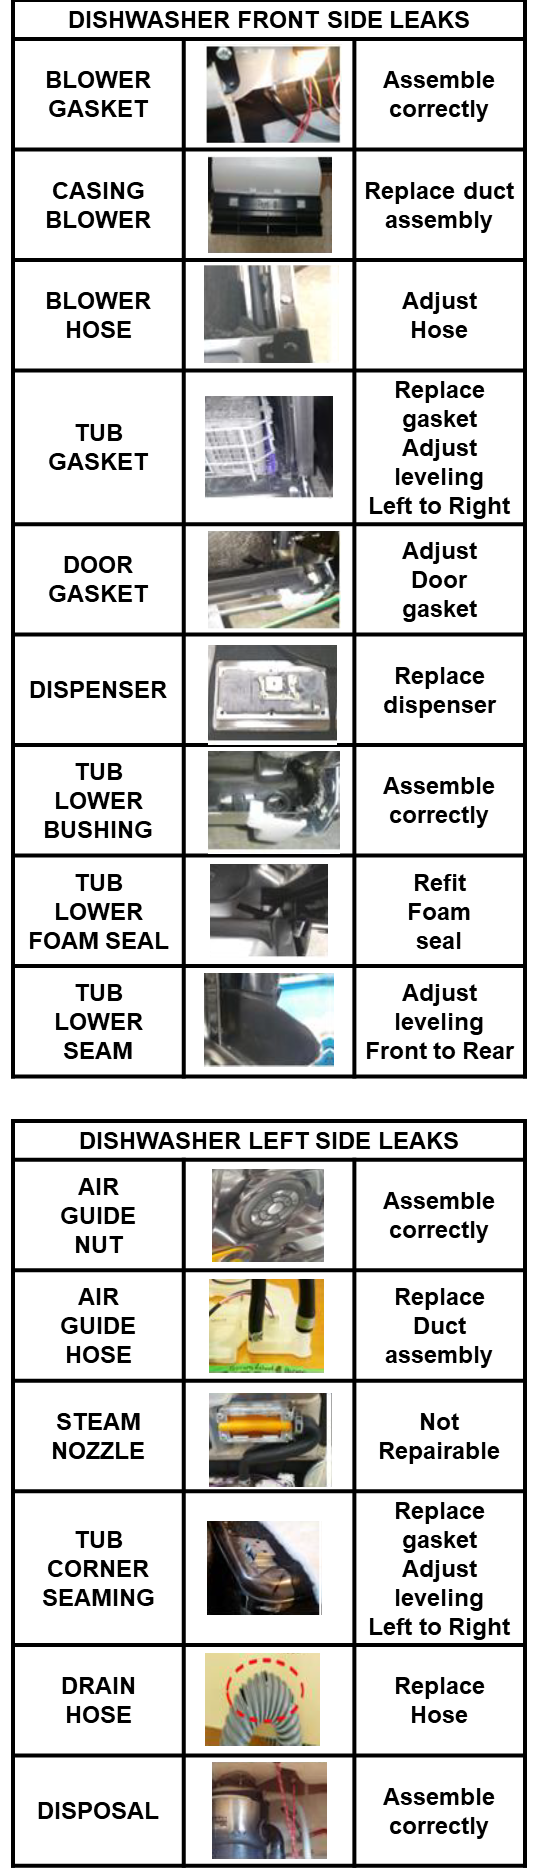
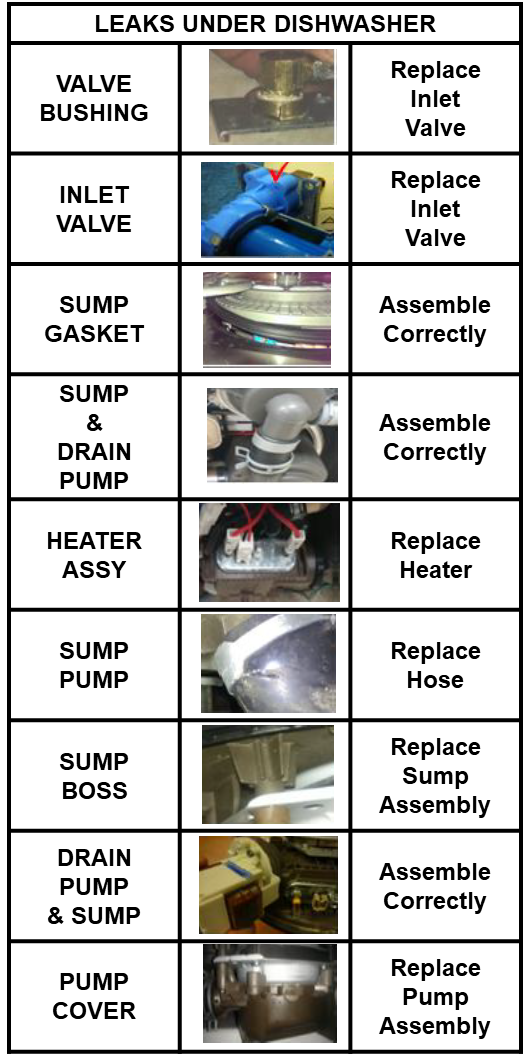
Other Possible Leak Points
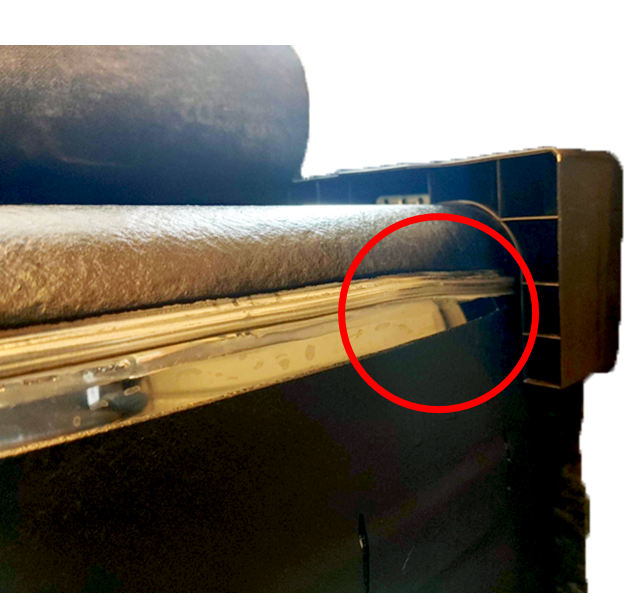
Sometimes a front gasket gets moved during installation and causes a leak from the front area.
Open the door, locate the six screws holding the outer door panel in place and remove the door panel.
Inspect the door gasket at the bottom of the door.
Make sure the gasket is not deformed or torn. The gasket also needs to overlap the tank properly.
Make sure there is no grease buildup or debris on the gasket and corresponding location on the tank. See examples below.
Sometimes a part is defective and can be replaced.
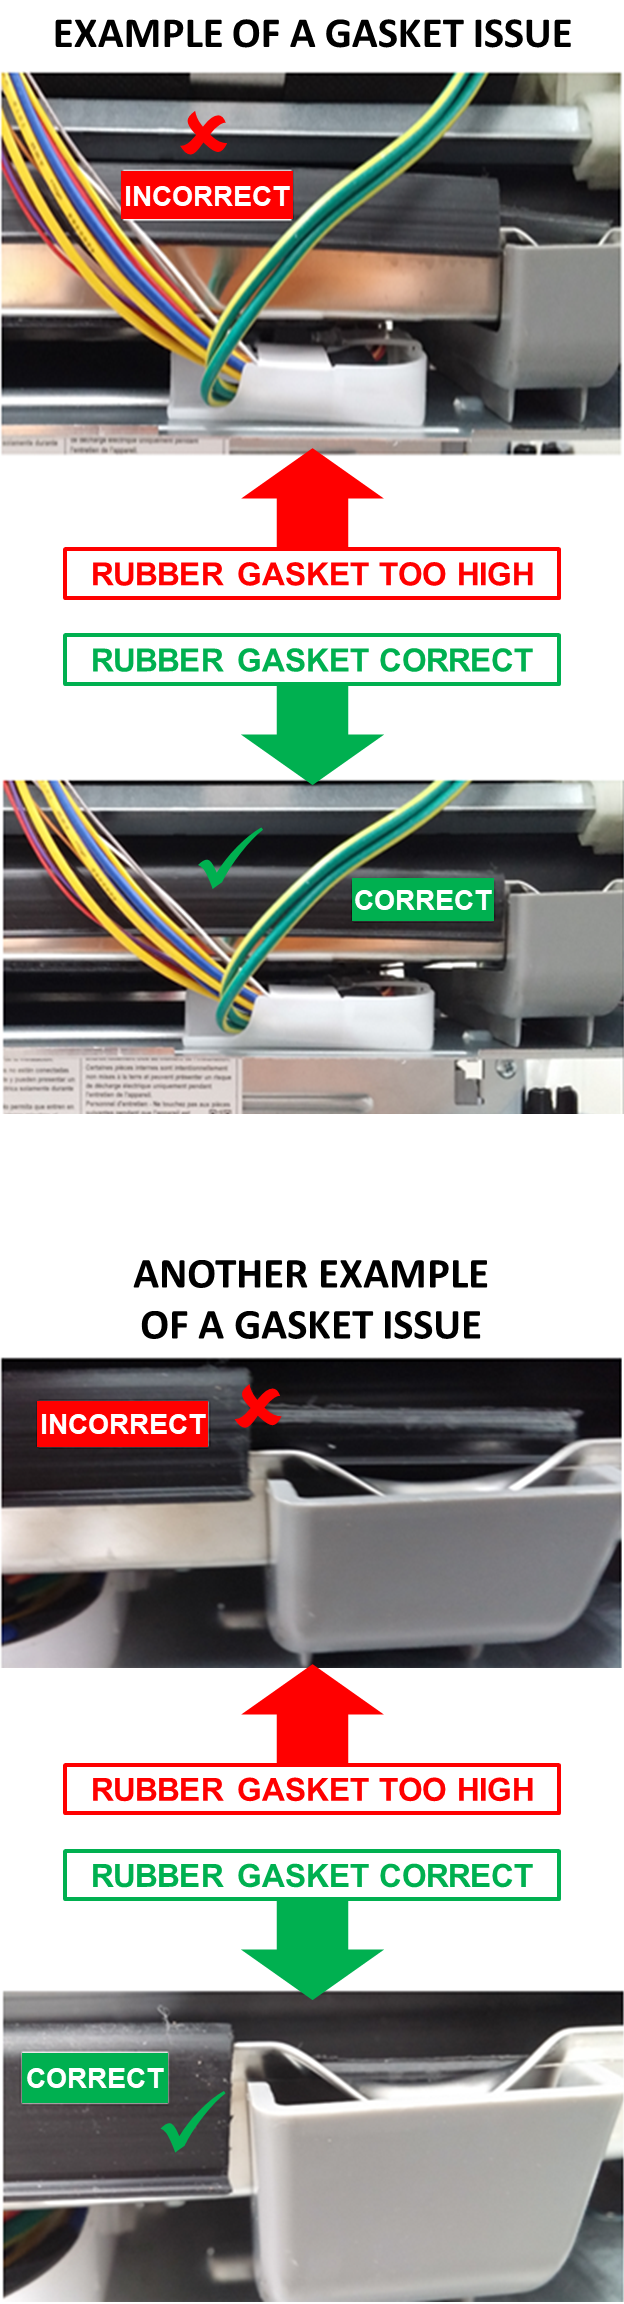
One common part that can be defective is the gasket between the fan and door.
See example below for how to inspect the gasket for a possible defect.
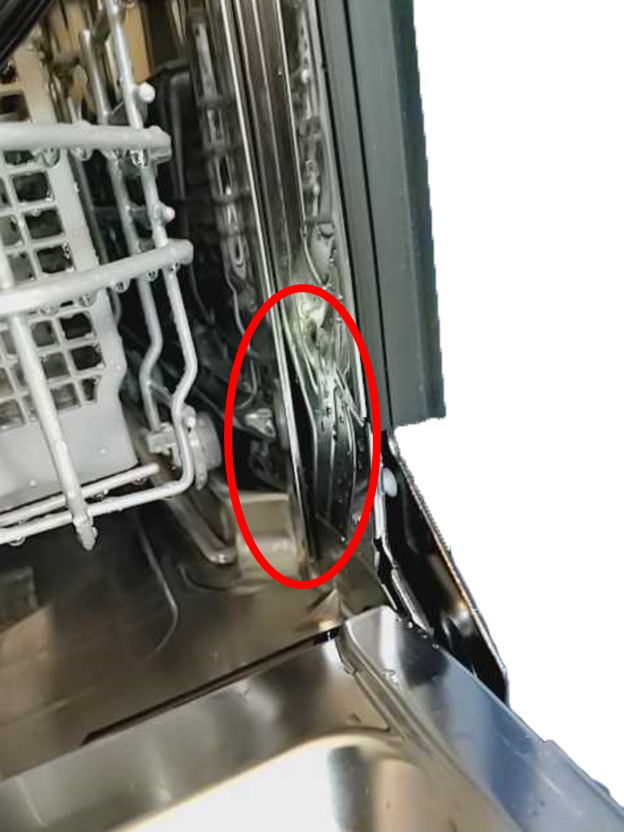
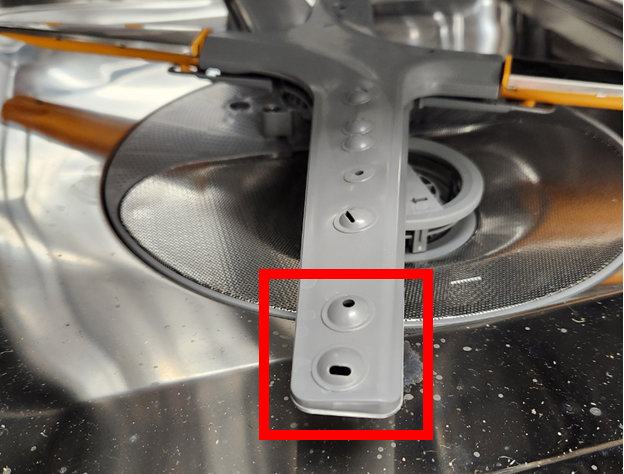
Another part that causes leaks from the front door is the lower spray arm being cracked or split which causes the water to spray under high pressure towards the door. This powerful water spray will cause the water to leak out of the door gasket. Check the lower spray arm to check for a split or other damage that may cause the unit to spray toward the door. (the spray arm may need to be twisted to see the split). See example below.
Another possible leak point is the water inlet valve. Check the water inlet supply tubing and water valve connections for possible leaks.
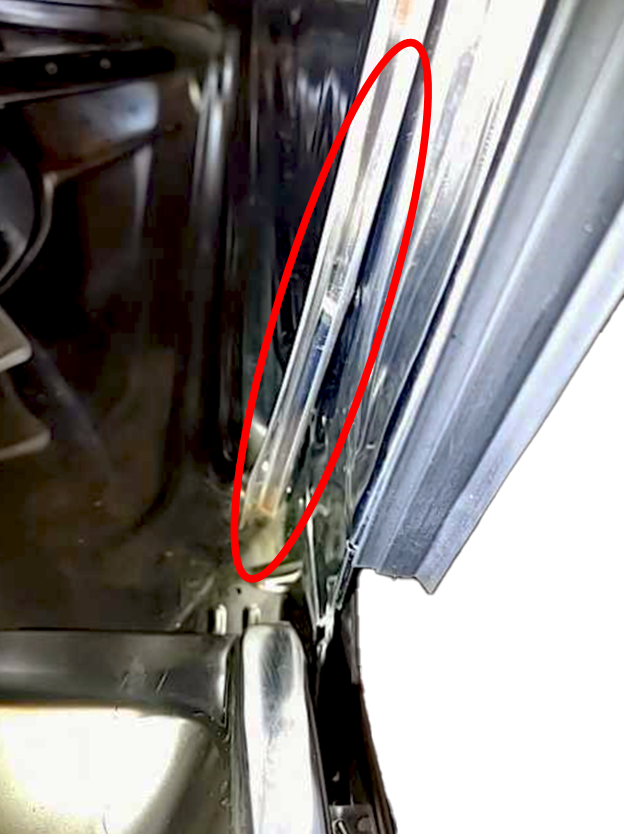
Check the Guide assembly on the left side, outside of the tub, it can be another point of a leak, however this is rare. Be sure the air guide nut is secure.