Dishwasher
Not Filling
Click on the Steps below to jump directly to that section:
**NOTICE**
Wiring Colors, Connectors, and Pins will vary by model/product code. Always be sure to download and use the service manual for your specific model.
For Test Mode procedures use this link and input your specific model: https://lgtestmodes.com/
1.) Is the water supply valve turned on? Check the customer’s water supply valve for being turned on.

2.) Is the water supply hose kinked? Check the water supply hose for a kink.
3.) Turn off the water and remove the supply hose from the water valve.
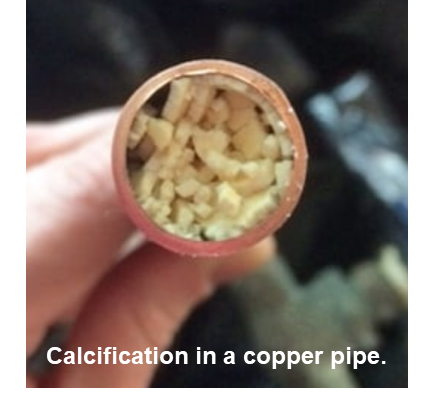
Is the filter screen blocked with debris or calcium buildup?
If calcium buildup is found the customer may need to have a water softener system installed.
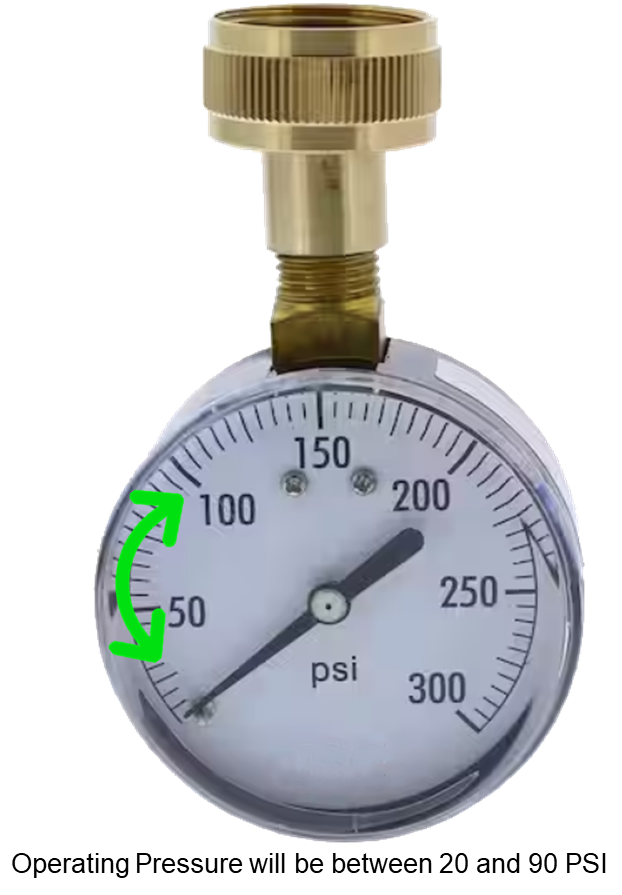
4.) Is the water pressure to low or excessively high? Below 20 psi and over 120 psi will be an issue that the customer needs a plumber to repair.
5.) Inspect the harness connection at the Main PCB for the inlet valve and flow meter.
Check the harness connections at the flow meter and inlet valve as well.
6.) Is water coming into the unit?
If so, inspect the flow meter water wheel to see if it is turning freely. If not, replace the flow meter.
If the water wheel is turning freely, verify 5Vdc is being supplied out of the Main PCB to the flow meter. If 5Vdc is present at the Main PCB, check for voltage at the flow meter. If no voltage is present, suspect a wiring harness issue. If voltage is present, check for a 5Vdc pulse signal from the flow meter to the Main PCB.
7.) If no water is coming into the machine, check the resistance and voltage of the water valve from the Main PCB.
If voltage is present at the Main PCB, check voltage at the water valve.
If no voltage is present at the Main PCB, replace the Main PCB.
If voltage is present at the valve, replace the valve.
If no voltage is present, suspect a wiring harness issue.
If an open is read from the Main PCB, measure the resistance at the valve.
If the valve resistance is okay, suspect a harness issue.
Water valves will be either 120Vac / 900-1300 ohms or 8 ~ 12Vdc / 20-30 ohms depending on specific model
