Electric Dryer
Not Heating
Click on the Steps below to jump directly to that section:
**NOTICE**
Wiring Colors, Connectors, and Pins will vary by model/product code. Always be sure to download and use the service manual for your specific model.
For Test Mode procedures use this link and input your specific model: https://lgtestmodes.com/
If your LG dryer is taking too long to dry your clothes or your dryer is not heating properly this is likely due to a blockage to the dryer’s airflow, which will make dry times longer than normal. Airflow blockages can be caused by an obstruction in the duct work or lint build-up on your lint screen. Check and clean the Lint Filter, Vent, and Vent Exit at the outside of the home. Also check the duct for blockage and if cleaning is needed then have the customer clean out the duct or have a professional duct cleaning service take care of this repair procedure.

Check the source power from the outlet.
The dryer will use the L1 for display, motor, and L2 for Heaters (2 coils). 120Vac from neutral to L1, 120Vac from neutral to L2, 240Vac between L1 and L2.

If the voltage is correct at the source, check at the terminal block on the back of the unit where the power cord attaches. Insure the terminals are tight.
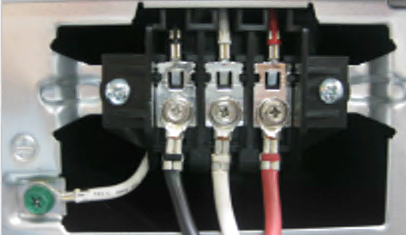
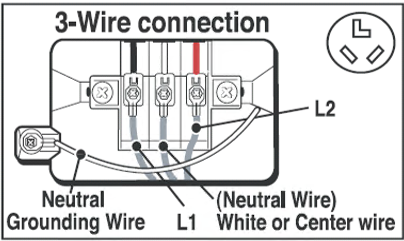
3-wire connection
Black is L1. White is neutral. Red is L2. Internal neutral grounding wire is connected to chassis ground.
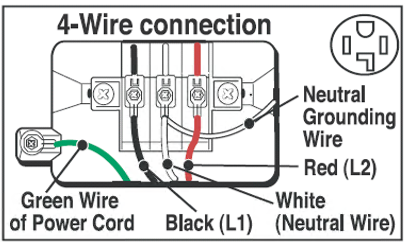
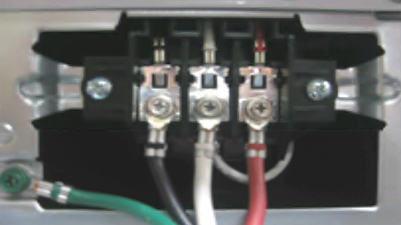
4-wire connection
Black is L1. White is neutral. Red is L2. Power cord green ground wire is connected to chassis ground. Internal neutral grounding wire is connected to neutral.
Check the thermostats for continuity. If no continuity is measured on any thermostat then replace the thermostat. See picture below of the heater assembly thermostats.
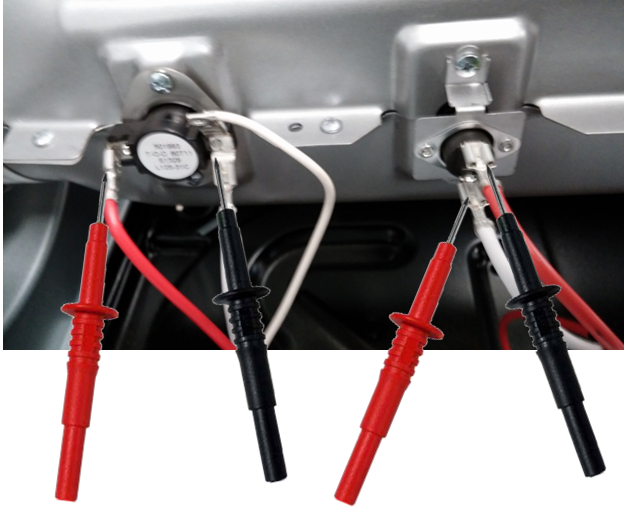
Check the blower thermostat for continuity and if no continuity is measured then replace the thermostat.

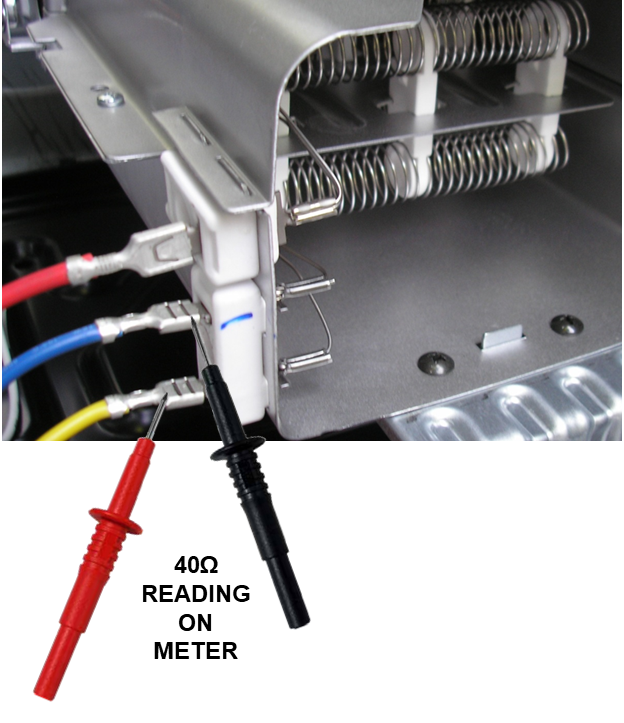
Check the heater coils. Each one should measure 21Ω individually and approximately 40Ω together. Unplug the unit, then unplug one of the heater relay wires, Black Relay, Blue wire, or White Relay and Yellow wire. Then check resistance from the Main PCB.

If the heater resistance checks good, connect the wires back to relays, plug the unit back up, now turn on the unit on high heat and from the Main PCB, check the Yellow and Blue wires at each relay to chassis ground and you should see 120Vac, if not replace Main PCB
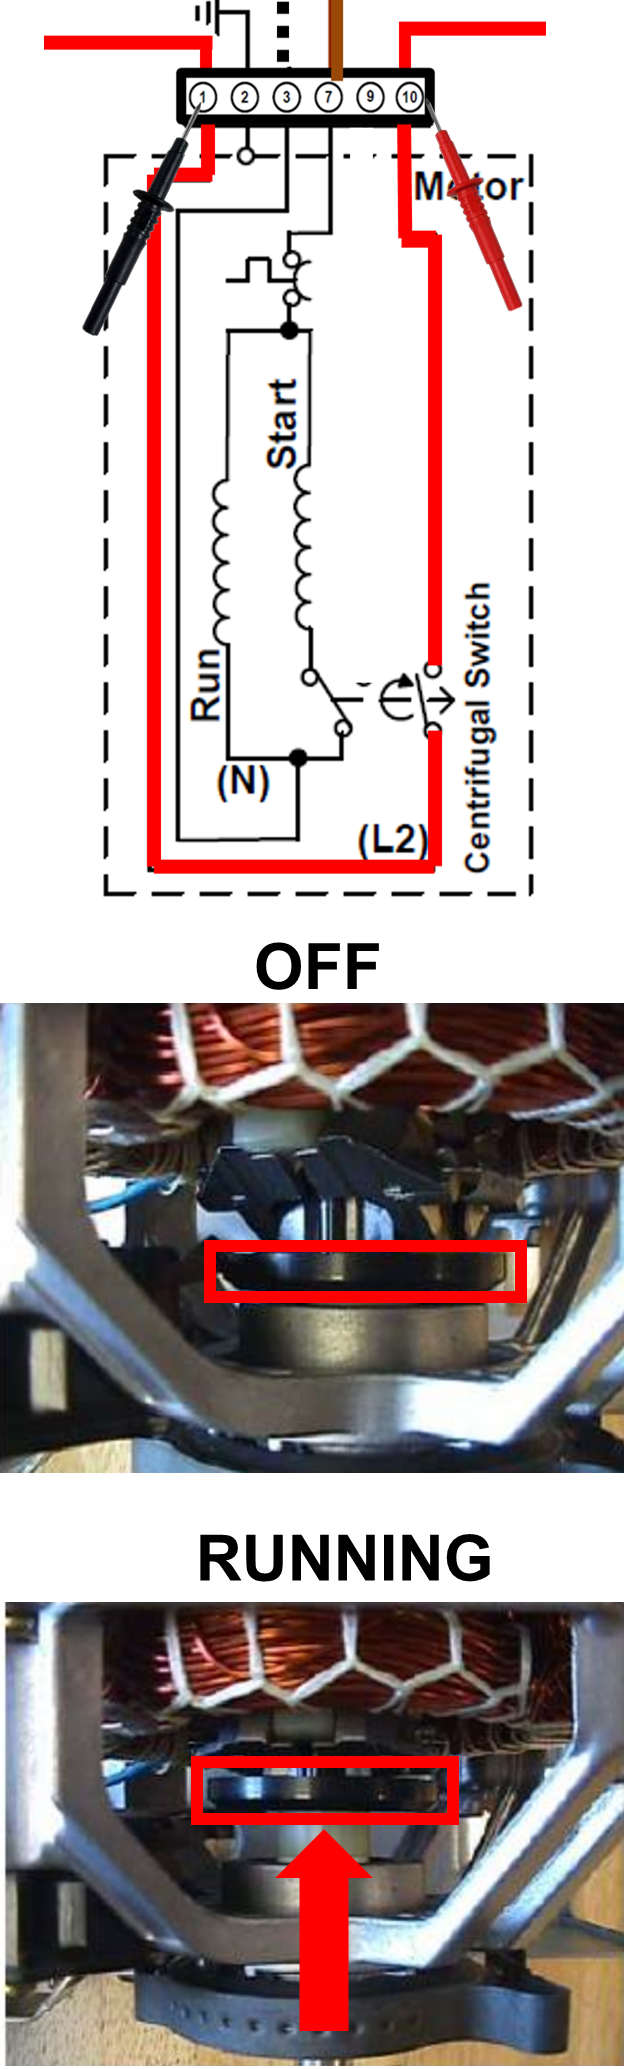
Lastly the centrifugal switch working incorrectly can cause the unit not to heat. (It wont turn on the heater until the drum is turning).
Unplug the dryer.
Remove the front panel and the drum.
Locate the drum motor and disconnect the motor harness connection. Check continuity on motor terminal pins 1 and 10. Your meter should read no continuity, now push the centrifugal switch collar towards the windings of the motor. Now the meter should read continuity. If the centrifugal switch does not read continuity while pushed in then replace the motor.