Top Load Washer
Not Filling
Click on the Steps below to jump directly to that section:
**NOTICE**
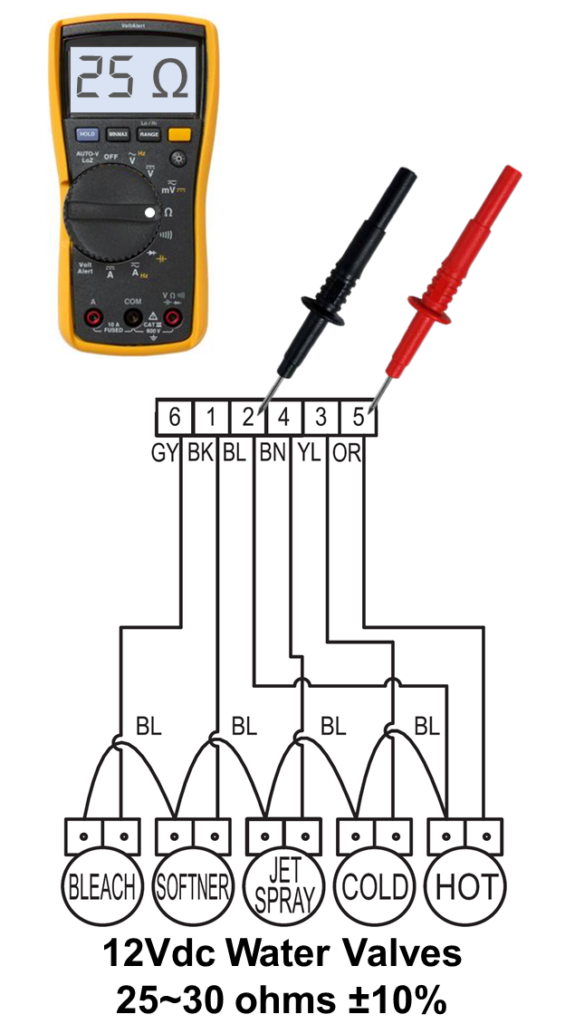
Wiring Colors, Connectors, and Pins will vary by model/product code. Always be sure to download and use the service manual for your specific model.
For Test Mode procedures use this link and input your specific model: https://lgtestmodes.com/
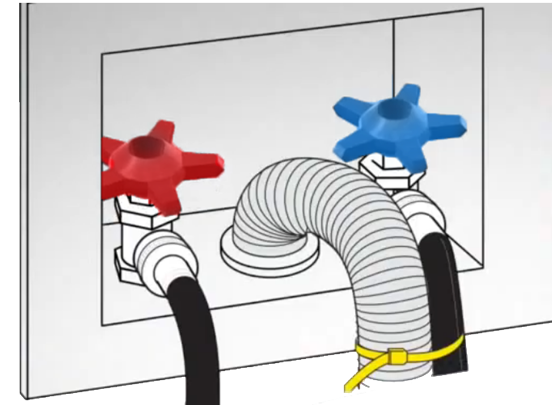
Make sure the home water supply is on.

Place the unit in test mode.
Plug in the unit and activate test mode to cycle through all water valves. Voltage should read 12VDC.
If no voltage is read at the valve, check voltage at the Main PCB.
If no voltage is present at the Main PCB, replace the Main PCB.
WATER FREQUENCY
When the Washer is in test mode, as the inlet valves are activated and the pressure switch senses the water pressure, the numbers on the Display will count down.
Example: If the Number starts at 255 as the drum begins to fill the number will start counting down, 254…253…etc, until the full level is achieved. *Note: The starting value will be different depending on model#.
This number dropping verifies that your pressure sensor is sensing the water level in the tub.
Use test mode to check water level frequency.
Is the water level frequency over 21.3kHz?
If no: does water flow continuously into the tub with unit unplugged? If so, you have a defective inlet valve.
12Vdc Water Valves
25~30 ohms ±10%
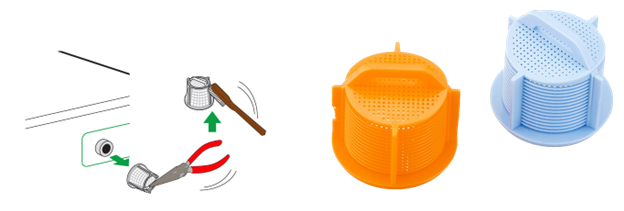
Check the hoses and the valve filters in the end of the valves.

DO NOT USEFLOOD SAFE HOSES
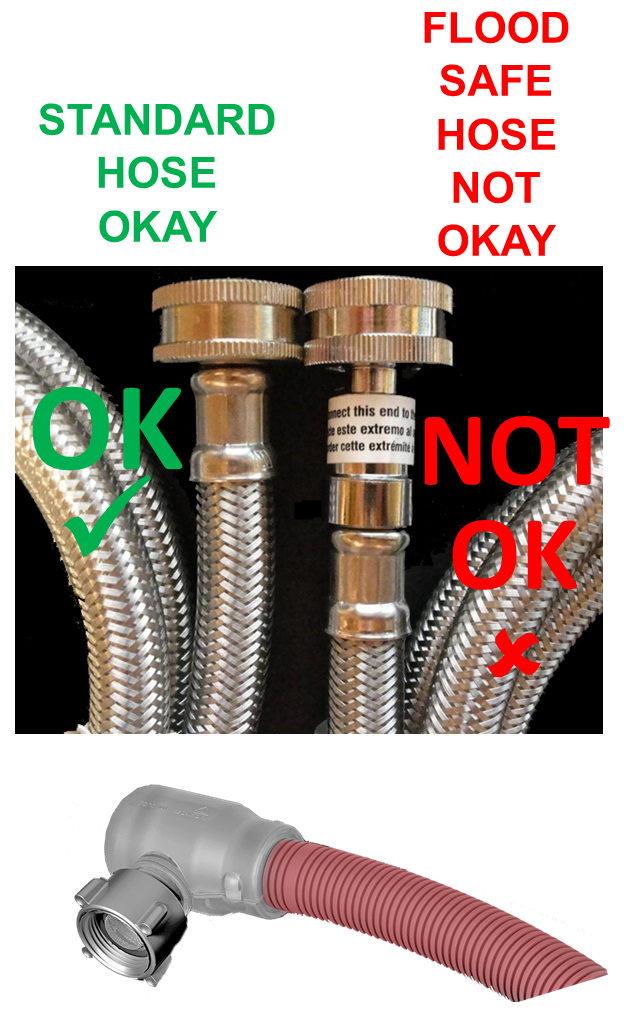
This is another style of flood safe hose (do not use).