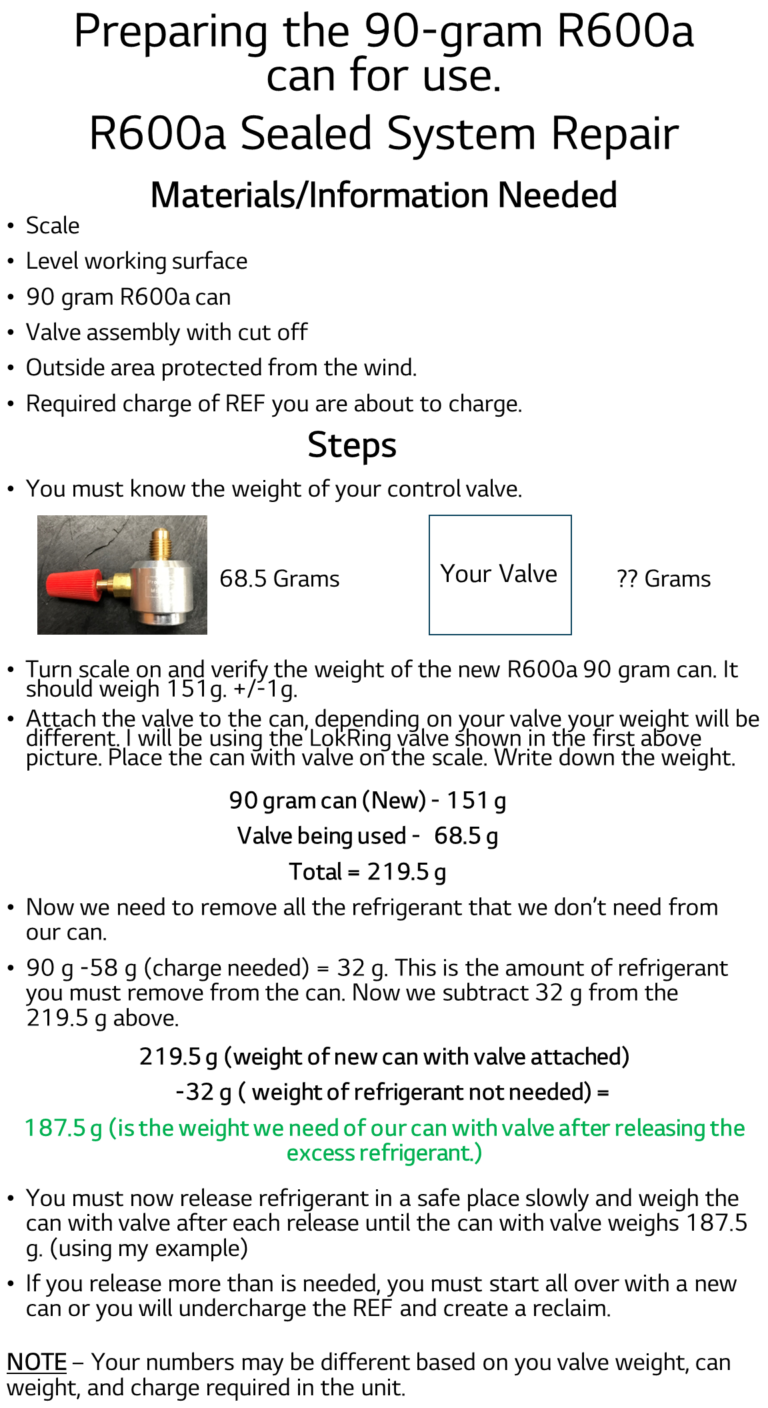
Vulkan LokRing Charging Station Kit for LG products:
Included in the Kit are the following items:
A – Digital Scale
B – Extraction Valve
C – Non-Return Valve w/Hoses
D – Ball Valve
E – T-Piece
F – Charging Hose
G – Liquid Charging base
H – Discharging Hose 5m
I – Valve Core Depressors (2)
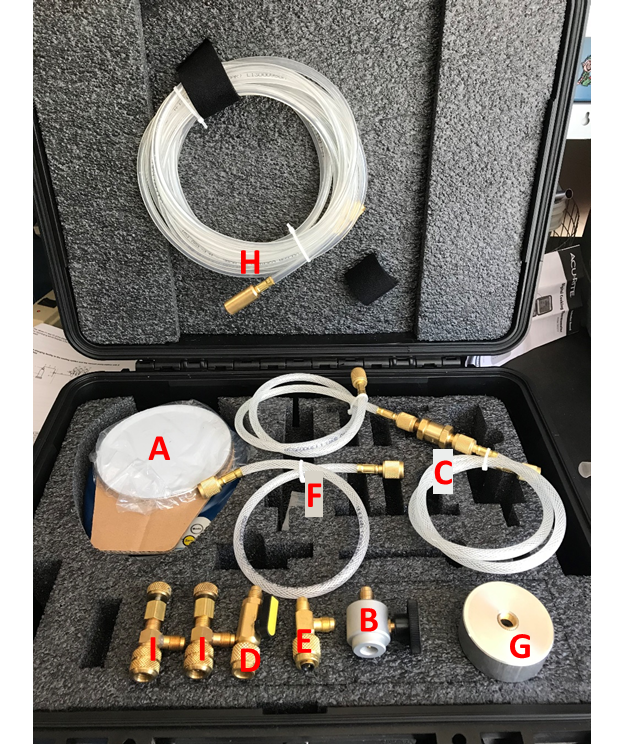
Make sure you have all parts of the Charging Station before proceeding.
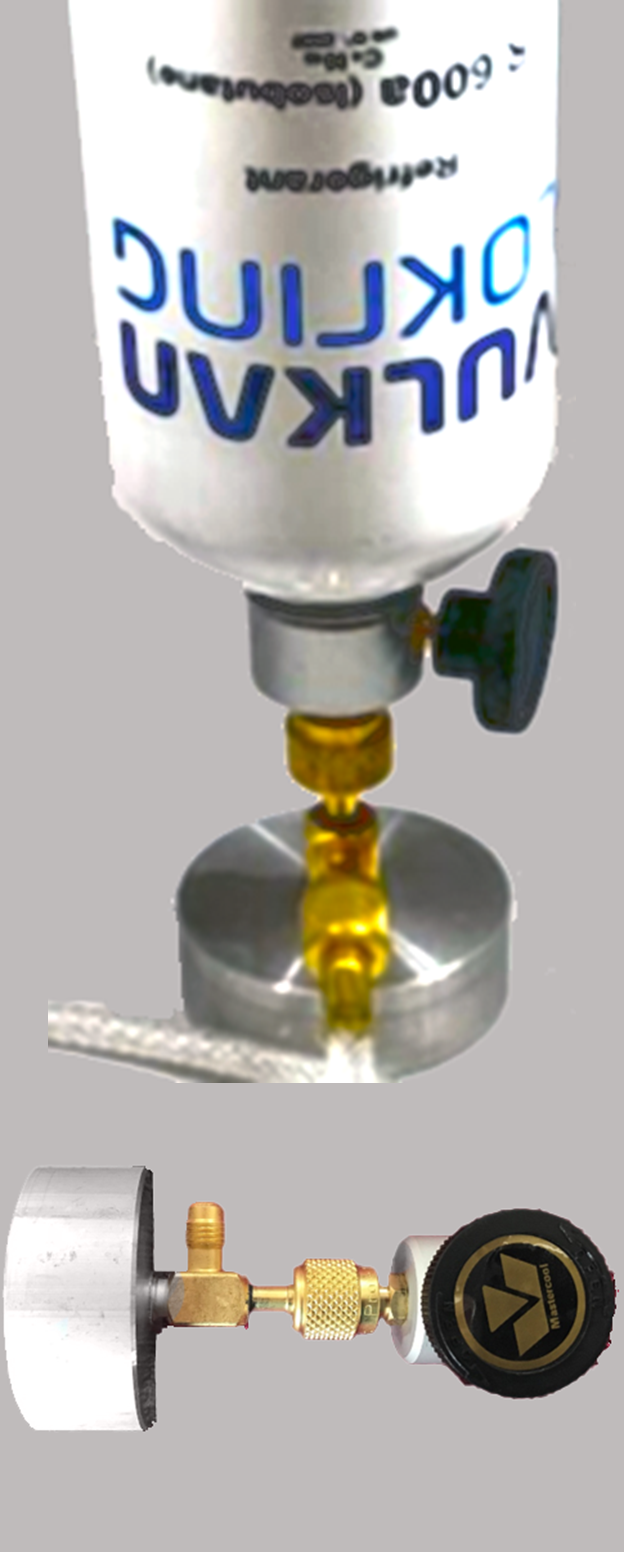
1. Begin with the B, E, and G items. Make sure the Schrader valve is in the bottom port to prevent pressure leakage.
2. Screw the T- piece into the base. The new base has a brass “cap” insert that can be removed and replaced if the threads are damaged.
3. Next attach the Extraction Valve onto the female connector on the T-piece. It is advised to leave these parts attached if possible.
THE GAUGE SET
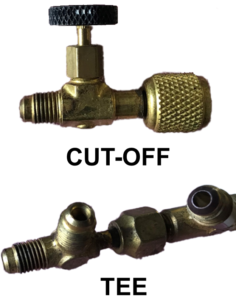
You will need to provide the gauge set, and a “Tee” with 2 Male and 1 female ends, (The female end will attach to your manifold on the center post).
And (optional), a “Cut-off” valve. This will allow you to totally close off the hose and prevent any leaks of loss of refrigerant in the charging steps. (Attach to the “Tee” fitting).
THE SCALE
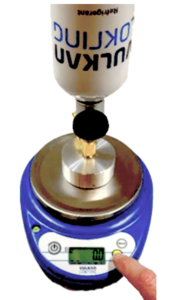
Install the batteries and place on a solid surface. You will then need to “Zero out” the scales, Press and hold the “Mode” and “0” keys together for about 5 seconds until the display shows the internal value. Attach the charging station so with the refrigerant attached the scales read zero.
Charging
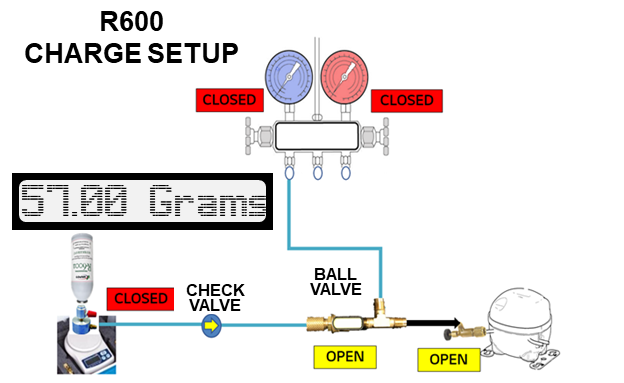
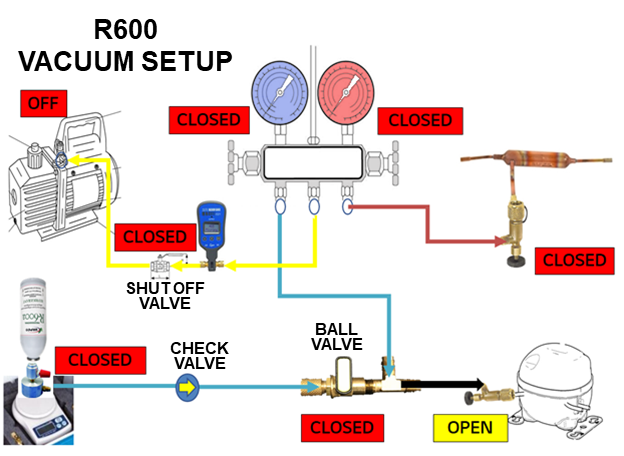
Once proper vacuum is achieved, close the both sides of the manifold, close the core on the drier and remove the core depressor, cap the drier. Turn off the pump and micron gauge. Close the ball valve to prepare for charging.
With the ball valve closed, power the scale on and zero out the scale.
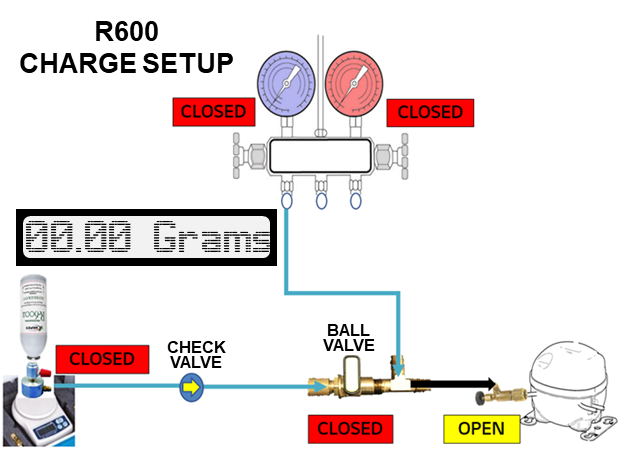
Open the can valve, some liquid refrigerant will flow to the ball valve. Approximately 5-15 grams will flow, this will be part of the charge.
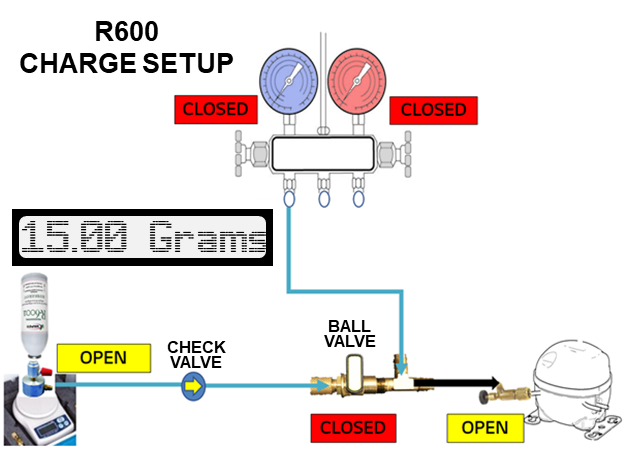
Open and close the ball valve until half the charge is charged into the unit. Once half the charge is in the unit, power the refrigerator on.
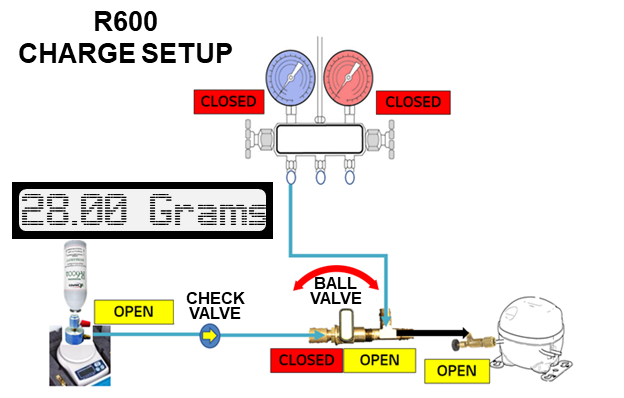
Repeat opening and closing the ball valve until you reach your target charge. Close the ball valve and then the can valve.
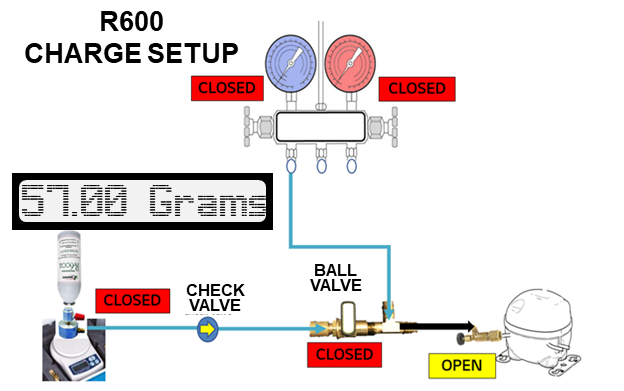
Open the ball valve and allow the compressor to draw in the remaining R600a. Once your manifold shows your low side in a vacuum you can close your compressor process stub core, and remove the core depressor, and the blue hose from the compressor.
