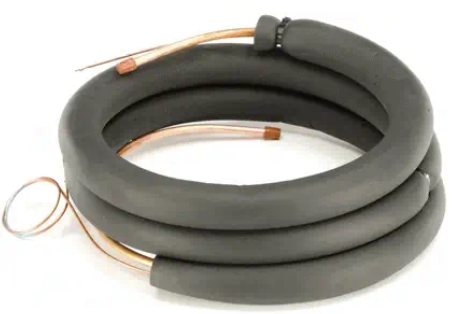
In the event the heat exchanger is broken or restricted and cannot be repaired, a replacement heat exchanger is available.
This replacement Heat Exchanger can be used on single evaporator units only.
Heat Exchanger Part # AGR75874401
How to Install
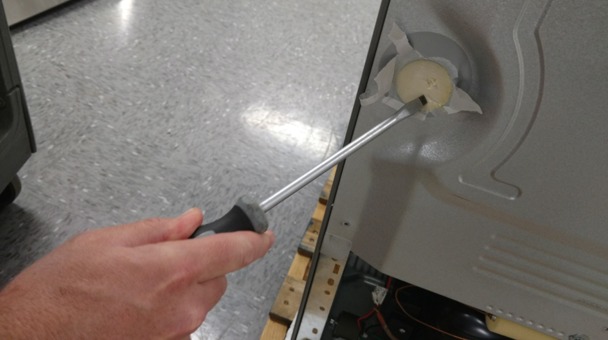
Step 1: Locate the insulation patch above the machine room on the left side and remove:
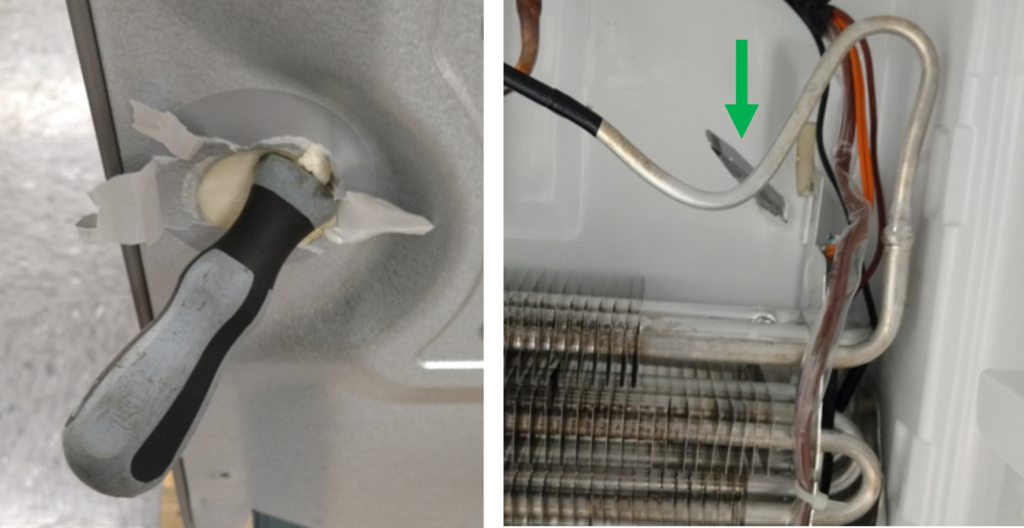
Step 2: Insert a #3 screwdriver with 7-8 inch shaft into foam at an extreme sharp angle as shown below until you feel contact with the plastic liner inside:
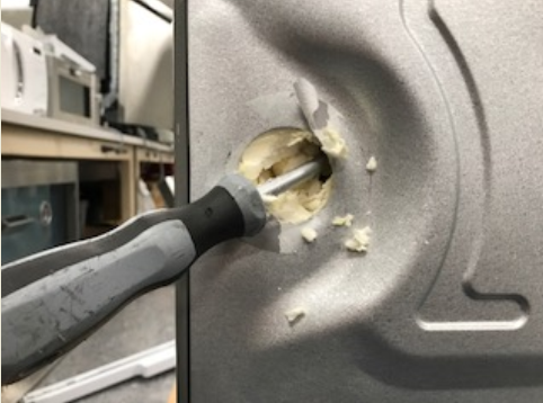
Step 3: Once you make contact with the inner liner put mild pressure on the screwdriver. This will cause the plastic inside to bow and will allow you to see where the new lines will be entering the freezer section, then take a box cutter and make an incision (an x shaped incision works great and keeps the liner from cracking):
Step 4: Now you are ready to push the screwdriver all the way through the plastic liner:
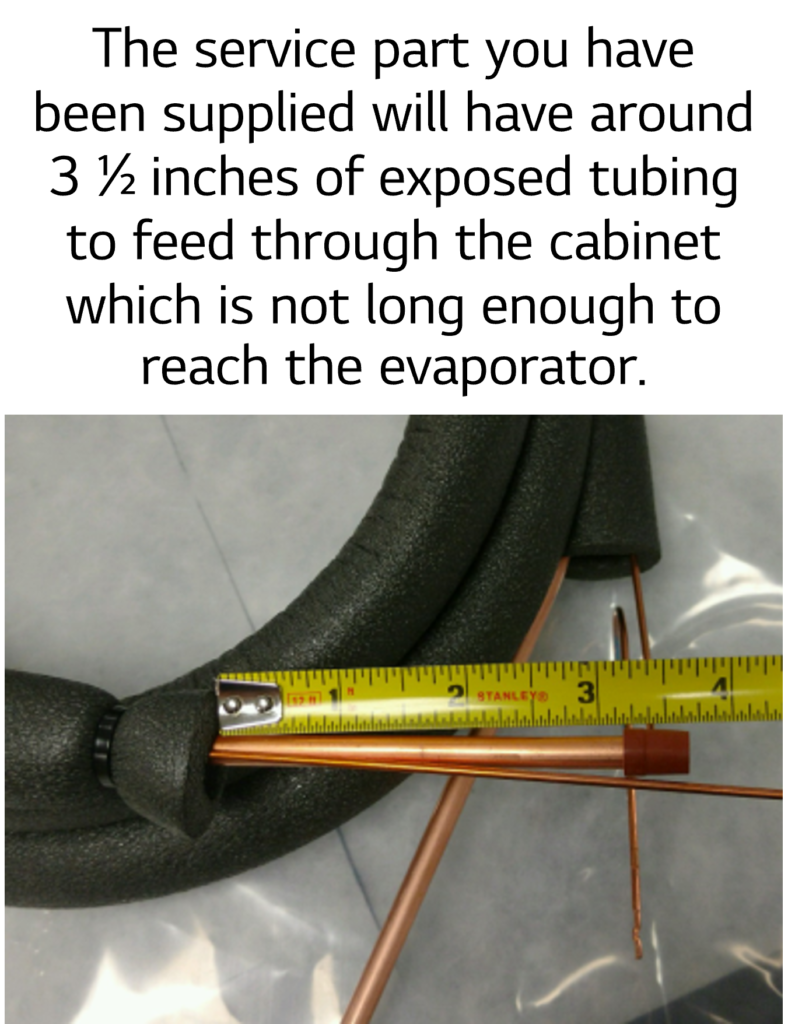
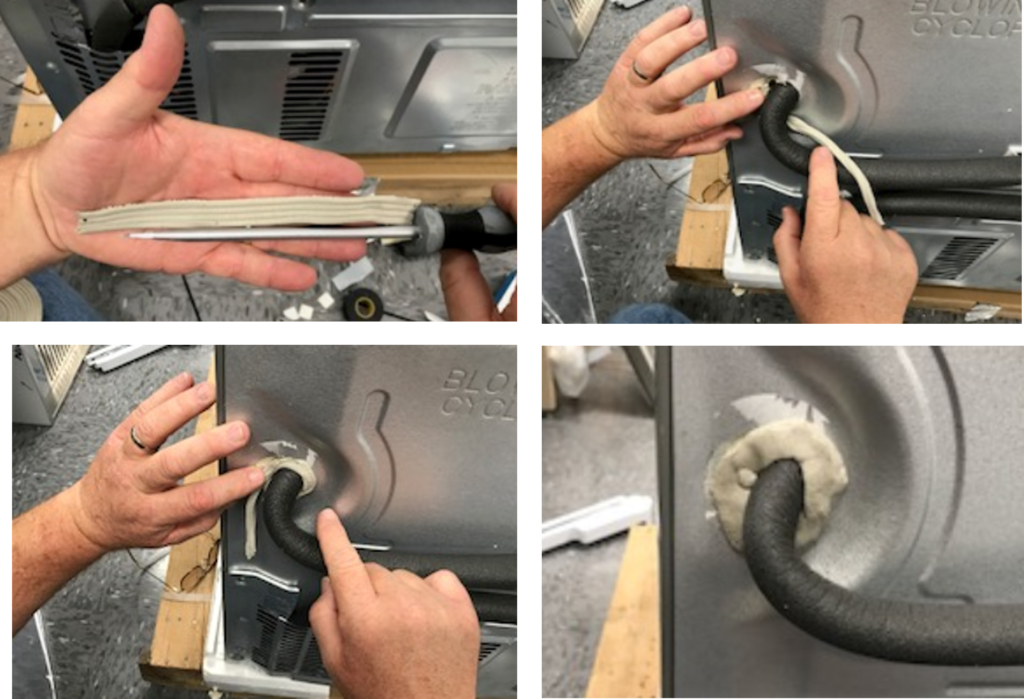
Step 5: You will need to trim some of the insulation back on the end of the heat exchanger that will be fed through the cabinet to the freezer section.
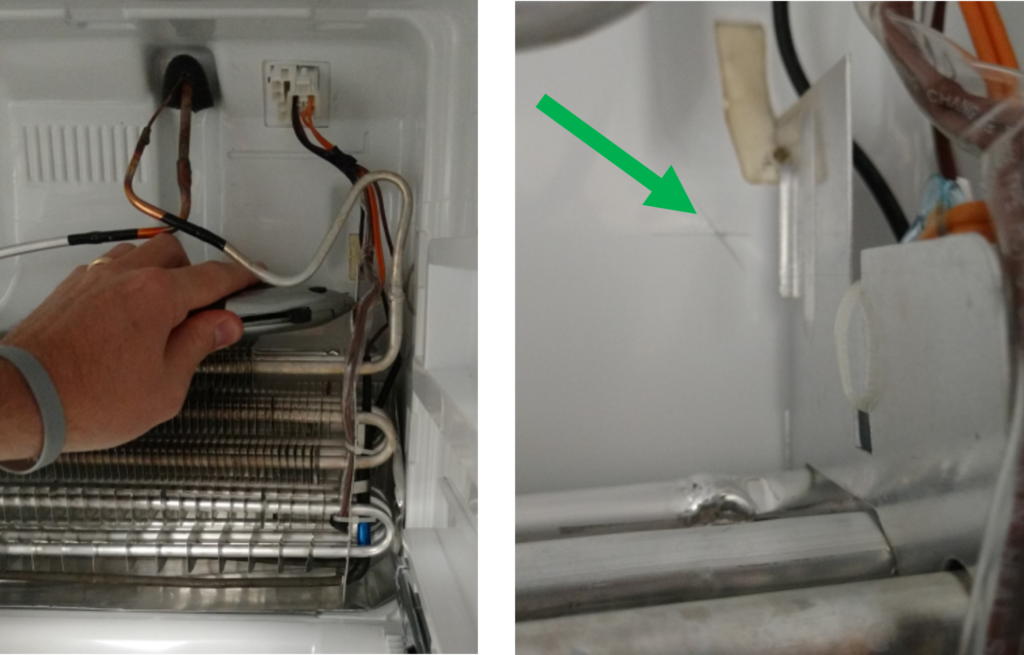
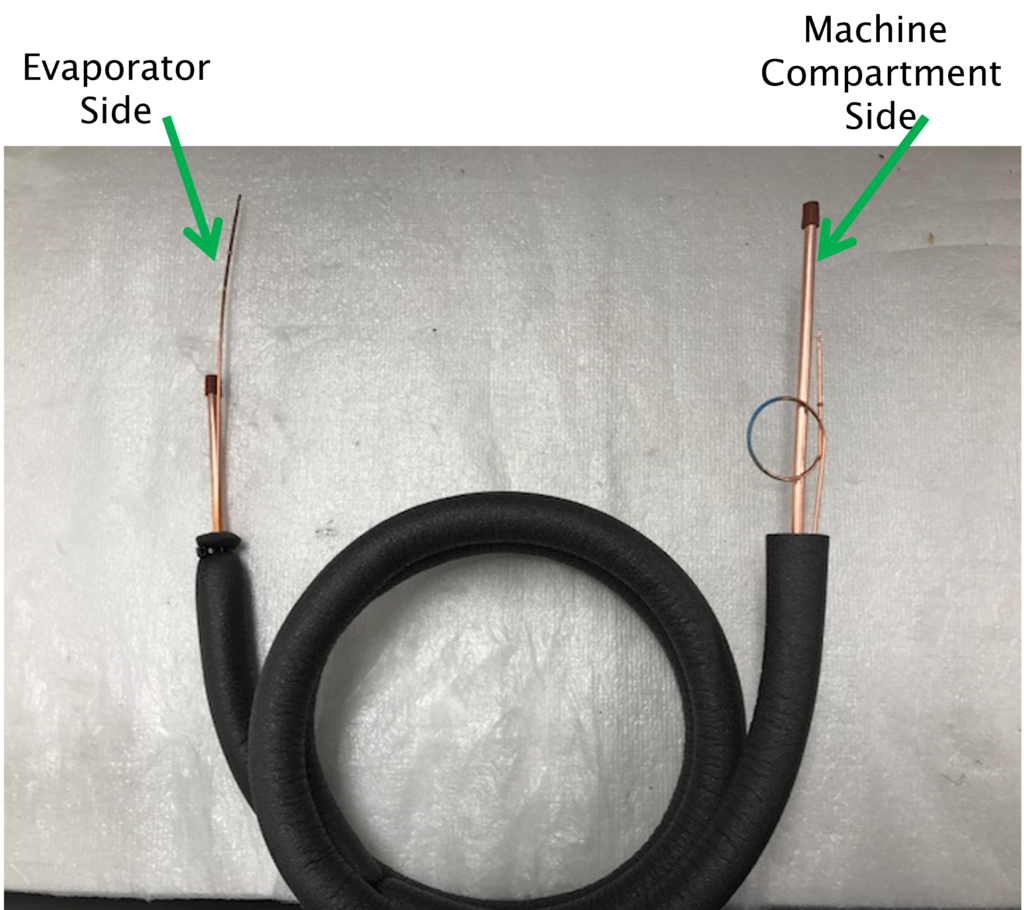
Step 6: You are now ready to feed your new heat exchanger from the back to the inside of the freezer section. (Wrapping the suction line and cap tube together tightly with electrical tape makes this process easier):
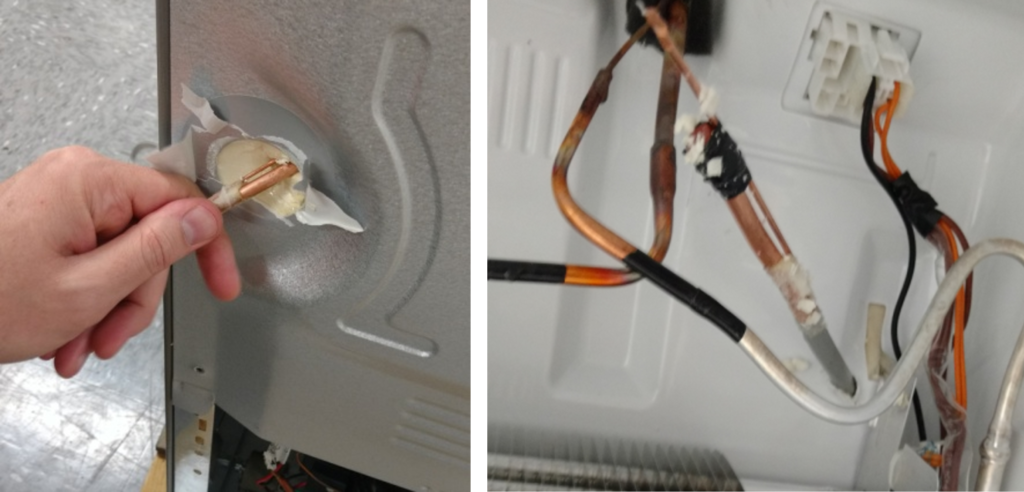
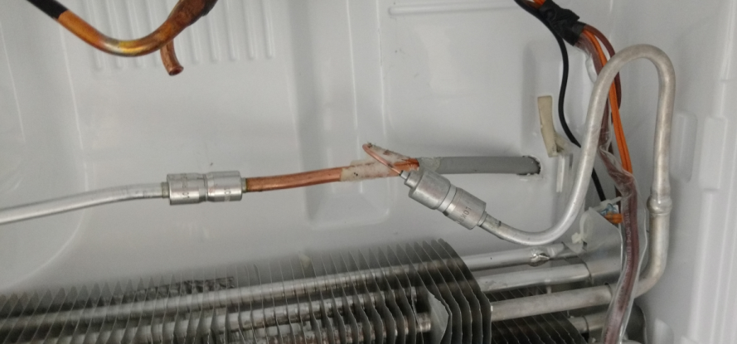
Step 7: Now you can connect the new suction line and capillary tube to the existing evaporator coil. Lokring or soldering will both work:
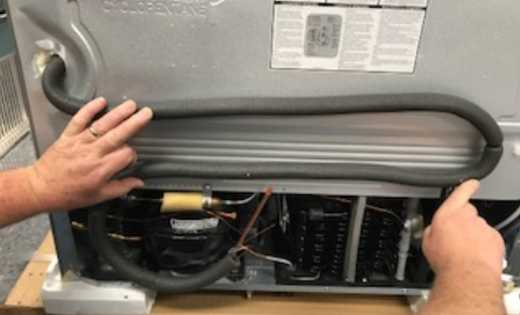
Step 8: You will need to unroll the heat exchanger and route it along the back of the refrigerator like the picture below. Now you can connect the new suction line and capillary tube to the compressor and drier. Lokring or soldering will both work:
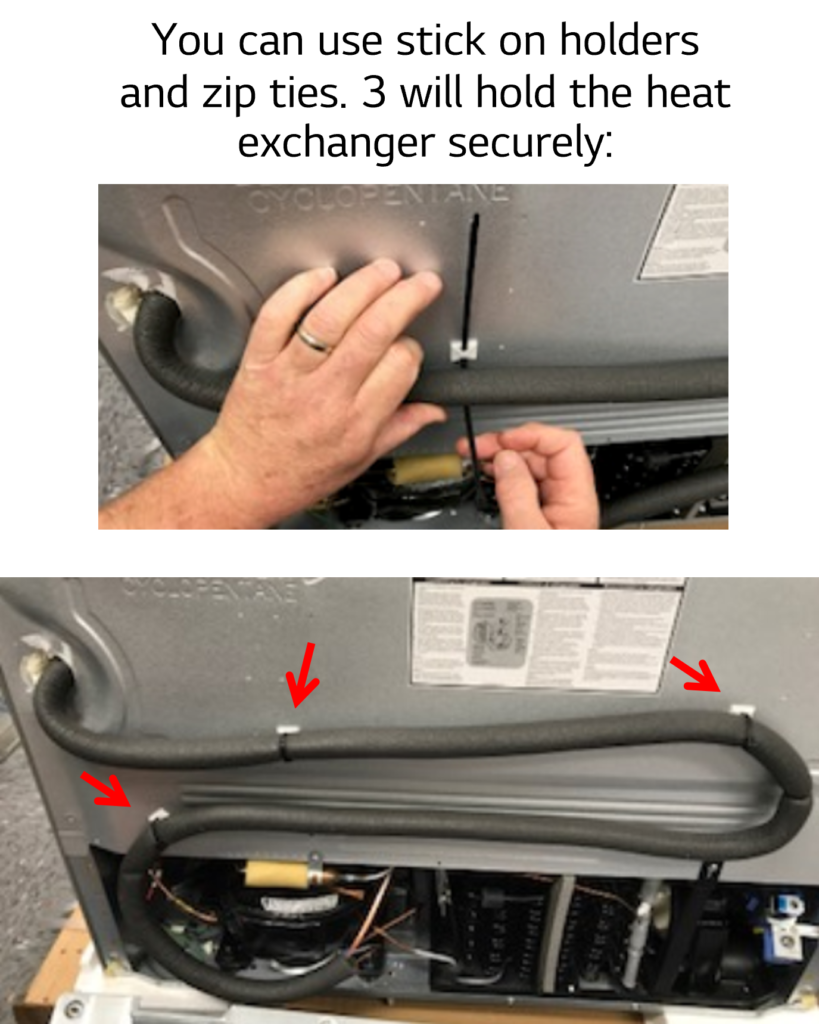
Step 9: You will need to secure the heat exchanger to the back of the refrigerator.
Step 10: You will need to seal with permagum where the heat exchanger enters the cabinet. This will keep air from escaping and stop the tubing from sweating.
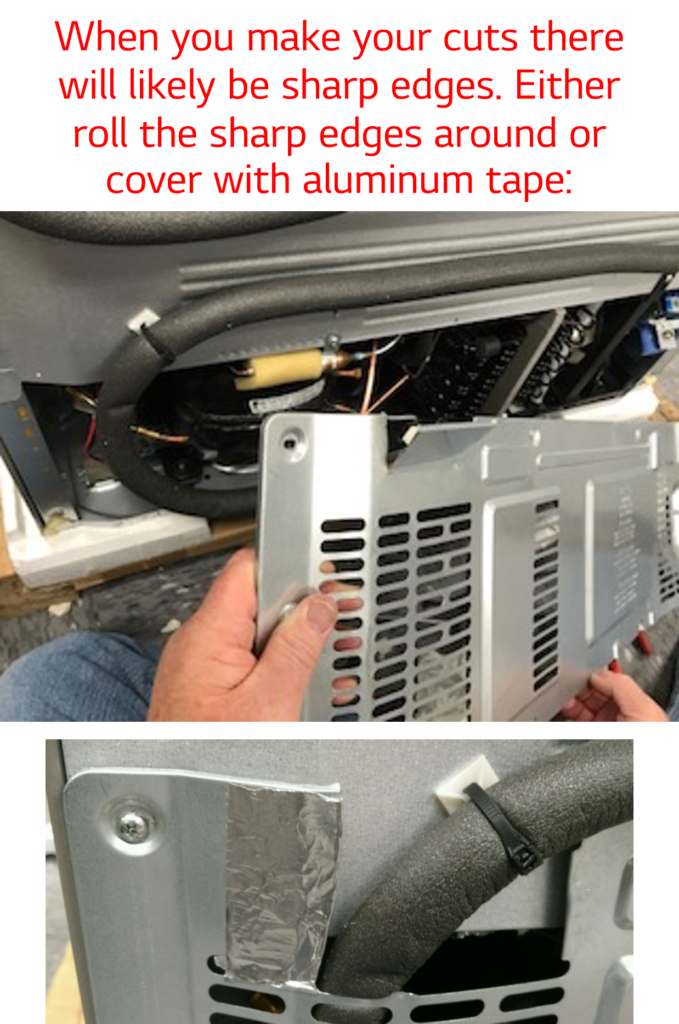
Step 11: You will need to cut the rear grille to fit around where the heat exchanger enters the machine room as below:
Now that the new heat exchanger has been routed through the cabinet you are ready to finish the sealed system repair.
Use nitrogen to leak check your joints after your connections have been made.
Pull a minimum 500 micron vacuum and make sure it holds below 1000 microns. Remember if the micron gauge shows a rise above 1000 microns when you isolate your pump you still have moisture in the system. A rise above 2000 microns indicates a leak.
Once your vacuum holds below 1000 microns you are ready to charge the system to the amount of refrigerant that is printed on the model/serial tag inside the refrigerator.