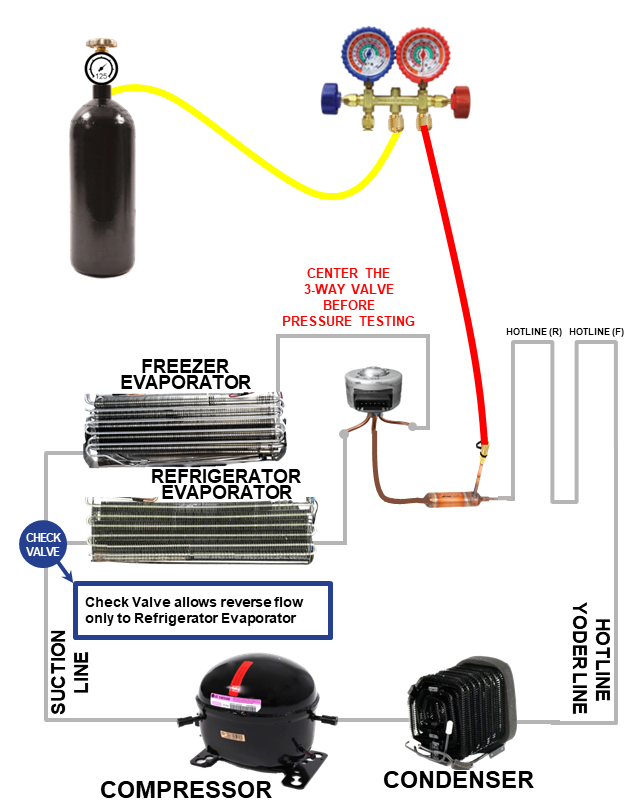
See the setup to pressurize the whole system with 150 psi nitrogen and close off the manifold and hold to see if the pressure drops. It is important to perform a leak test after replacing sealed system parts to make sure you did not make a mistake or overlook a leak in the system.
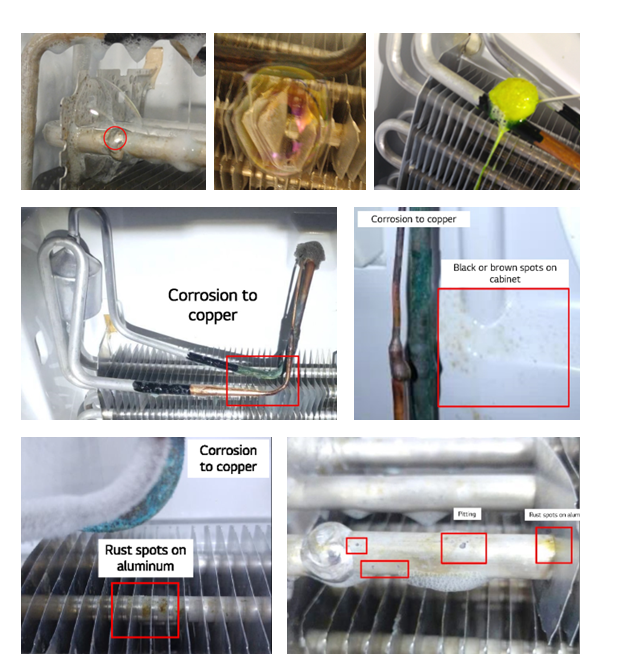
Below are examples of common Low Side Leaks on the Evaporator Coils.
These type leaks are often very small. It is suggested to pressurize the system to 150 PSI with nitrogen and use bubble solution to locate the leak.
Below are the common joints at your evaporator coils. These should all be checked if
a low side leak is suspected.
French Door Freezer Evaporator Examples:
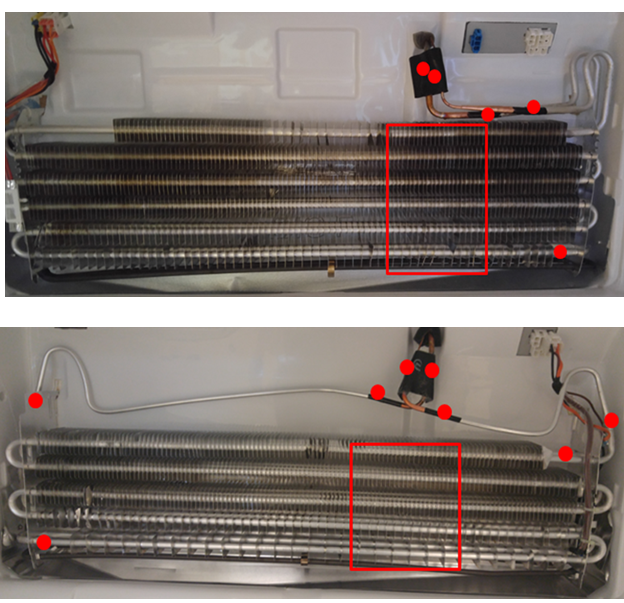
Below is a French Door Refrigerator Evaporator Example:
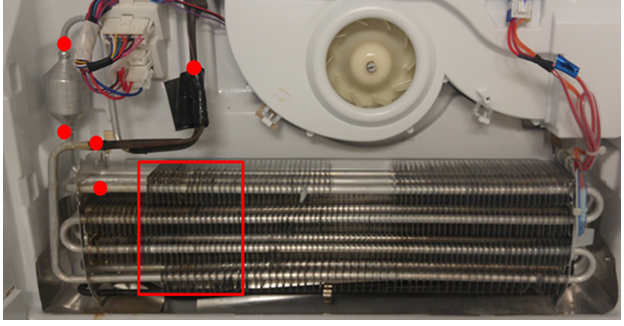
Below is a Top Mount Refrigerator Evaporator Example:
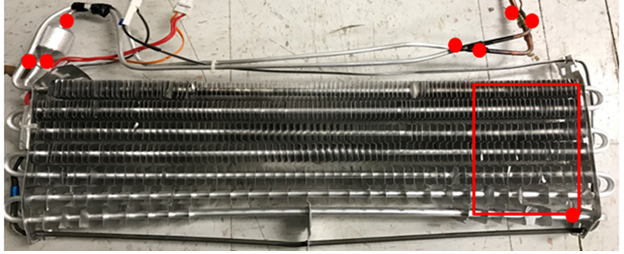
Below is a Side-by-Side Refrigerator Evaporator Example:
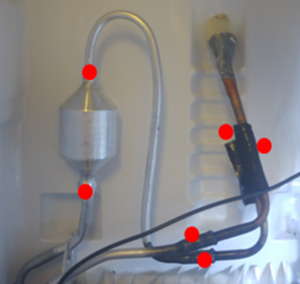
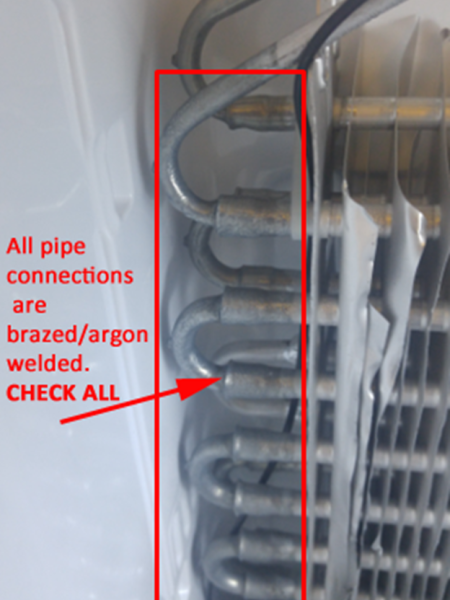
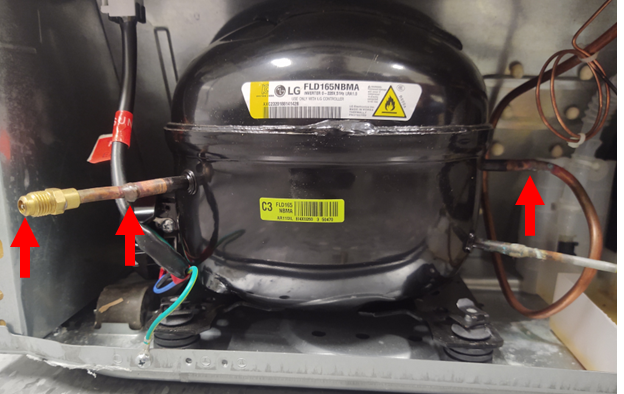
Below is a picture of areas to inspect for leaks on the compressor.
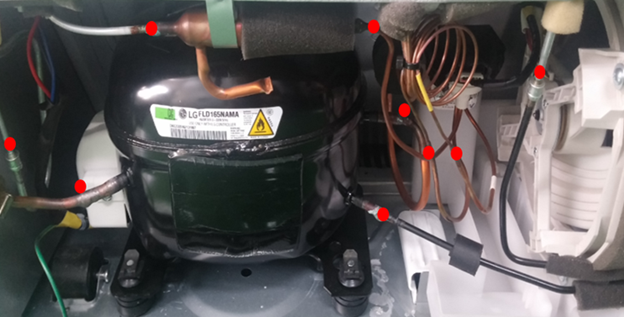
Bubble check all the High Side joints and leak points if the leak cannot be heard or easily found. Be sure and test the lower portion of the condenser coil that routes into the drain pan for corrosion and test the factory compression fitting that joins the Condenser coil to the Yoder Loop.
Below are common places to check for High Side leaks while the system is pressurized.
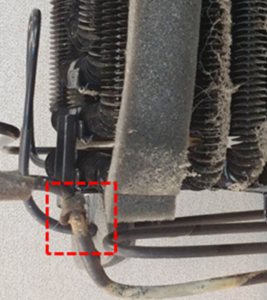
On models with the steel condensers, it was possible for the steel to rust and form tiny leaks in the drain pan area as shown in the below picture:
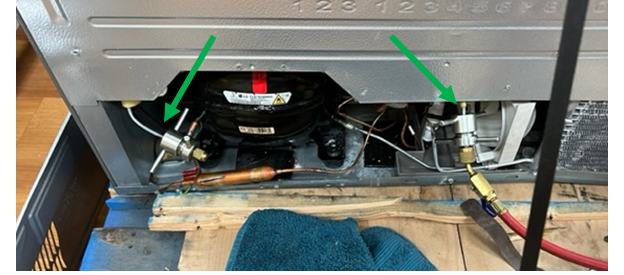
If no external leaks on the High Side of the system can be found, then the internal Yoder Loop can be tested. To properly test the Yoder Loop, it needs to be fully isolated from the rest of the system and pressure tested. Isolation example below:
In some cases, the Yoder Loop can be repaired depending on where exactly the leaking is located….
See LGTA App Article # (20150125133427) for repair info where the Yoder enters and exits the cabinet. And (20150113949139) for repair info on Yoder Loop leaks found in the mullion area between the freezer doors on dual freezer drawer models.
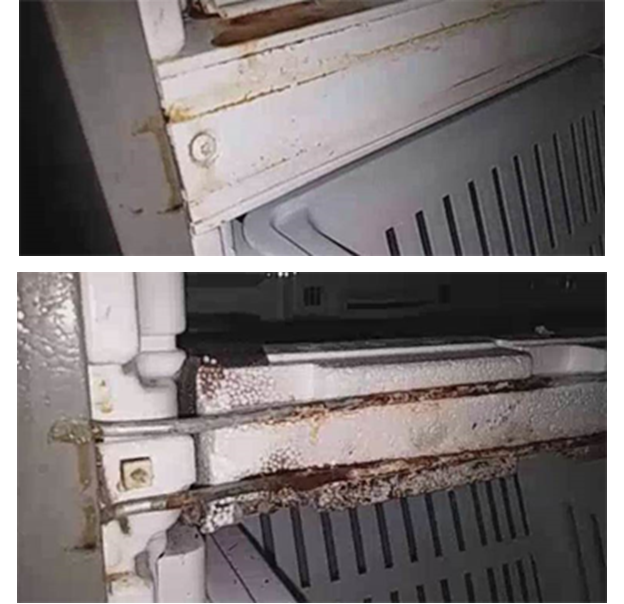
For units with confirmed Yoder Loop leaks there is often external identifiers that point to the Yoder being rusted or leaking. Check the cabinet seams around the front of the unit where the Yoder is routed for these visual signs. See the below example:
